Create Tasks
🎏The first step to construct wholesome collaborative annotaion workflow is to create a task flow. Here is the detailed guide for you to start creating tasks.
Video Tutorial
Getting Started
Team Admin/Owner can click Team Task Management tab under the Task module on BasicAI - > click Create a Task tab to start creating a new task. The platform supports two creation methods: Create a Task by Yourself or Create a Task by Templates.

ReminderOnly Team Admin/Owner is able to create a task. Learn more details on Role & Permissions page.
How do I create a task flow? Please find the detailed guide below.
Hand-on-Hand Guide:Create a Task by Yourself:
Step 2: Upload Data from Dataset
Step 3: Configure Ontology&Instructions
Step 4: Set up QA Rules (Optional)
Create a Task by Templates:
Create a Task by Yourself
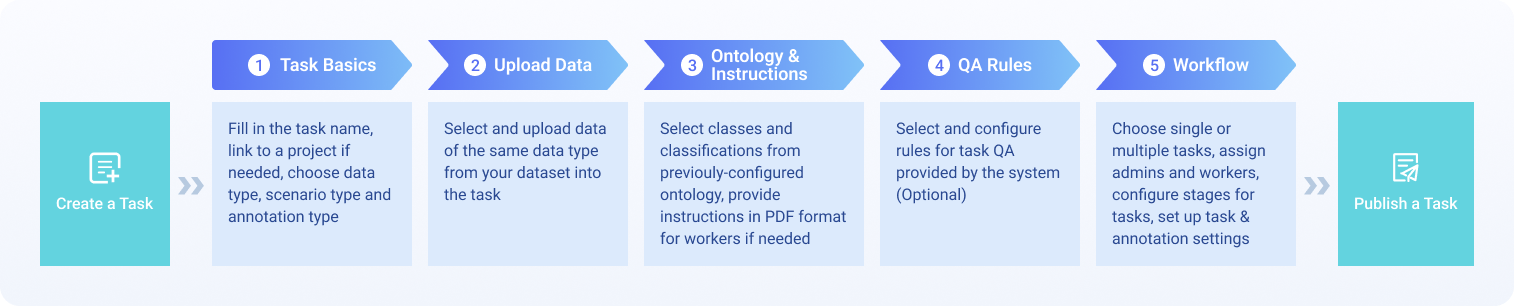
The overall process of creating a task includes 5 steps: Task Basics, Upload Data, Ontology & Instructions, QA Rules and Workflow. Please refer to the following flow chart for more details.
Task&Data Type Elaborations:BasicAI platform currently supports the creation of task types including LiDAR Fusion, Image, Audio & Video, Text and Generative AI. The scene types and annotation types supported for publishing different data types are:
LiDAR Fusion: Supports publishing single data, scenes, 4D BEV, and the annotation type can be selected as 'instance' or 'segmentation'.
Image: Supports publishing single data and scenes, and the annotation type can be selected as 'instance' or 'segmentation'.
Audio & Video: Only supports publishing single data, and annotated in the type of 'instance'.
Text: Only supports publishing single data, and the annotation type can be selected as 'instance' or 'relation'.
Generative AI: Only supports publishing single data, and annotated in the type of 'instance'.
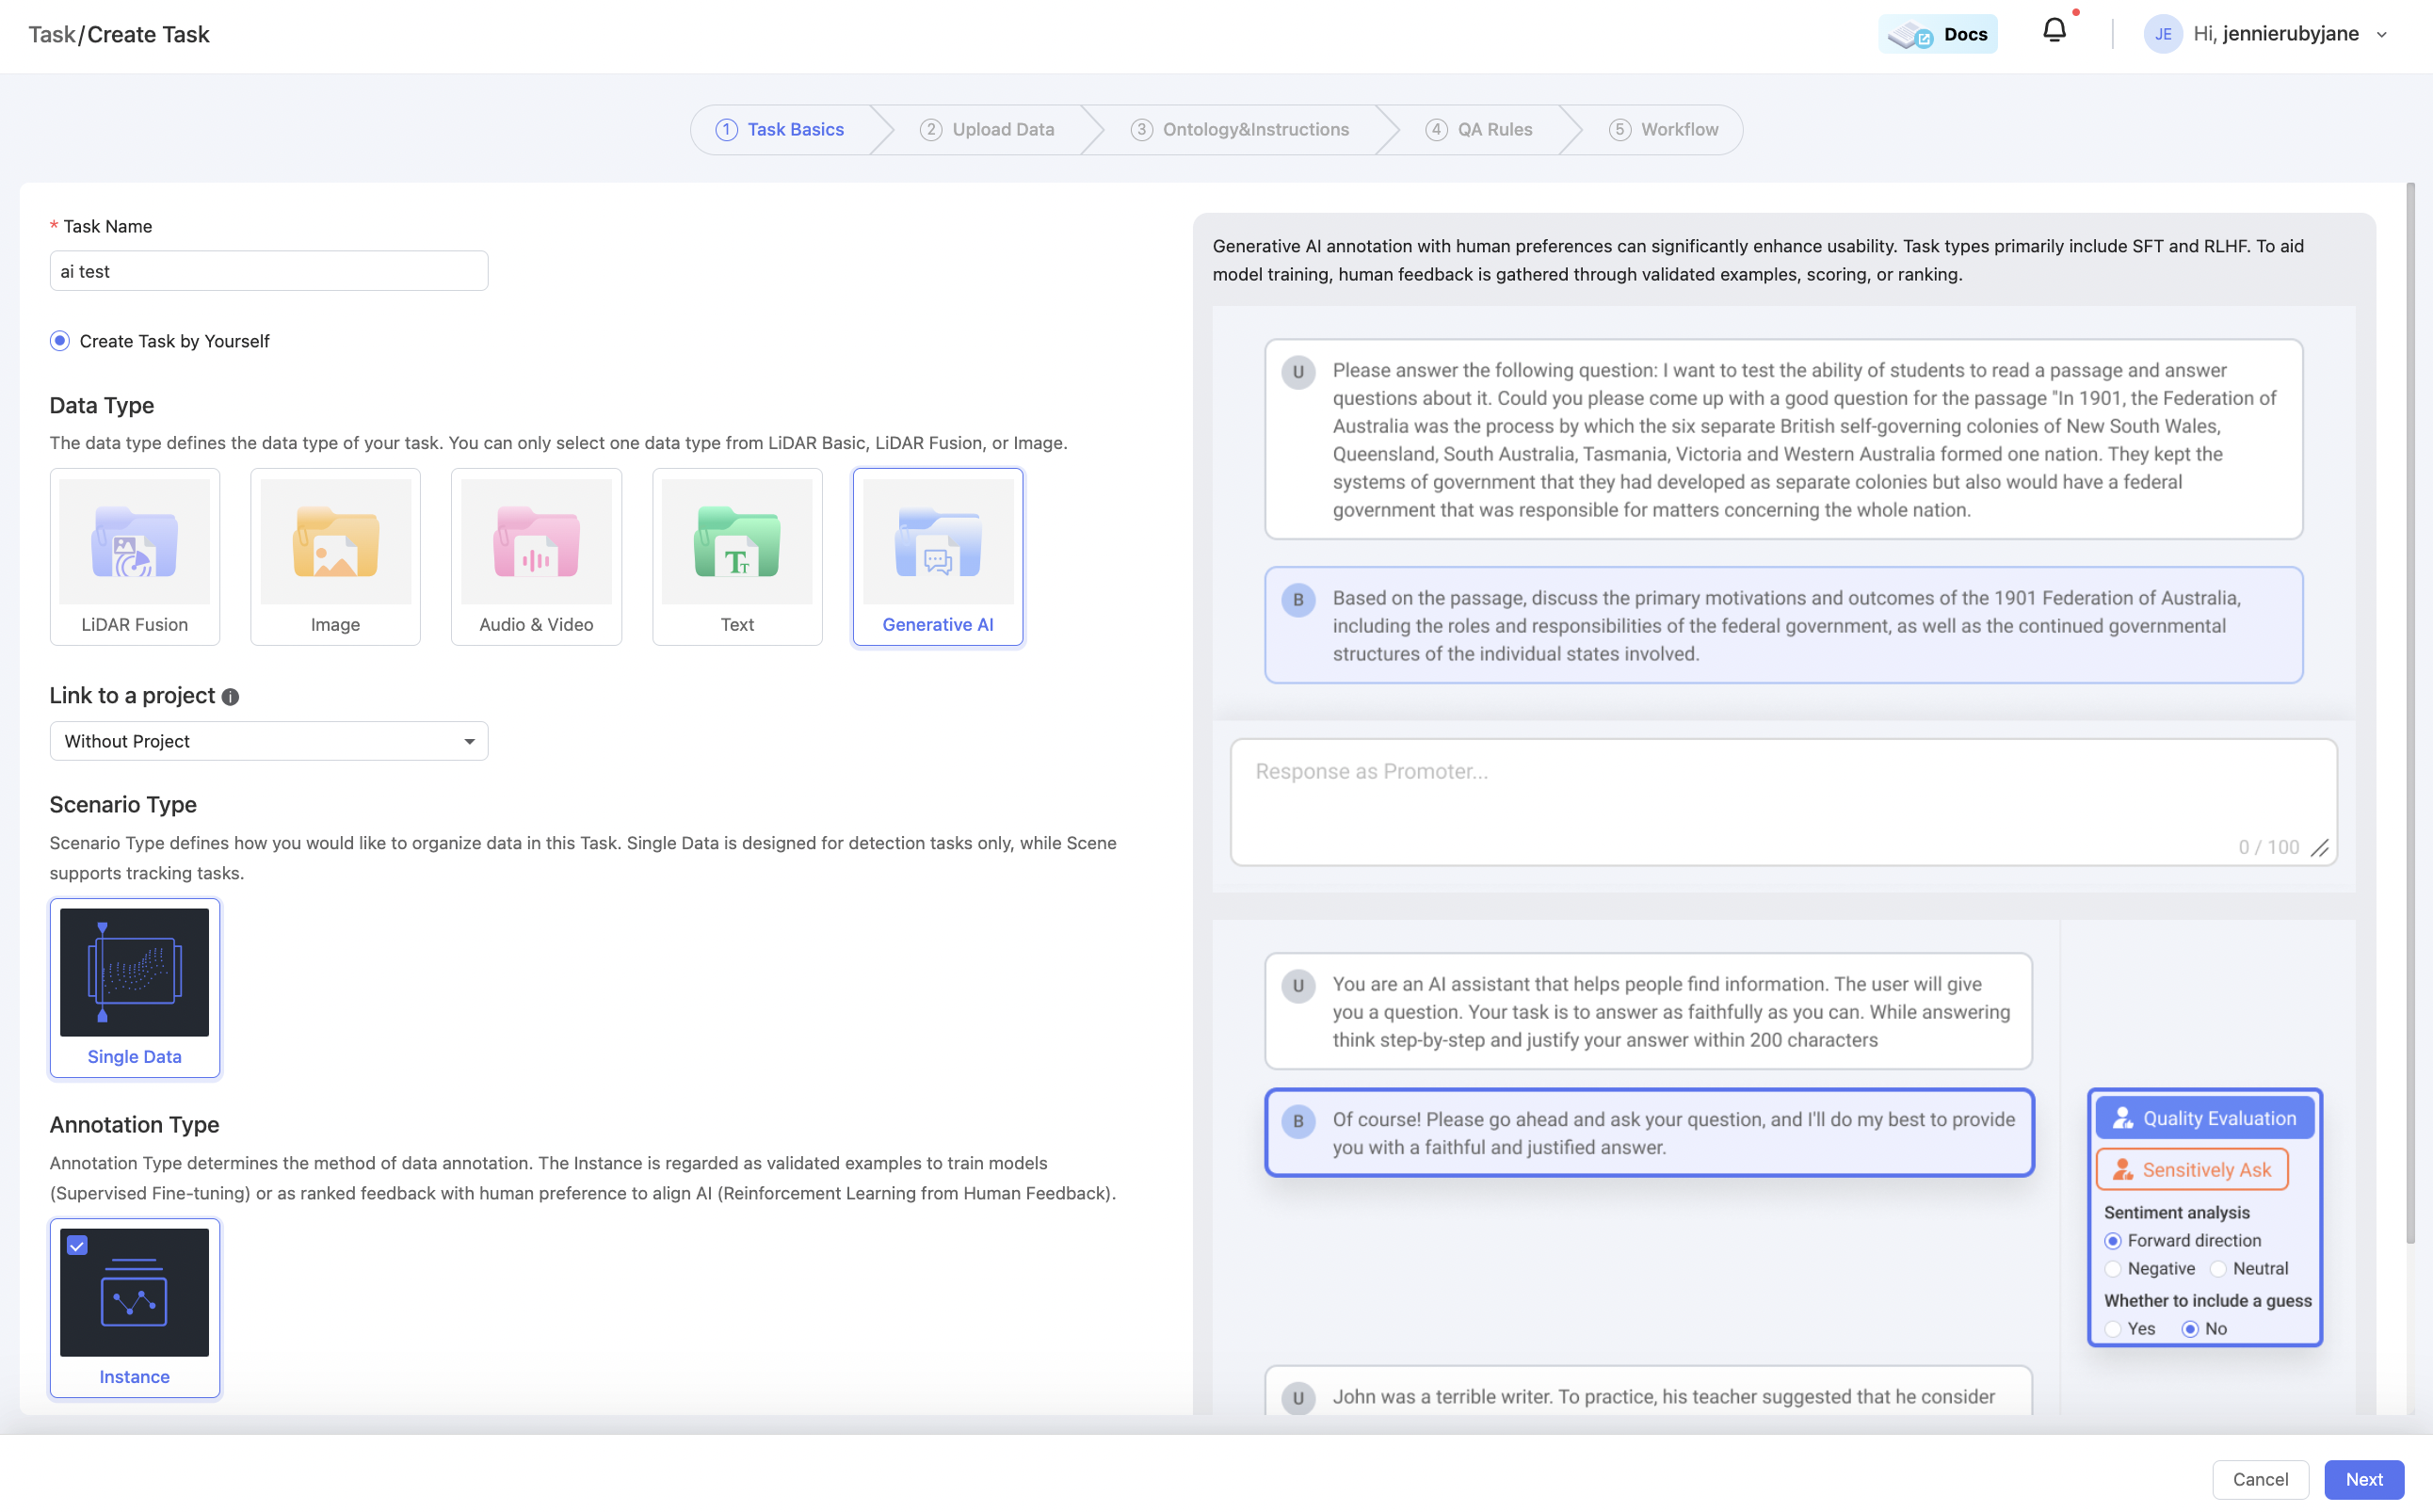
Step 1: Fill in Task Basics
- Fill in the task name and select
Create a Task by Yourself. - Select Data Type: LiDAR Fusion, Image, Audio & Video, Text or Generative AI.
- To bind the task to a project, select a project from the
Link to a Projectdrop-down box. - Select Scenario Type: Scenario Type defines how to organize data in tasks, including Single Data, Scene, and 4D BEV (only for LiDAR Fusion). Single Data is designed for object detection, audio & video, text or Generative AI tasks, while Scene supports object tracking tasks.
- Select Annotation Type: Annotation Type determines how you would like to annotate your data, including Instance (for Image, LiDAR Fusion, Audio & Video, and Generative AI), Segmentation (for Image and LiDAR Fusion), and Entity & Relation (only for Text).
Step 2: Upload Data
You can either select an already existing dataset or upload a new one. To upload a new dataset, please find more details on the Upload Dataset page.
Please note: if you cannot find the data, please check if the data has been grouped into a scene in the dataset!
- Click on the previously-configured Dataset to upload data. The data type needs to be consistent.
- Click
+ Addand select data from the dataset, or select a result from ground truths or model runs in the result drop-down box at the top left and then click+ Addif you would like to upload data with pre-labeled results; clickSelect Allin the upper left corner to select all the data. After selecting the data, clickConfirmto complete uploading.
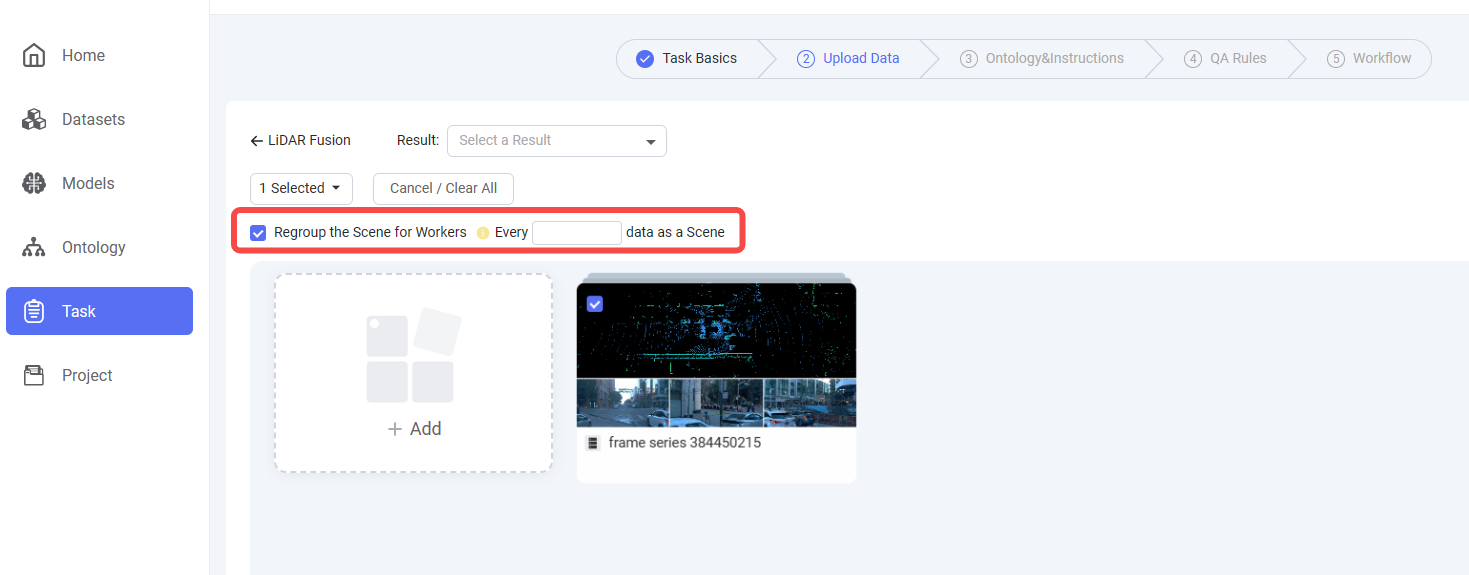
Re-Group Scene FunctionIf you choose 'Scene' as the scenario type when creating a new task, we have a function called Re-Group Scene. After uploading a scene form a dataset, if the amount of data from the scene is too large, you can click
Regroup the Scene for Workersand fill in thenumber of data as a Sceneto divide the large scene into smaller scenes, which is more convenient for workers to perform data annotation.
Step 3: Configure Ontology & Instructions
- Select Class & Classification from the configured ontology, or click
Editto jump to the Dataset module for ontology set-up. - Slide down the page, and if necessary, you can upload the operation instructions in PDF format for workers' reference.
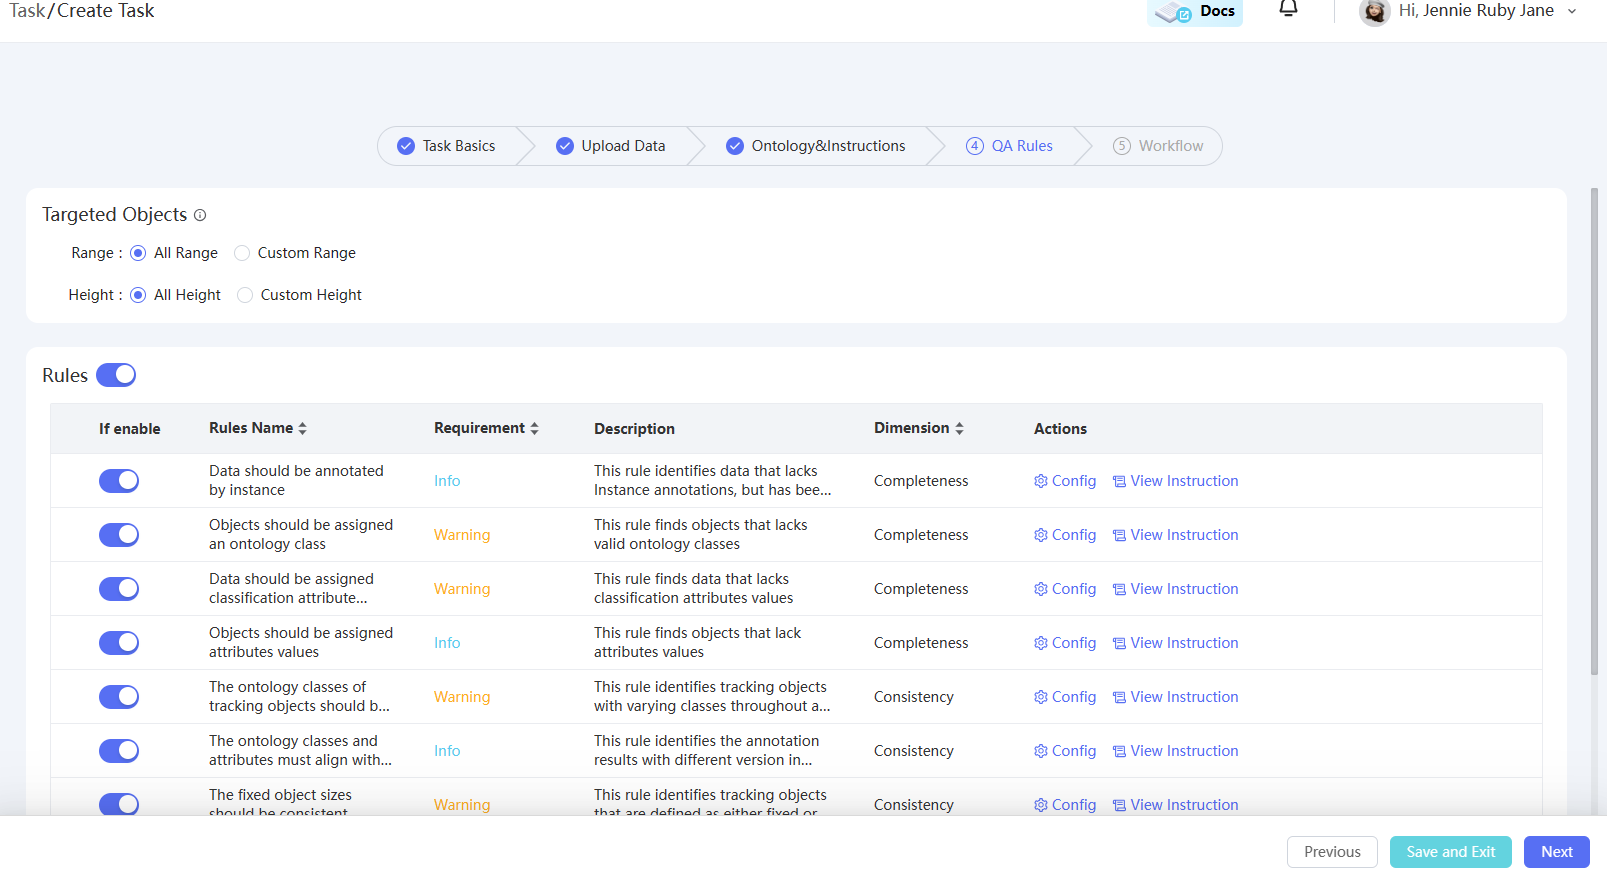
Step 4: Set up QA Rules (Optional)
If you need to use the Auto QA function to check data result quality on the tool page, you can select and enable the QA rules from the rule list. You can click Configure on the right side of each rule to configure it, or click View Instruction to view the rule details and descriptions. If you do not need to configure Auto QA, you can directly click Nextto enter the next step.
Step 5: Configure Workflow
Workflow SettingsOn the
Workflowpage, the following options are provided for setting up:▶️Choose task type: single-task or multi-task type,
▶️Set task life stages: add review stages except annotation
▶️Assign admins and workers: choose annotators, reviewers, inspectors and task admins
▶️Select comment tags : choose comment tags from
Commments Pool▶️ Complete Task & Annotate settings
1️⃣ Task Distribution
Choose One Task or Multiple Tasks, depending on the amount of data to be annotated. If the amount of data is too large, you can choose to create Multiple Tasks.
- Select
One Task: proceed with the subsequent setting options directly. - Select
Multiple Tasks: you need to configure the amount of data for each task and the task naming rules, then click theRegenerate Tasksbutton to generate the task details table. - Click the
Configbutton in the task sheet to enter the subsequent configuration pages for each task. You can also bulk-configure the tasks by selecting all tasks at the top left corner and then clickingConfig.
2️⃣ Workflow Setting
On the workflow setting panel, project managers can add review stages for tasks, assign workers to each stage, or share the task with external partners etc.
-
Assign Annotators: On the annotation stage card, choose team members and check the names as annotators to perform annotation work.
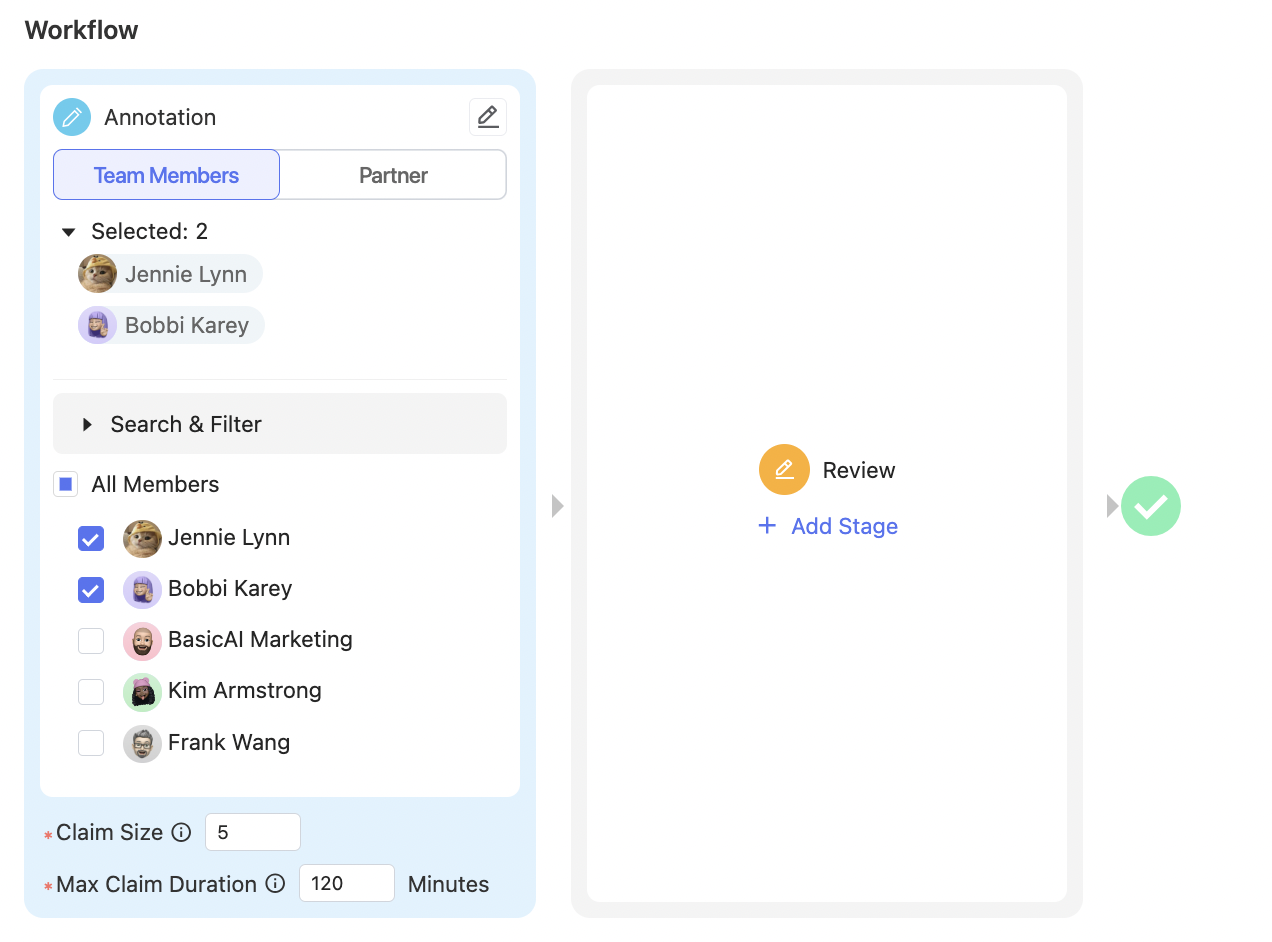
-
Add Review Stage: If you would like to add review stages to the task, just click
Add Stageto add a review stage, and check the team member names to assign reviewers. Up to 5 review stages can be added. You can also click the delete icon at the top right corner of a review stage card to delete it.
-
Share with Partner team: If the data amount of the task is too large for one team to handle and you would like to share the task with a Partner team, you can click the
Partnertab besideTeam Memberson the annotation or review stage card, and then select a Partner team. You can also click+Createto jump to the Team center, clickInvite Partnerand input Partner team ID to invite new Partners.
-
Claim Size and Max Claim Duration: At the bottom of each stage card, you can customize the
Claim Sizewhich is the number of data that each worker can claim at a time, andMax Claim Durationwhich is the maximum number of minutes allowed for finishing a claim of data.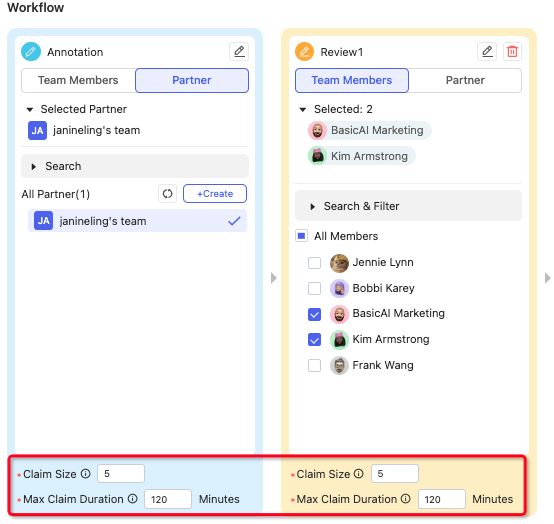
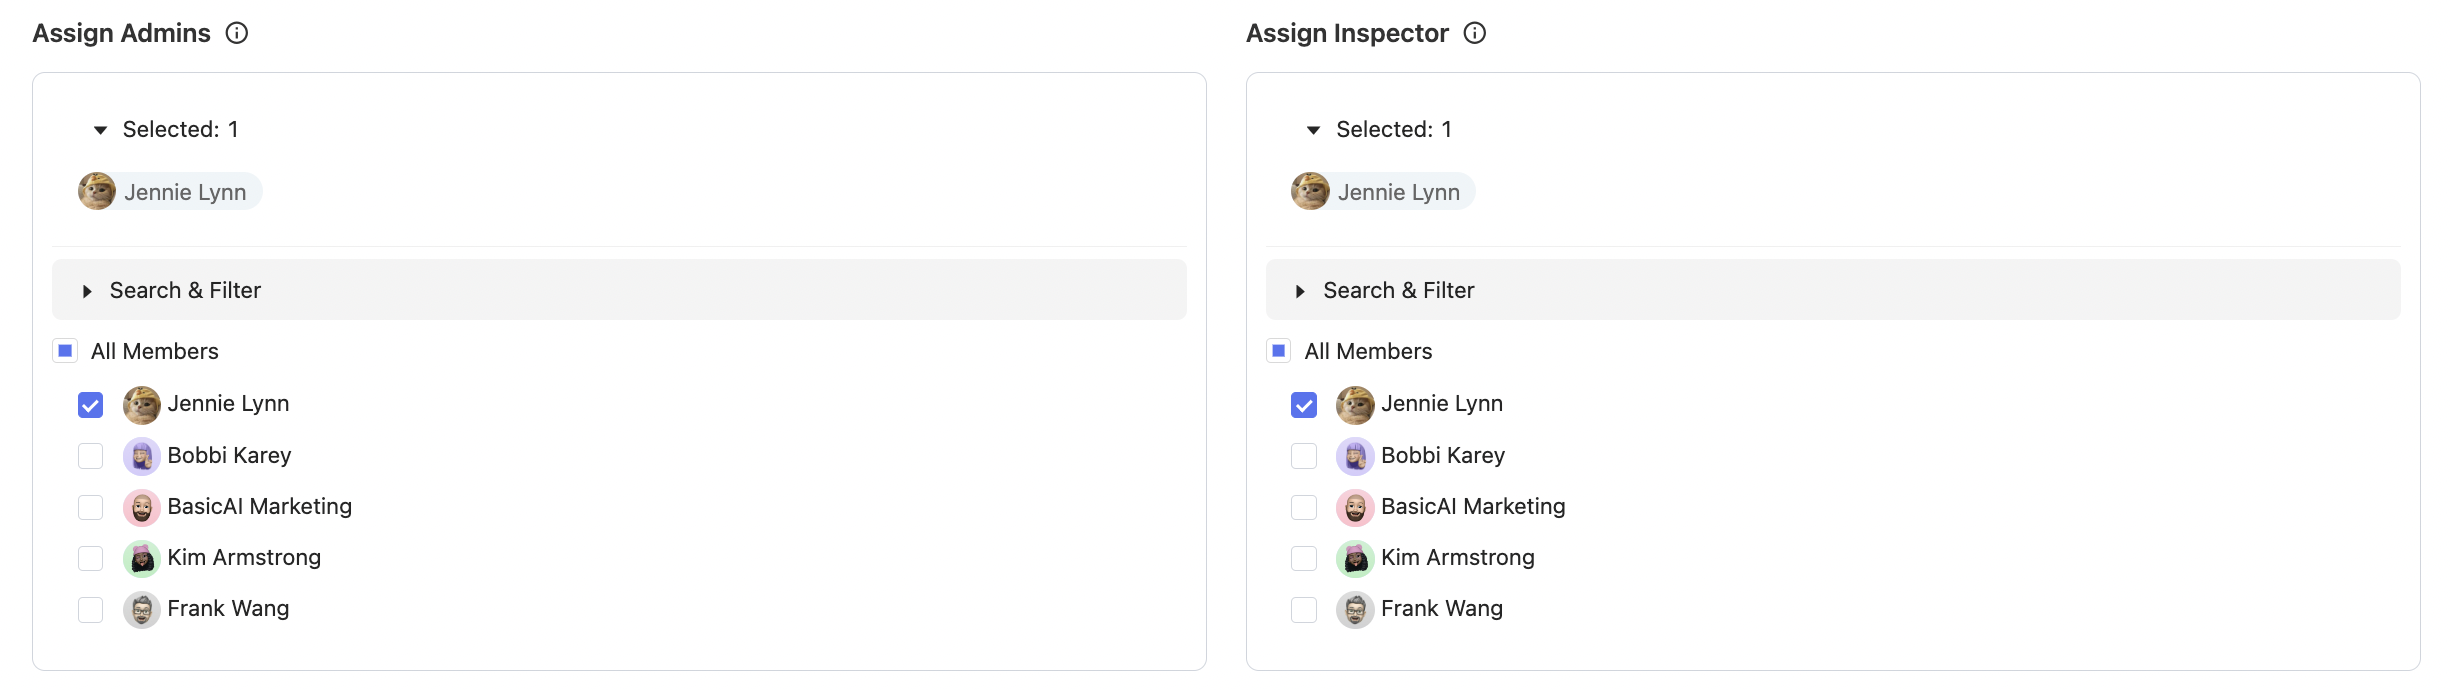
3️⃣ Assign Admins and Inspector
Check the team member names to assign Task Admin and Inspector to the task. Task Admin is responsible for task management. Only the Inspector has permission to accept the task.
4️⃣ Comments
Click and select comment tags that can be displayed on the tool page, such as Missed ,Wrong Object,Wrong Label,Not Fit, etc. All comment tags are pre-selected by default.

5️⃣ Task Settings
Configure task basic settings here which include the following options:

- When to Start
It controls when the task starts after it is published.
Automatically: Start immediately after the task is published.
All Stages Ready: If share the task with partners is selected in the workflow, the task will only start after all partners accept it.
Wait for My Confirmation: Admins need to start the task manually.
- History Access Permissions
If you would like to give workers access to view / restore history result versions on the tool page, you can click on the worker roles to grant permissions: Annotator, Reviewer, or Inspector. Multiple selection is supported here. Keep in mind that any changes made to history results can affect performance.
- Data Accuracy
This is the object accuracy threshold used to determine if the data are accurate. Set the accuracy threshold as needed, and the default threshold is 95%.
- Allow workers to view submitted data.
If enabled, all workers in the task can view submitted data.
- Include group results in accuracy and missing rate calculations.
This determins whether to include group results when calculating accuracy and missing rates.
- Allow the same worker to work on the same data at different stages
If this option is clicked on, it means there are no restrictions on whether a worker has participated in certain data when assigning tasks at different stages.
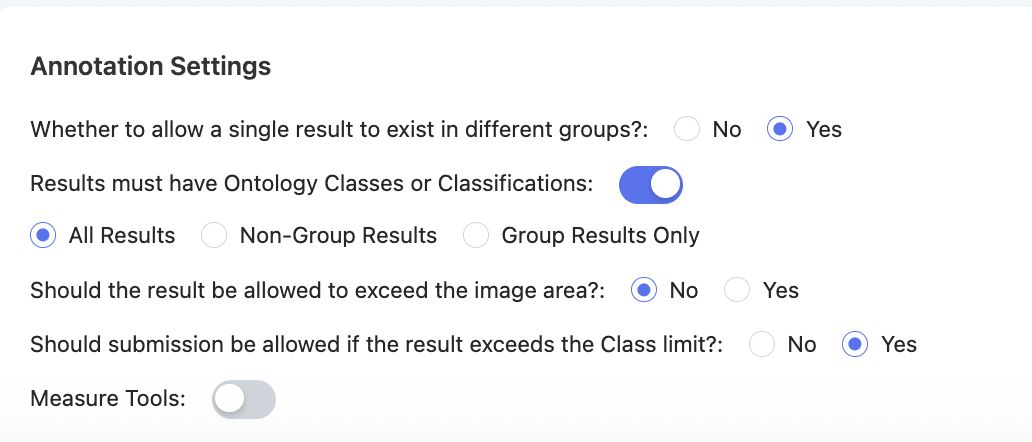
6️⃣ Annotation Settings
Annotation Setting provides configuration options including annotaion constraints and pre-settings, which can be applied to the tool page. Annotation results that violate those settings will not be able to be submitted. The specific setting options can be different according to certain dataset types. Below are the total setting options for reference.
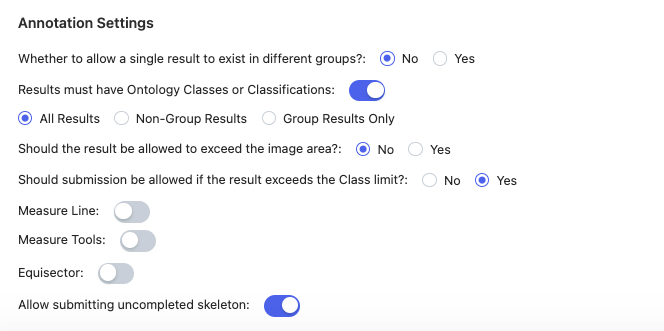
Annotation Setting for Image
Annotation Setting for LiDAR
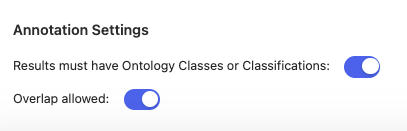
Annotation Setting for Audio&Video
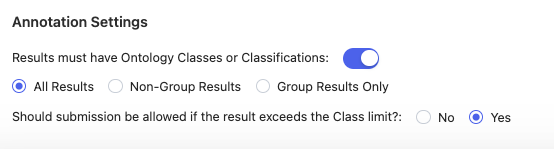
Annotation Setting for Text
- Results must have Ontology Classes or Classifications.
This determines if your objects and data must have ontology classes or completed classifications to be submitted. If yes, you need to specify how this rule will apply to a group result:
All Results: applied to all instance and segmentation results including groups.
Non-Group Results: applied to all instance and segmentation results except groups.
Group Results Only: applied only to group results in the instance or segmentation results.
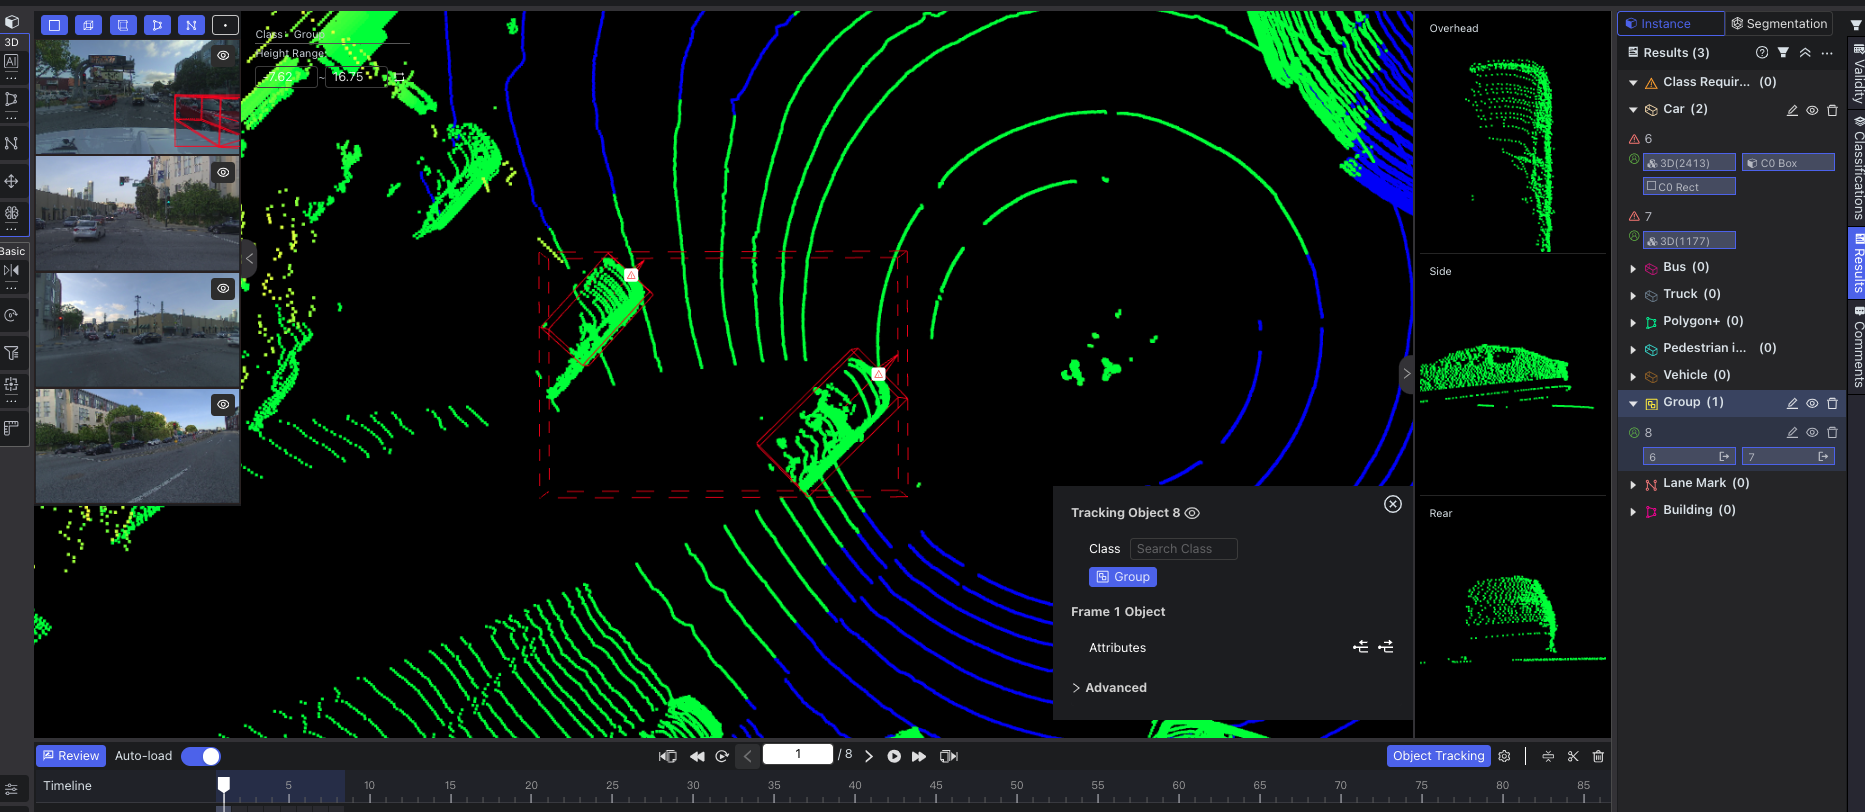
The default setting is that all results must have classes or classifications. Group results mean that multiple results are combined together into a group on the tool page. You can check our Group guide in Lidar Fusion Tool chapter for an example.
- Whether to allow a single result to exist in different groups?
This determines whether the same result can be combined into different group results on the tool page.
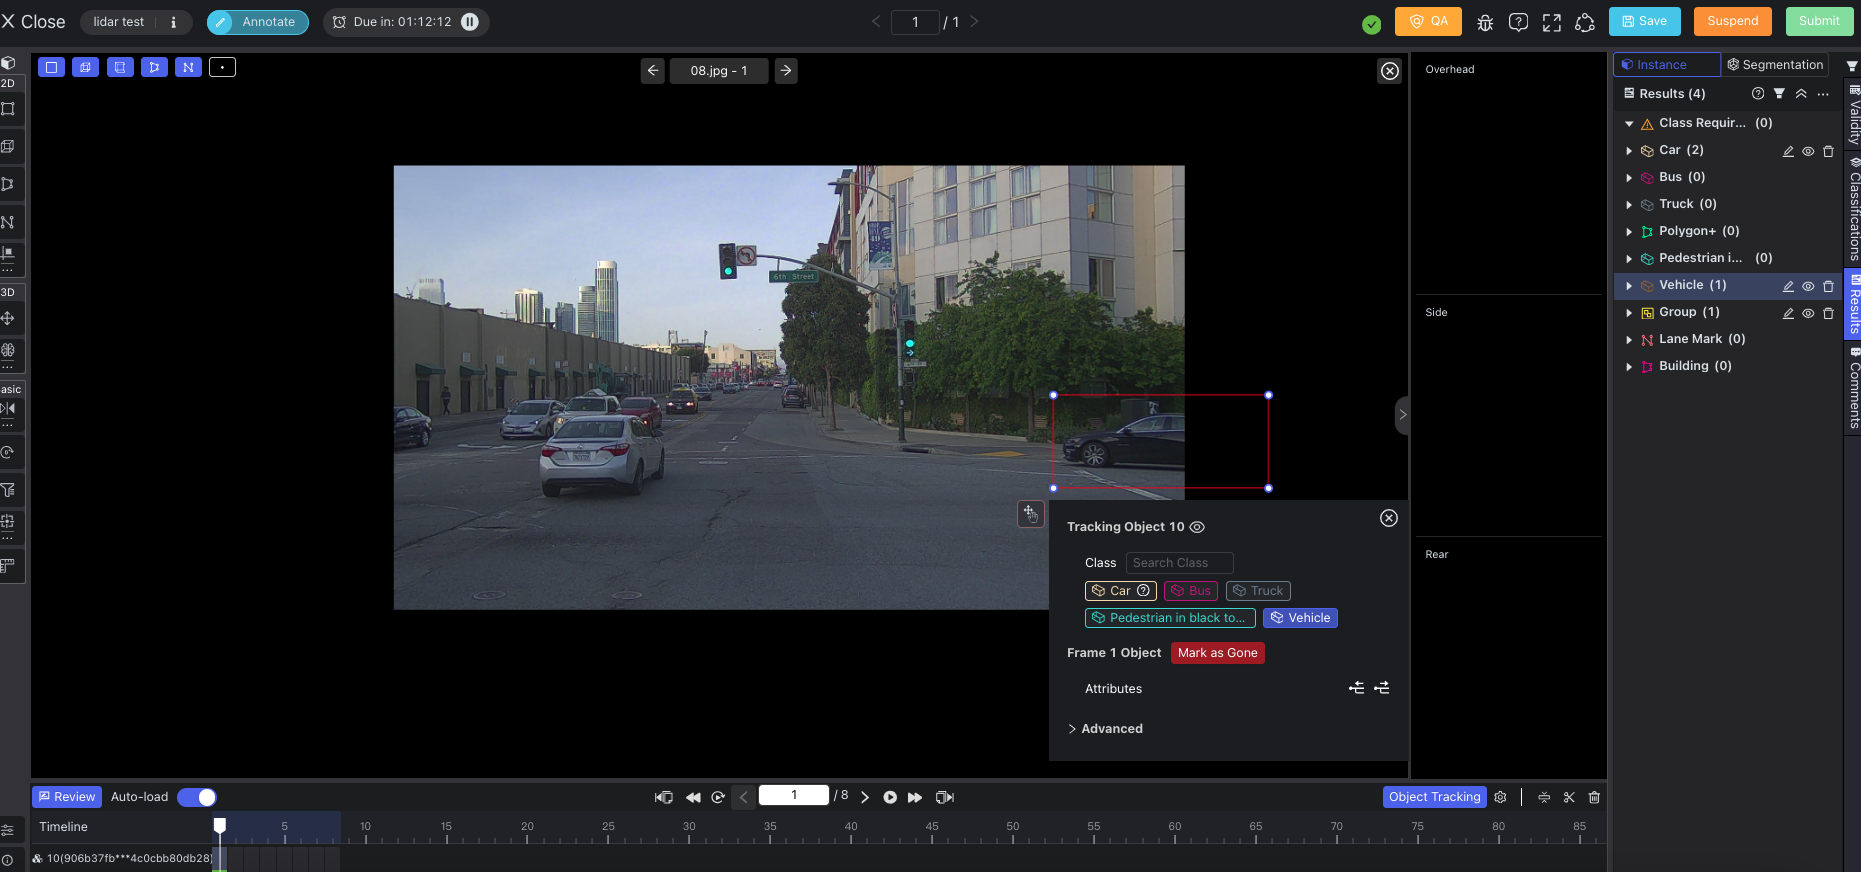
- Should the result be allowed to exceed the image area?
This defines if the object result can exceed the image area on the tool page. If yes, it means workers can create and save results exceeding or outside the image area on the tool page as shown in the screenshot below:
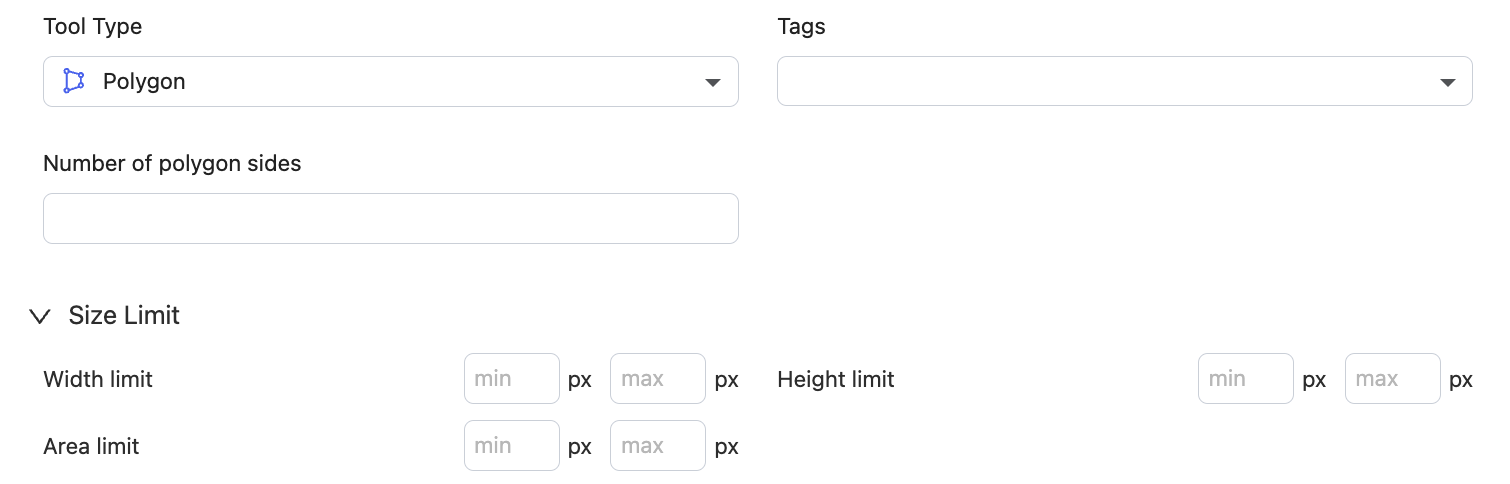
- Should submission be allowed if the result exceeds the Class limit?
Choose whether to allow submission if results exceed class limits on the tool page. If no, the results which exceed class limits cannot be submitted.
Class limits refer to size limits or constraints when configuring ontology classes linked with the dataset. Many tool types can be set up with customized size limits. Please refer to the Tool Type guide for detailed explanations about class limits of different tool types.
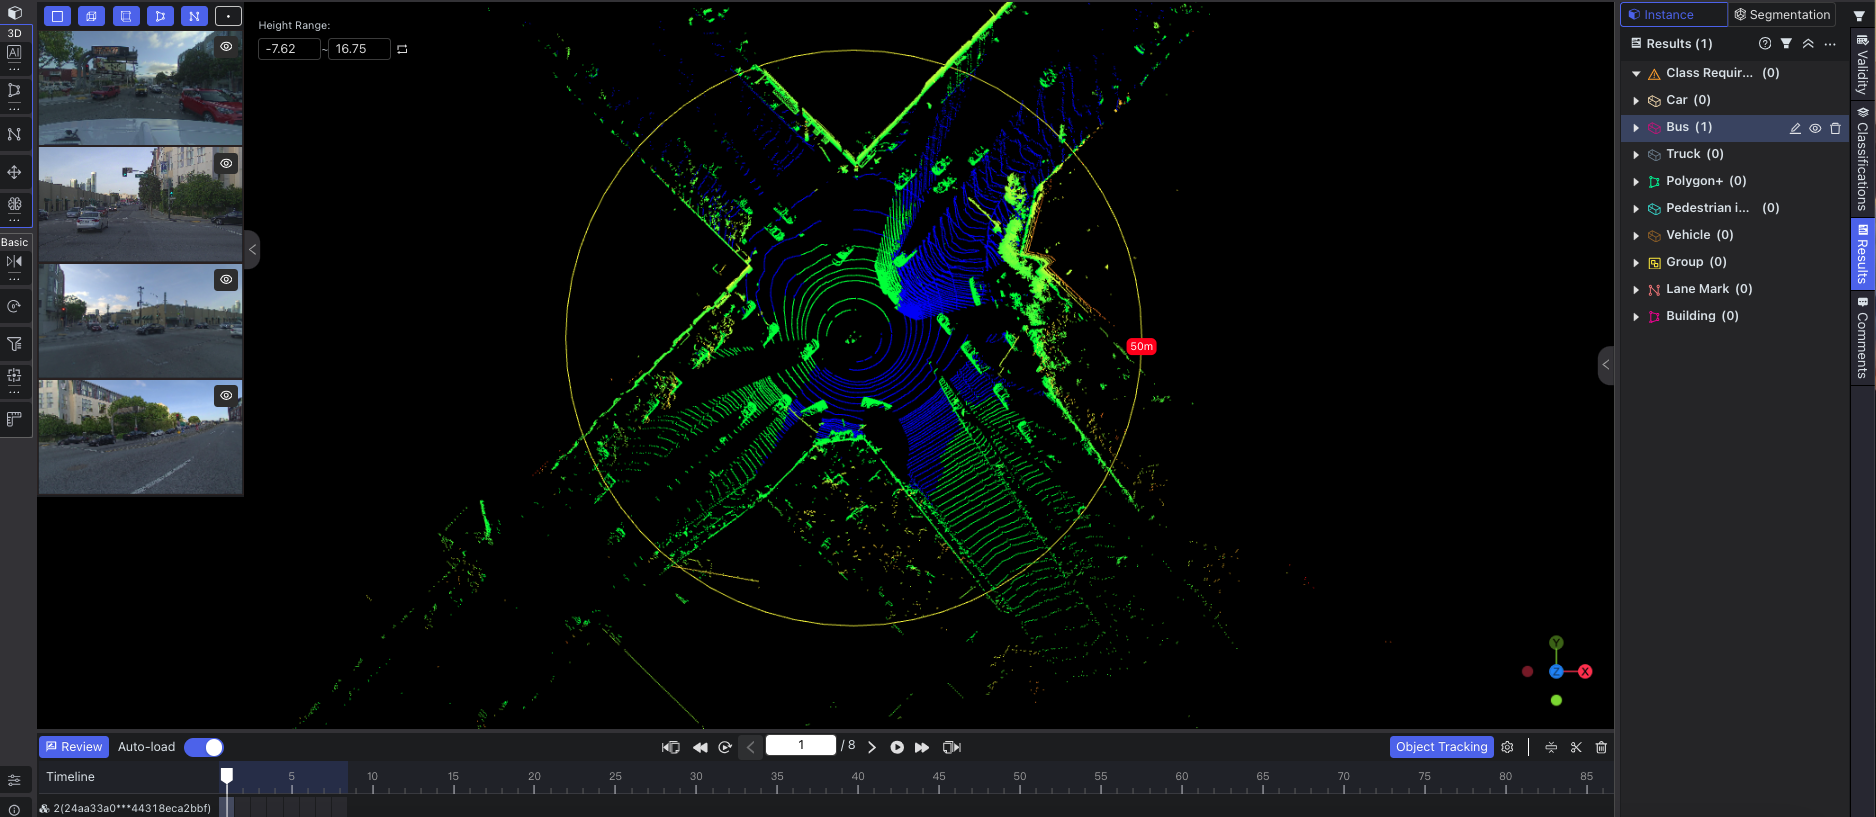
- Measure Line, Measure Tools and Equisector are all measure auxiliary tools for Image Dataset. You can enable the buttons if needed on the tool page. For LiDAR Dataset, it only displays the Measure Tools setting option.
Measure Line: after enabling, select the color for the measure line.
Measure Tools: after enabling, select the color and add a circle or a rectangle with customized size limits. The radius or distance value unit is meter.
Equisector (Bisector): after enabling, select the color and define the width, vertical and horizontal values.
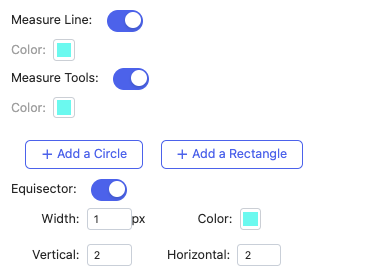
For example, if you add a circle with a radius of 50m, when you enter the tool page of LiDAR or Image data, the circle will automatically display on the canvas.
- Allow submitting uncompleted skeleton.
This option appears only in Image Tasks. If enabled, it allows unfinished skeleton points to be submitted on the tool page. If not, then submission of unfinished skeleton points is not allowed.
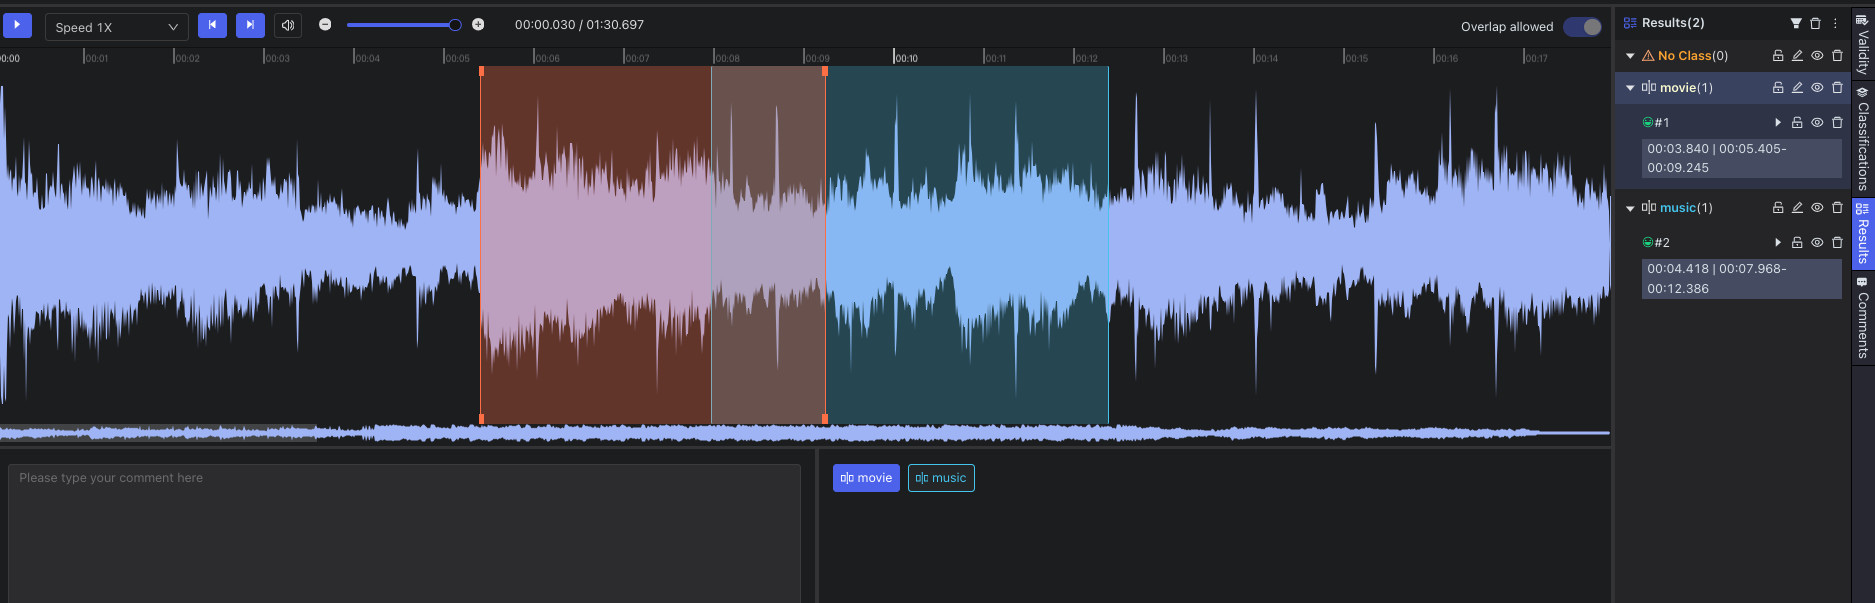
- Overlap allowed.
This option appears only in Audio&Video Tasks for clip annotation. If enabled, it means segmented audio clips can overlap with one another on the tool page.
Step 6: Publish
After configuring all the above steps, click Publish to complete task publishing. After publishing, all tasks will be displayed under Team Task Management.
Create a Task by Templates
Task Creation TemplatesBasicAI provides users with several templates for quickly creating tasks for two types of data: 3D LiDAR and Image in the autonomous driving industry. The templates use prepared datasets and ontology settings, which can help users create tasks in a faster and more efficient way.
The currently available templates are shown in the table below. After clicking on the template card, detailed explanations of the template will appear on the right side of the page.
| Data Type | Task Creation Templates | Remarks |
|---|---|---|
| 3D LiDAR | Quick Start | 3D LiDAR task creation quick start |
| 3D LiDAR | PandaSet Detection Task | Suitable for creating PandaSet 2D/3D Object Detection tasks |
| 3D LiDAR | PandaSet Tracking Task | Based on 50 continuous frames from PandaSet and 4 real-world classes |
| 3D LiDAR | PandaSet DebugTask | Users can debug model results and then make comparisons in the dataset |
| Image | CoCo Dataset Object Detection | Based on CoCo Dataset with 10 ontology classes without attributes |
| Image | PandaSet Classification Task | Suitable for creating PandaSet image classification tasks |
After selecting a template, click
Nextto enter the subsequent steps sinceUpload data, which are the same as explained in the Create a Task by Yourself section above, but the dataset and ontology configurations are provided by the selected template.
Next
Go to the Work with Tasks page to learn how to start annotation, review and acceptance, etc.
For Task Admin (Project Manager), please find more information on Manage Tasks page about how to manage tasks.
Updated about 1 year ago