Integrate Custom Models
Guide to integrating your custom model with BasicAI.
BasicAI now supports custom model integration via API, tailored to meet your unique model annotation requirements.
1. Create a Model
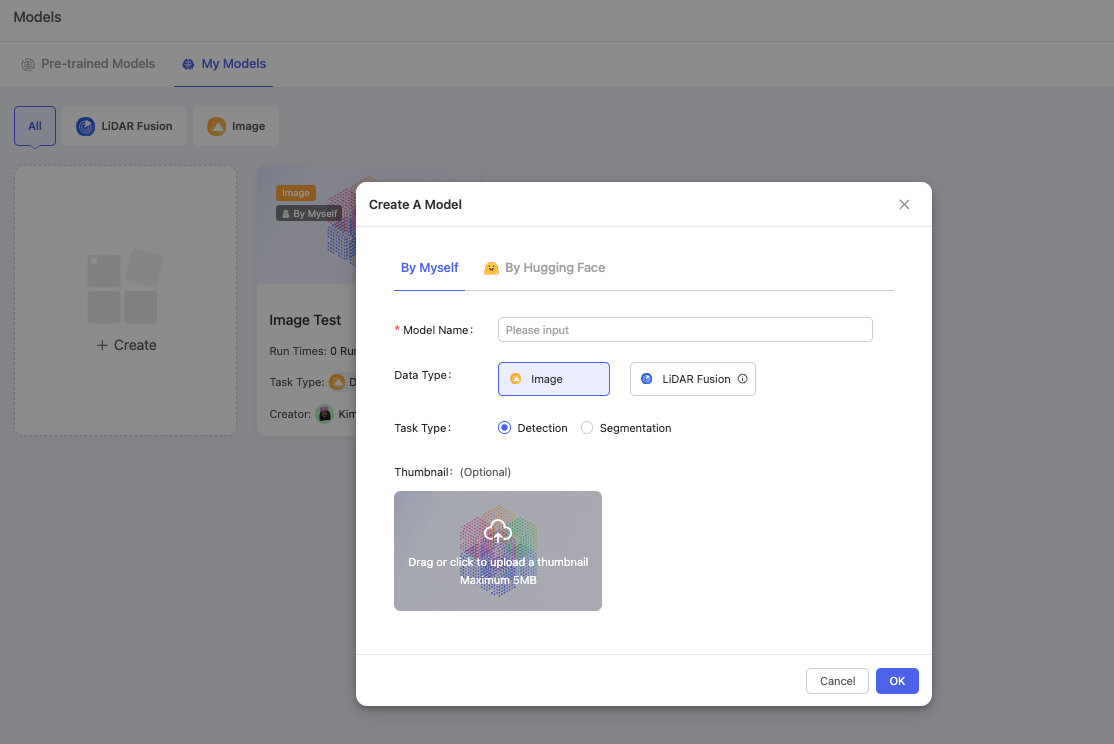
Head to the Model Center - My Models and click the + Create button. You can create a model by yourself or by Hugging Face.
1.1 By Myself
Under the tab By Myself, fill in the following information:
- Model Name: Input the name of your model, which can be edited later.
- Data Type: Currently, BasicAI only supports custom models targeting
Imagedata and Point Cloud Data (PCDs) inLiDAR Fusiondata. - Task Type: Select whether to detect objects or segment data. The
Detectionmode exclusively supports 2D bounding box annotation for Image data and cuboid (3D box) annotation for PCDs in LiDAR Fusion data. - Thumbnail: Optionally upload a cover image of the model (max 5MB).
Click OK to complete creation.
1.2 By Hugging Face 🤗
Hugging Face is an open-source community platform for AI, where users can publish and share pre-trained models. It is currently the largest open-source model community. By accessing Hugging Face, users can access hundreds or thousands of models at very low cost or even for free.
If you want to create a model by Hugging Face, please switch to the By Hugging Face tab, fill in the following information and then click OK:
- Hosted Interface API: which is all kinds of Hugging Face URLs or repo_id.
- Access Token: which is generated on Hugging Face.
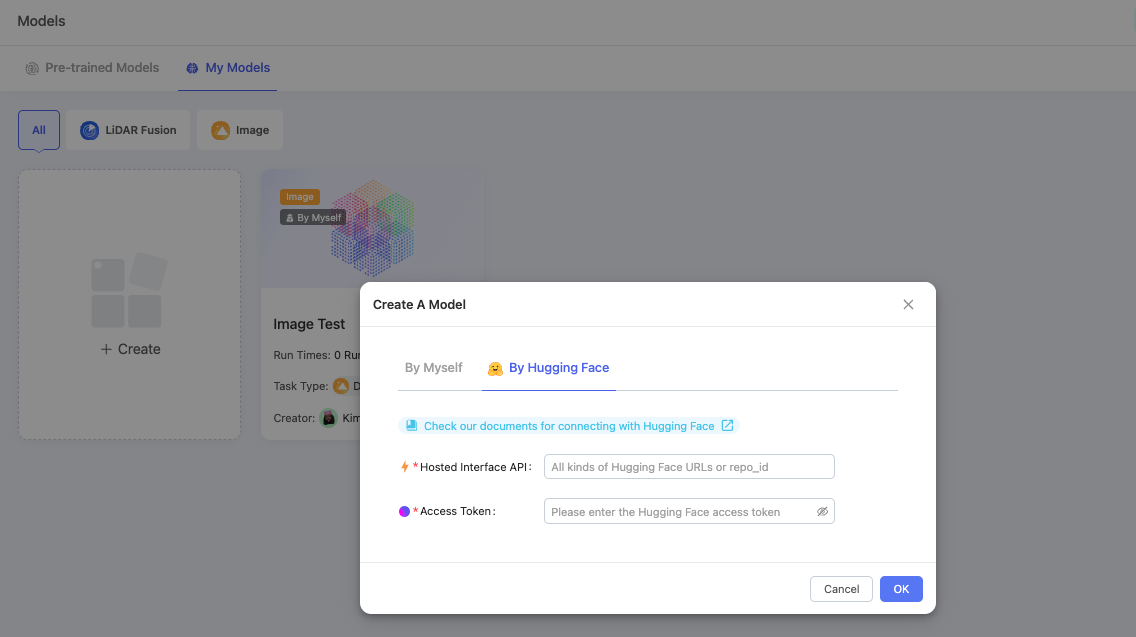
How to get those key fields from Hugging Face to create a model on BasicAI? You can refer to this documentation of detailed parameters on Hugging Face.
2. Self-Created Model Setting
2.1 Model Configuration
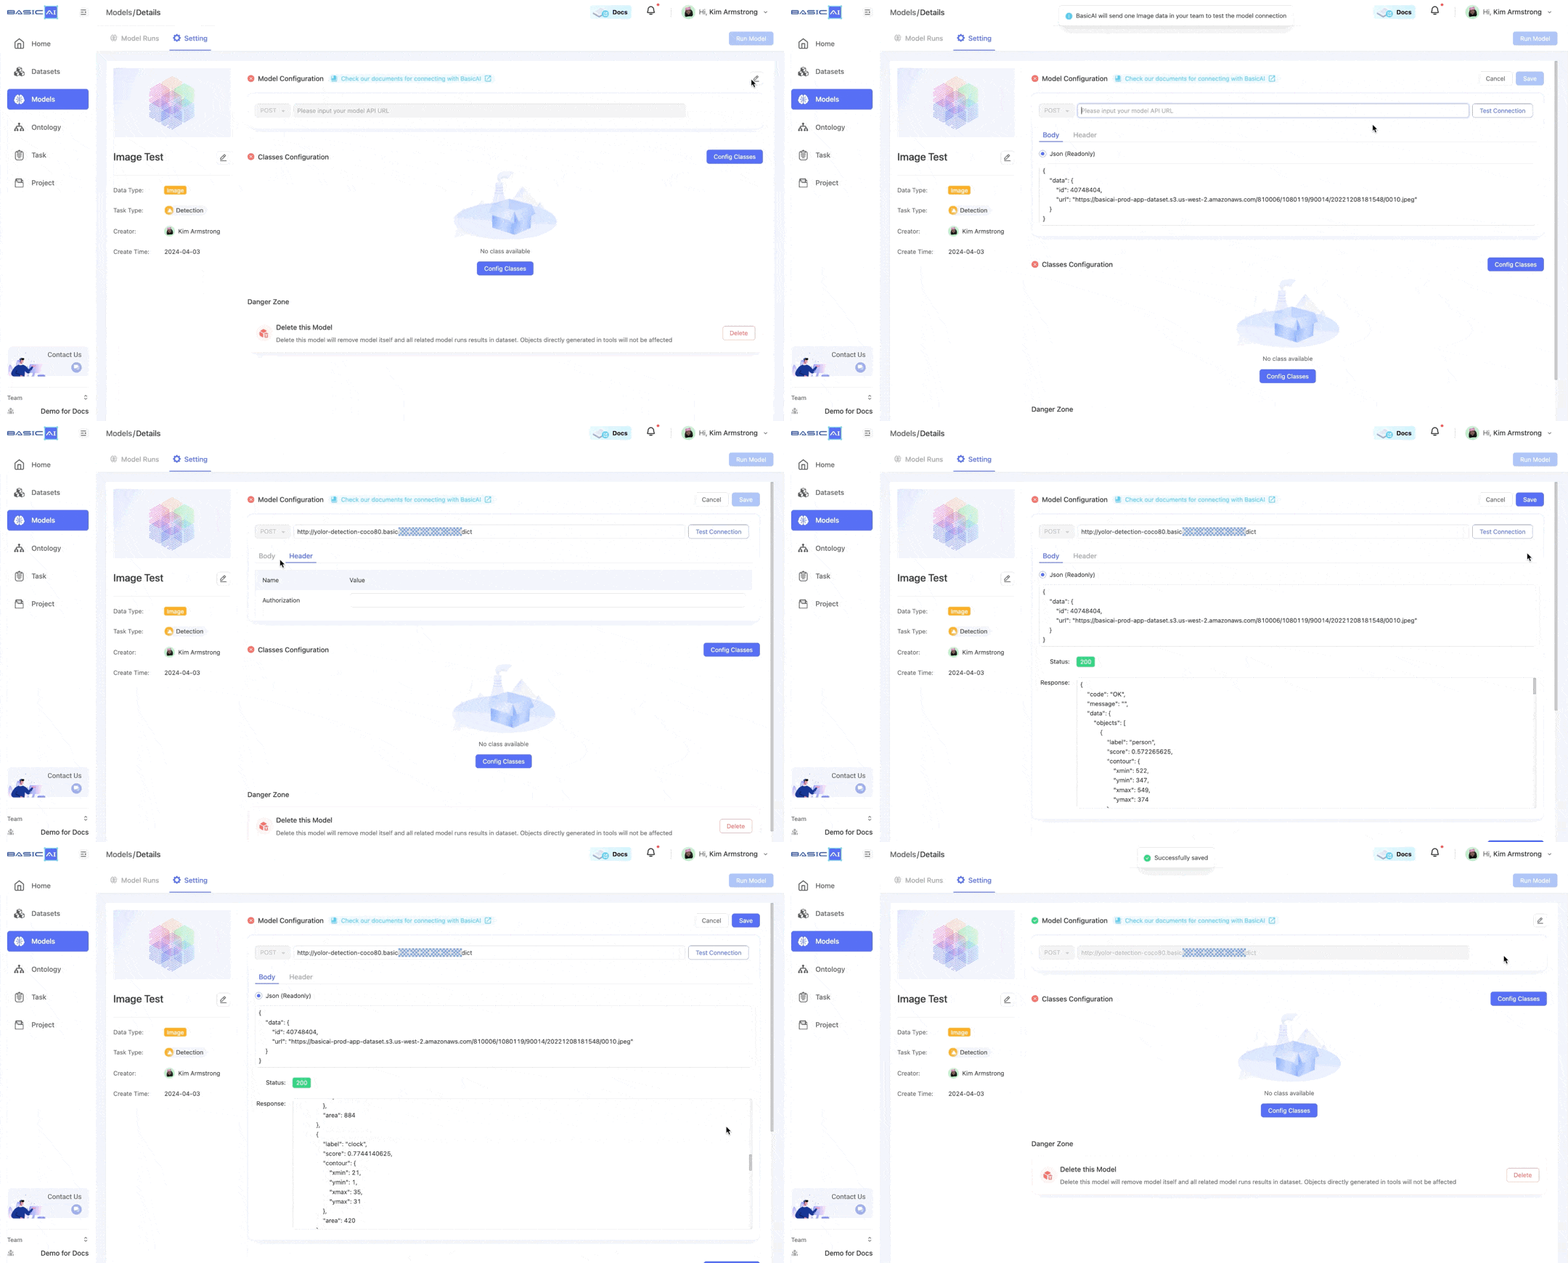
First, click the edit icon to input your model API URL. The Request Method is fixed as POST.
BasicAI will send a data sample from your team datasets to test the model connection. An example Request Body will be automatically provided in JSON format (read-only). Optionally, you can input Authorization in the Header if needed.
Then, click the Test Connection button. You will see the Request Status and the Response. If you encounter any errors, please follow the instructions provided in the prompt.
Upon successful testing, click Save.
For more information, please review the API Reference.
2.2 Class Configuration
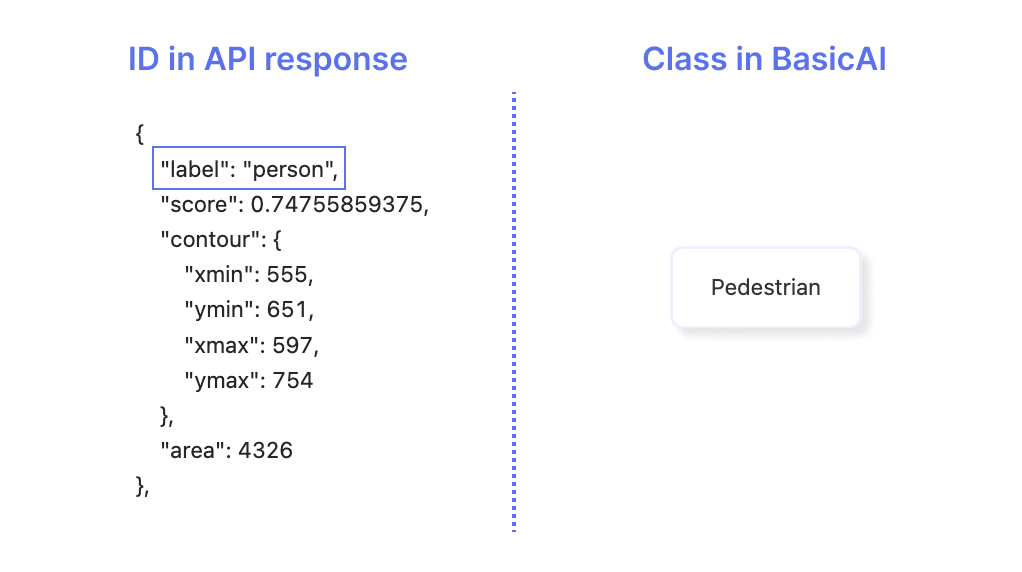
Click Config Classesto match the ID with the model Class.
- ID: The class or label in your API response.
- Class: The class name shown for the model in BasicAI.
You can switch between Edit by row or Edit by text in the top right corner of the pop-up window.
- Edit by row: Input the corresponding ID and Class at each row.
- Edit by text: Input “ID,Name” for each pair.
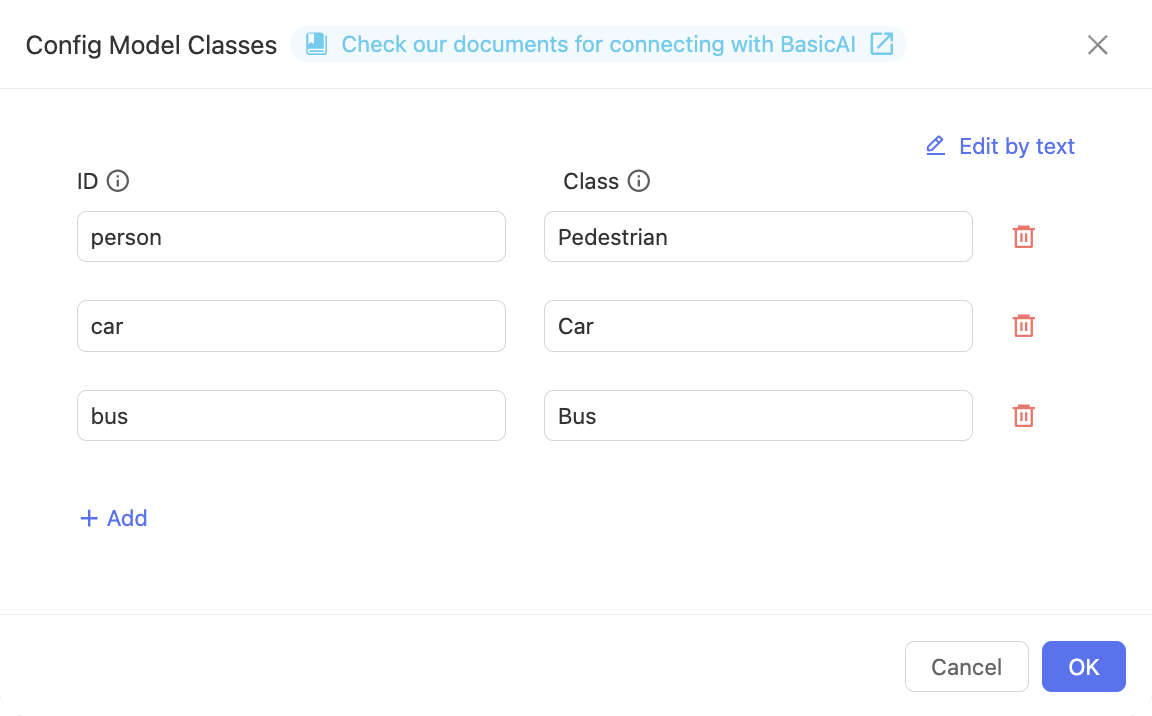
Edit by row
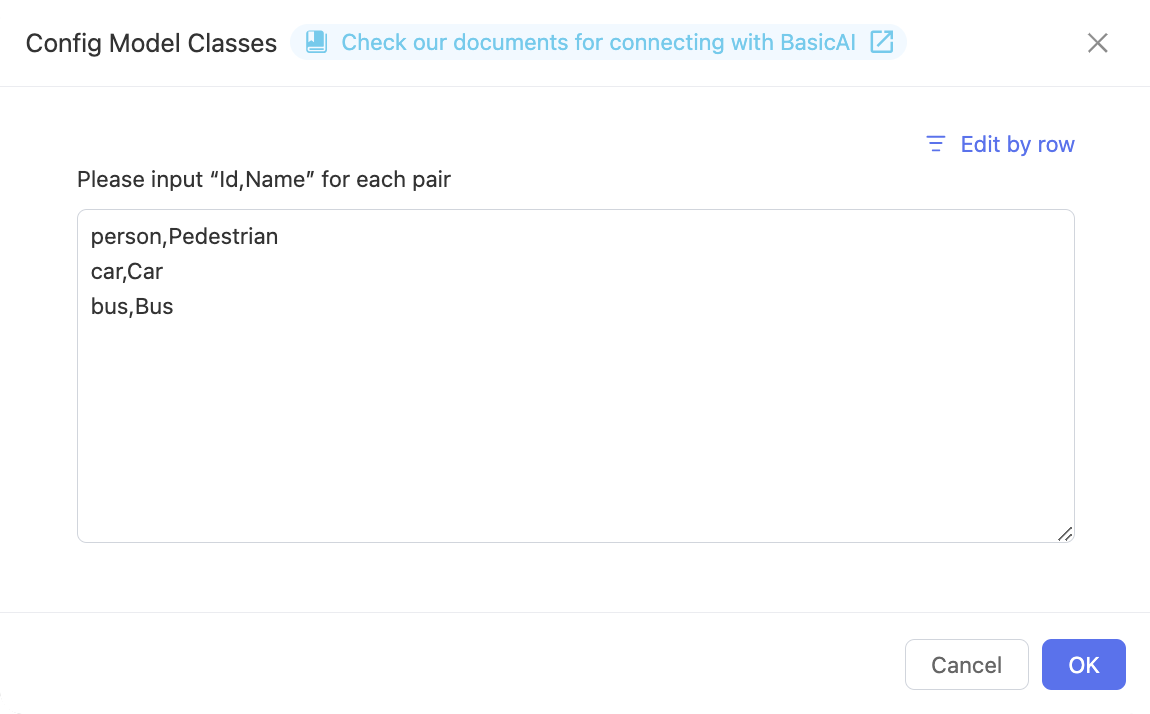
Edit by text
Remember to save.Click
OKto save your edits. Otherwise, the changes will be lost.
3. Hugging Face Model Setting
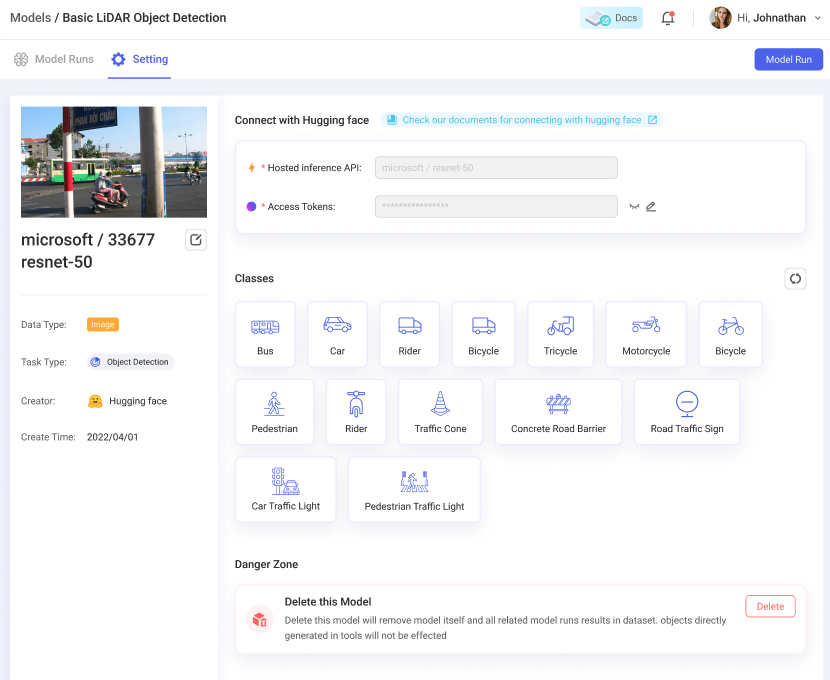
After you create a model by Hugging Face, the pre-configured classes in the Hugging Face model will be displayed on the setting page. On this page, you can operate the following options:
- Changing Access Tokens: you can click the pencil icon beside the access token to edit it if needed.
- Changing Model Name: click the editing icon beside the model name on the left side to change the model name.
- Reset Classes: click the refresh icon beside classes to reset the classes and fetch the latest class information from Hugging Face. Please note that this may cause inconsistency with your model mapping.
- Delete Model: You can click the
Deletebutton at the bottom to delete the model. Please operate with caution.
4. Run the Model
The icons next to the Model and Class Configuration indicate their status. When both turn green, you can click Run Model at the top right corner. The model running process is similar to Pre-trained Models.
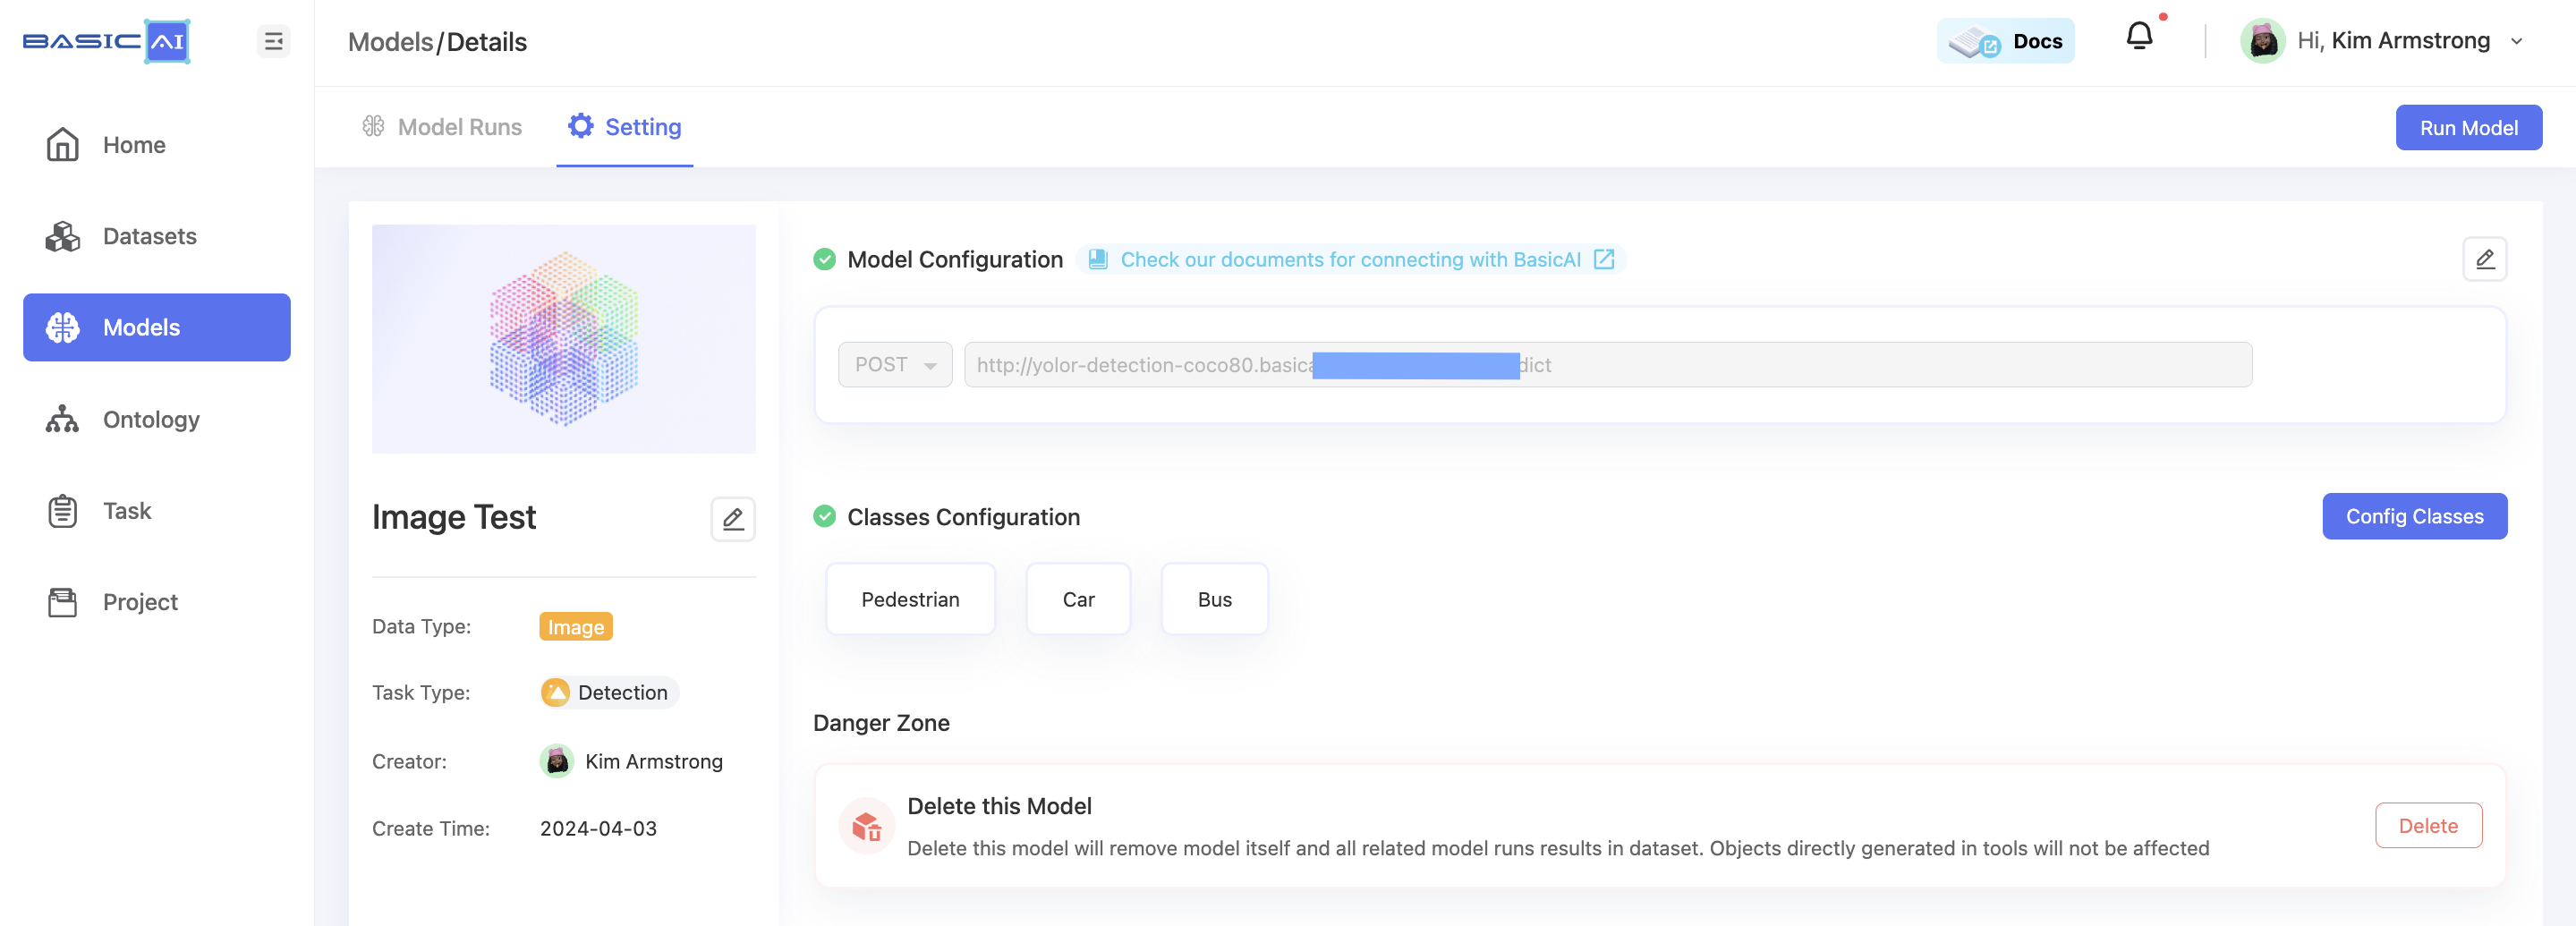
Be cautious to delete.Deleting the model will remove the model itself and all associated model run results in the dataset. Objects directly generated in tools will not be affected.
Updated 9 months ago
