KITTI Annotations on BasicAI
🐈 Introducing the KITTI 3D format and its import/export in BasicAI LiDAR Fusion annotation tool.
The KITTI format is widely used in autonomous driving for computer vision tasks, such as 3D object detection, multi-object tracking, and scene understanding.
For more information, please visit the KITTI site.
On the BasicAI annotation platform, you can import and export data in KITTI format for 3D object detection, which will be detailed in this article.
You can download KITTI datasets from the official website or find samples here📂.
Import KITTI to BasicAI
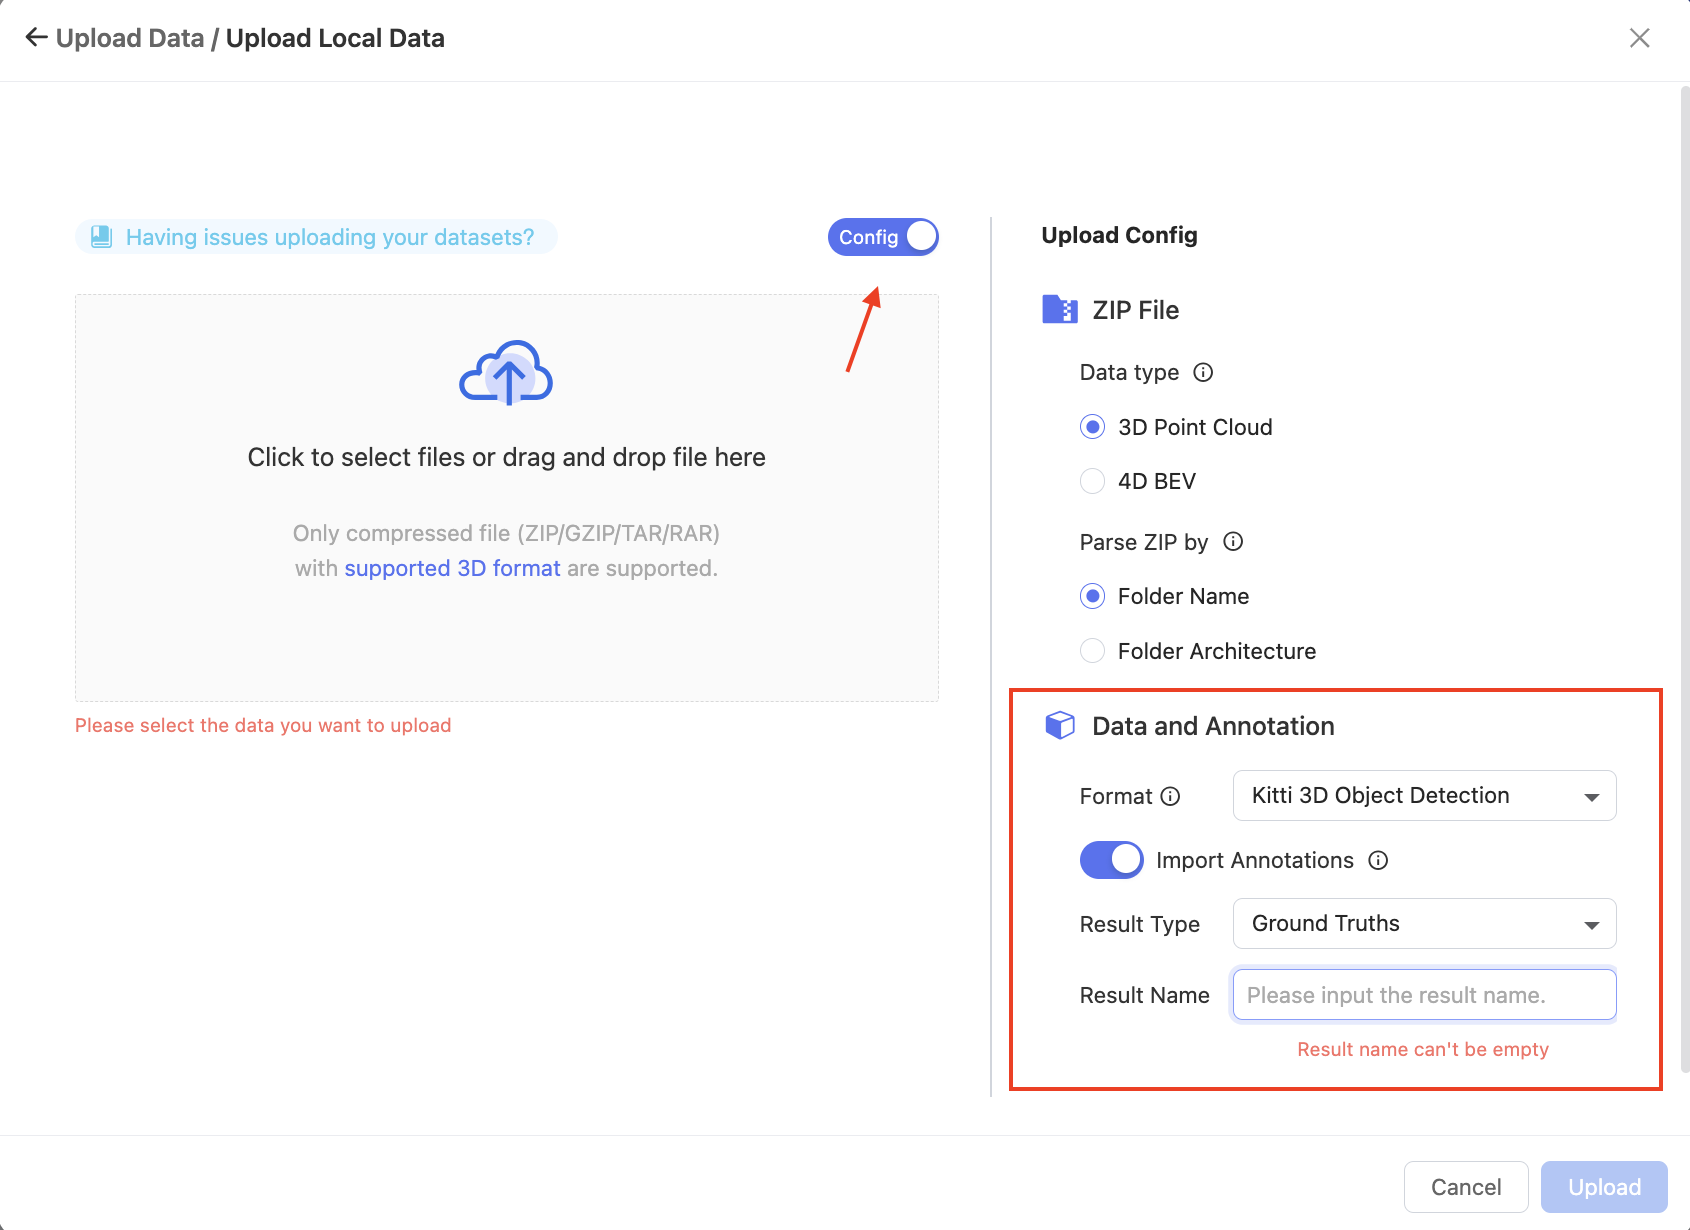
Currently, BasicAI offers only KITTI 3D object detection for single data. The required data is marked in red below.

When uploading to BasicAI, the data should be organized in a ZIP archive with the standard KITTI format:
kitti_format_dataset
├── calib // Camera calibration parameters
│    ├── 0000.txt
│    ├── 0001.txt
│    ...
├── image_2 // Left color images
│    ├── 0000.png
│    ├── 0001.png
│    ...
├── label_2 // Label files for the left color images (optional)
│    ├── 0000.txt
│    ├── 0001.txt
│    ...
├── velodyne // Lidar point cloud
│    ├── 0000.bin
│    ├── 0001.bin
│    ...
Please adhere strictly to the folder names and file types provided. We will explain each of them below.
Click to expand details:
📄 **calib (.txt)**
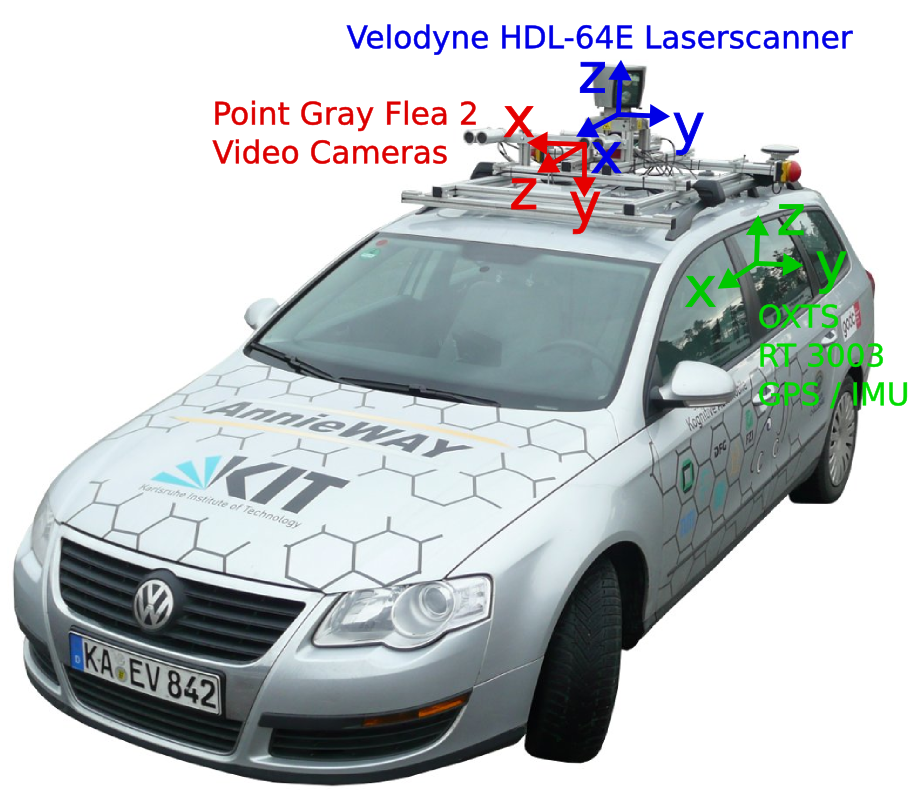
In 2D and 3D sensor fusion annotation, camera calibration parameters are required to convert the point cloud coordinates into the camera coordinates.
Here is a sample text file of camera calibration parameters:
P0: 7.215377000000e+02 0.000000000000e+00 6.095593000000e+02 0.000000000000e+00 0.000000000000e+00 7.215377000000e+02 1.728540000000e+02 0.000000000000e+00 0.000000000000e+00 0.000000000000e+00 1.000000000000e+00 0.000000000000e+00
P1: 7.215377000000e+02 0.000000000000e+00 6.095593000000e+02 -3.875744000000e+02 0.000000000000e+00 7.215377000000e+02 1.728540000000e+02 0.000000000000e+00 0.000000000000e+00 0.000000000000e+00 1.000000000000e+00 0.000000000000e+00
P2: 7.215377000000e+02 0.000000000000e+00 6.095593000000e+02 4.485728000000e+01 0.000000000000e+00 7.215377000000e+02 1.728540000000e+02 2.163791000000e-01 0.000000000000e+00 0.000000000000e+00 1.000000000000e+00 2.745884000000e-03
P3: 7.215377000000e+02 0.000000000000e+00 6.095593000000e+02 -3.395242000000e+02 0.000000000000e+00 7.215377000000e+02 1.728540000000e+02 2.199936000000e+00 0.000000000000e+00 0.000000000000e+00 1.000000000000e+00 2.729905000000e-03
R0_rect: 9.999239000000e-01 9.837760000000e-03 -7.445048000000e-03 -9.869795000000e-03 9.999421000000e-01 -4.278459000000e-03 7.402527000000e-03 4.351614000000e-03 9.999631000000e-01
Tr_velo_to_cam: 7.533745000000e-03 -9.999714000000e-01 -6.166020000000e-04 -4.069766000000e-03 1.480249000000e-02 7.280733000000e-04 -9.998902000000e-01 -7.631618000000e-02 9.998621000000e-01 7.523790000000e-03 1.480755000000e-02 -2.717806000000e-01
Tr_imu_to_velo: 9.999976000000e-01 7.553071000000e-04 -2.035826000000e-03 -8.086759000000e-01 -7.854027000000e-04 9.998898000000e-01 -1.482298000000e-02 3.195559000000e-01 2.024406000000e-03 1.482454000000e-02 9.998881000000e-01 -7.997231000000e-01
🏙️ **image_2 (.png)**
BasicAI currently supports only ONE camera for KITTI and the folder name should be image_2.
In total, the KITTI dataset includes 4 camera data, including 2 grayscale cameras and 2 color cameras. The RGB image data captured by the left color camera is stored in image_2.

🏷 **label_2 (.txt)**
If your data has been pre-annotated, you can upload the label file to BasicAI.
In order to correspond to the image_2 folder, the label file needs to be named label_2.
It is a text file containing a set of lines, with each line representing the annotation for a single object in the corresponding image. The format of each line is as follows:
<class names> <truncation> <occlusion> <alpha> <bbox coordinates> <3D dimensions> <location> <rotation_y> <score>
Here is a description of these fields:
| Elements | Parameter Name | Description | Example |
|---|---|---|---|
| 1 | class names | The class or type of the annotated object. This can be one of the following: 'car', 'van', 'truck', 'pedestrian', 'person_sitting', 'cyclist', 'tram', 'misc', or 'dontcare'. 'dontcare' is used for objects that are present but ignored for evaluation. | car |
| 1 | truncation | The fraction of the object that is visible. Float from 0 (non-truncated) to 1 (truncated), where truncated refers to the object leaving image boundaries. | 0 |
| 1 | occlusion | Integer (0,1,2,3) indicating occlusion state: [ 0 = fully visible, 1 = partly visible, 2 = largely occluded, 3 = unknown] | 2 |
| 1 | alpha | Observation angle of object, ranging [-pi..pi] | 0.146 |
| 4 | bounding box | Coordinates | 100, 120, 180, 160 |
| 3 | 3d dimension | 3D object dimensions: height, width, length (in meters) | 1.65, 1.67, 3.64 |
| 3 | location | 3D object location x, y, z in camera coordinates (in meters) | -0.65, 1.71, 46.7 |
| 1 | rotation_y | Rotation ry around the y-axis in camera coordinates, ranging [-pi..pi] | -1.59 |
| 1 | score | Only for results: float, indicating confidence in detection, needed for p/r curves, higher is better | 1 |
The sum of the total number of elements per object is 16. Here is a sample text file:
Car 0.00 0 -3.61 1082.39 404.87 1389.54 645.27 1.70 1.92 3.84 2.06 -1.80 -2.86 -0.94 1
Car 0.00 0 2.41 556.36 466.44 775.85 628.07 1.55 1.86 4.51 1.63 -1.38 7.60 2.56 1
Truck 0.00 0 -3.27 1426.23 309.84 1751.97 444.15 1.43 1.55 4.14 7.07 -6.52 -5.65 -0.99 1
🌌 **velodyne (.bin)
LiDAR point cloud data captured by the Velodyne laser scanner is stored in a .bin file.
After formatting data in standard KITTI, you can upload it to the LiDAR Fusion datasets on BasicAI. Remember to click the Config switch button, select the format as KITTI 3D Object Detection, and choose whether to import pre-annotations.
For more details about creating datasets and uploading data, please refer to Data and Folder Structure.
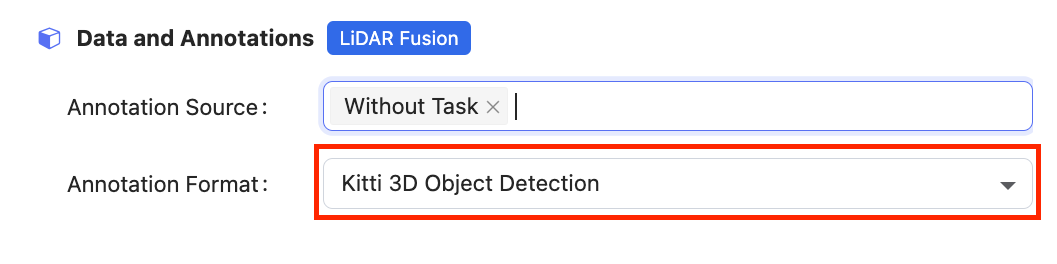
Access the LiDAR Fusion Tool to annotate point cloud and image data. You can load pre-annotations from the top right corner.
Export KITTI from BasicAI
You can export annotation results in the KITTI 3D Object Detection format from BasicAI.
For more details about exporting, please refer to Export.
For export of results:
- In KITTI format, only 2D bounding boxes on camera image data can be exported.
- When annotating in multi-camera fused angles, multiple label files will be exported for each camera in a downloaded
.ziparchive with the following structure:
result
├── label_0 // Annotations on camera image 0
│    └── 0000.txt
├── label_1 // Annotations on camera image 1
│    └── 0000.txt
├── label_2 // Annotations on camera image 2
│    └── 0000.txt
├── label_3 // Annotations on camera image 3
│    └── 0000.txt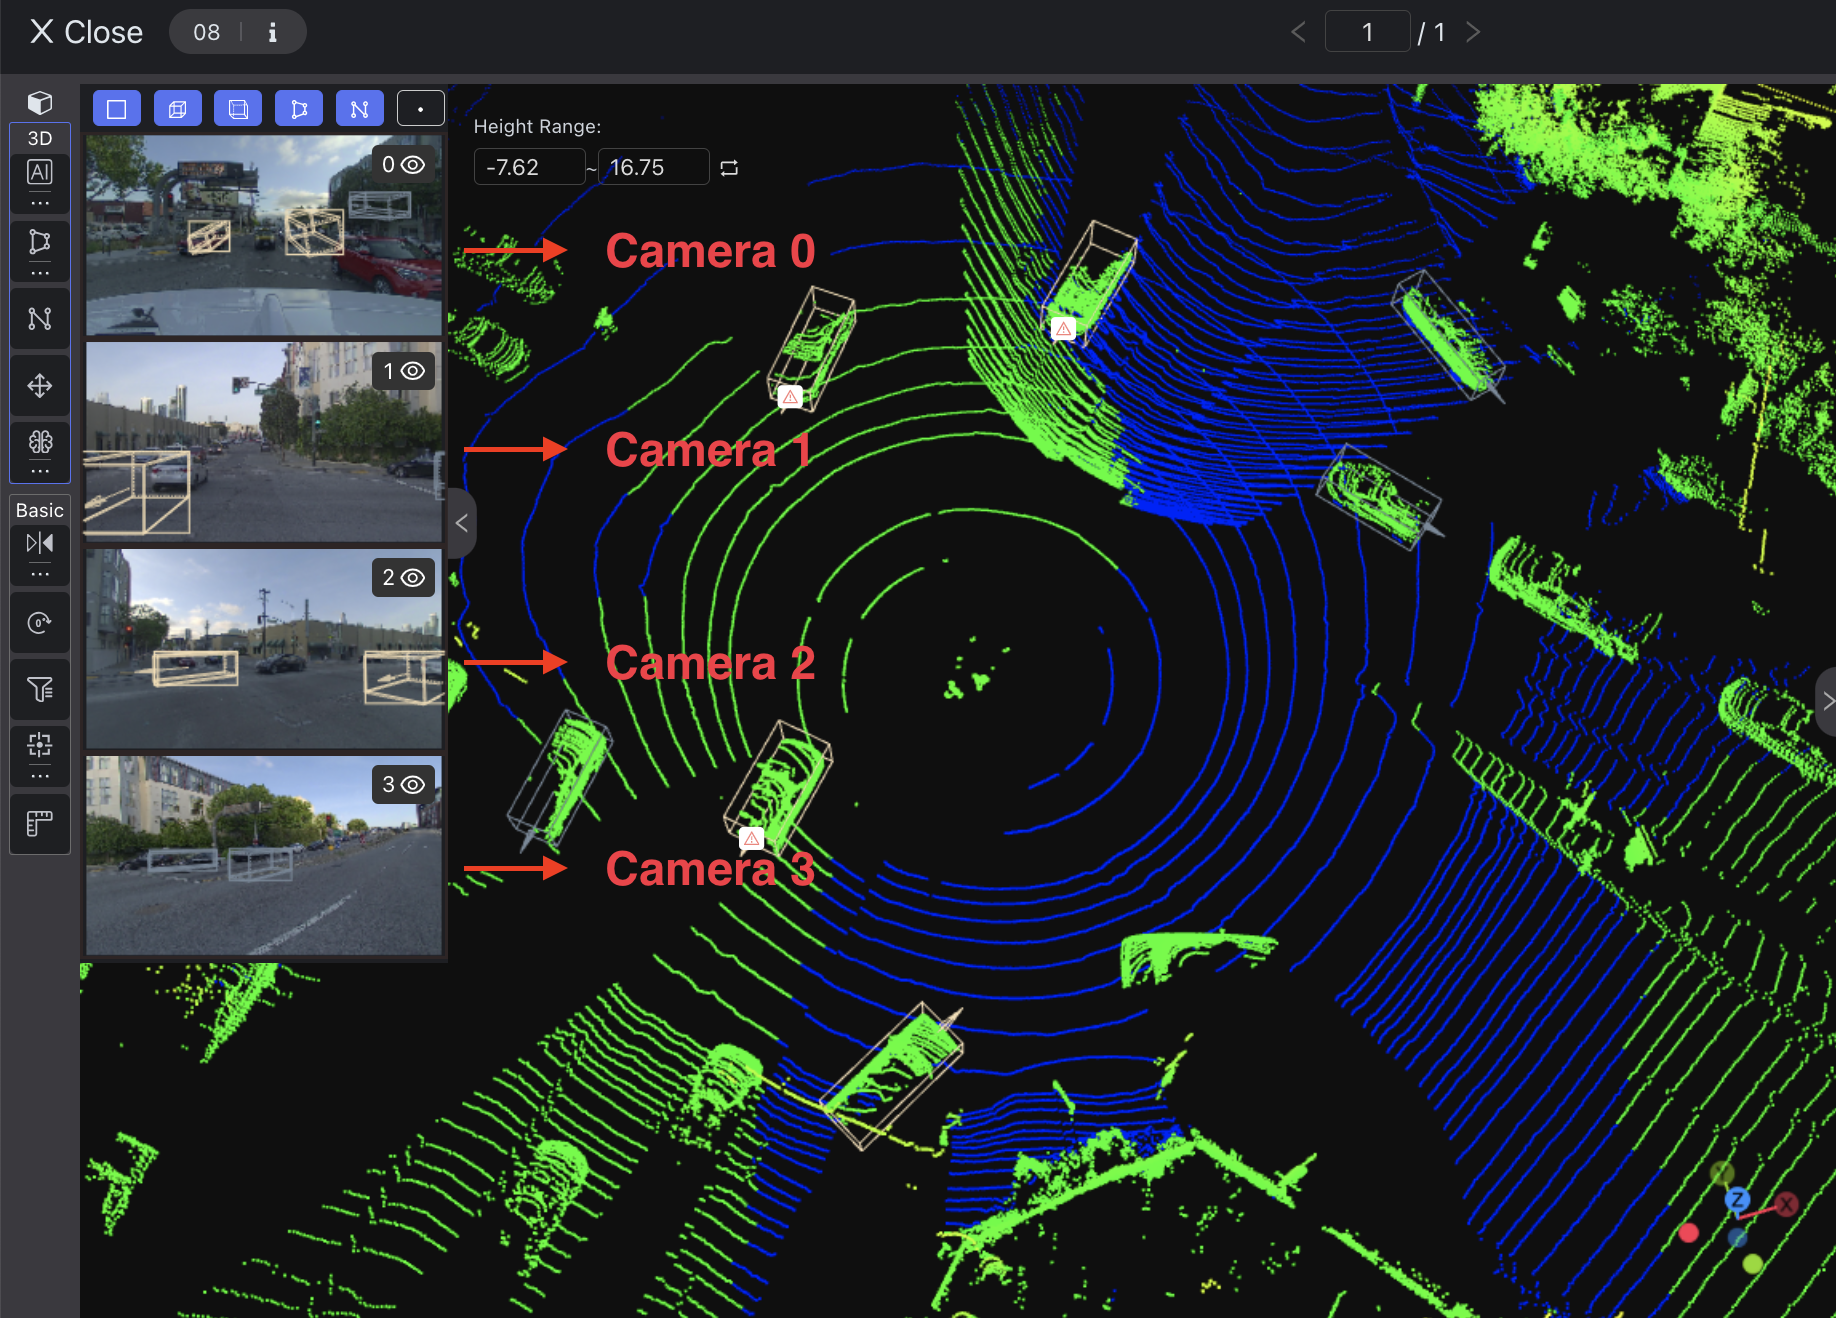
-
The label file contains annotated objects with each line representing one. Please refer to the label_2 section for detailed information. Note that attributes like "Occlusion" and "Truncation" are not supported, with default values being occlusion: 0 and truncation: 0.00.
-
The object labeled only in 2D, not 3D, corresponds to the "DontCare" class in the KITTI dataset. It has negative position values for all data except the 2D box.
DontCare -1 -1 -10 892.66 529.90 1786.14 883.20 -1 -1 -1 -1000 -1000 -1000 -10
If you encounter any issues with importing or exporting your KITTI-like data, feel free to seek assistance on our Slack channel or through email [email protected] 📧.
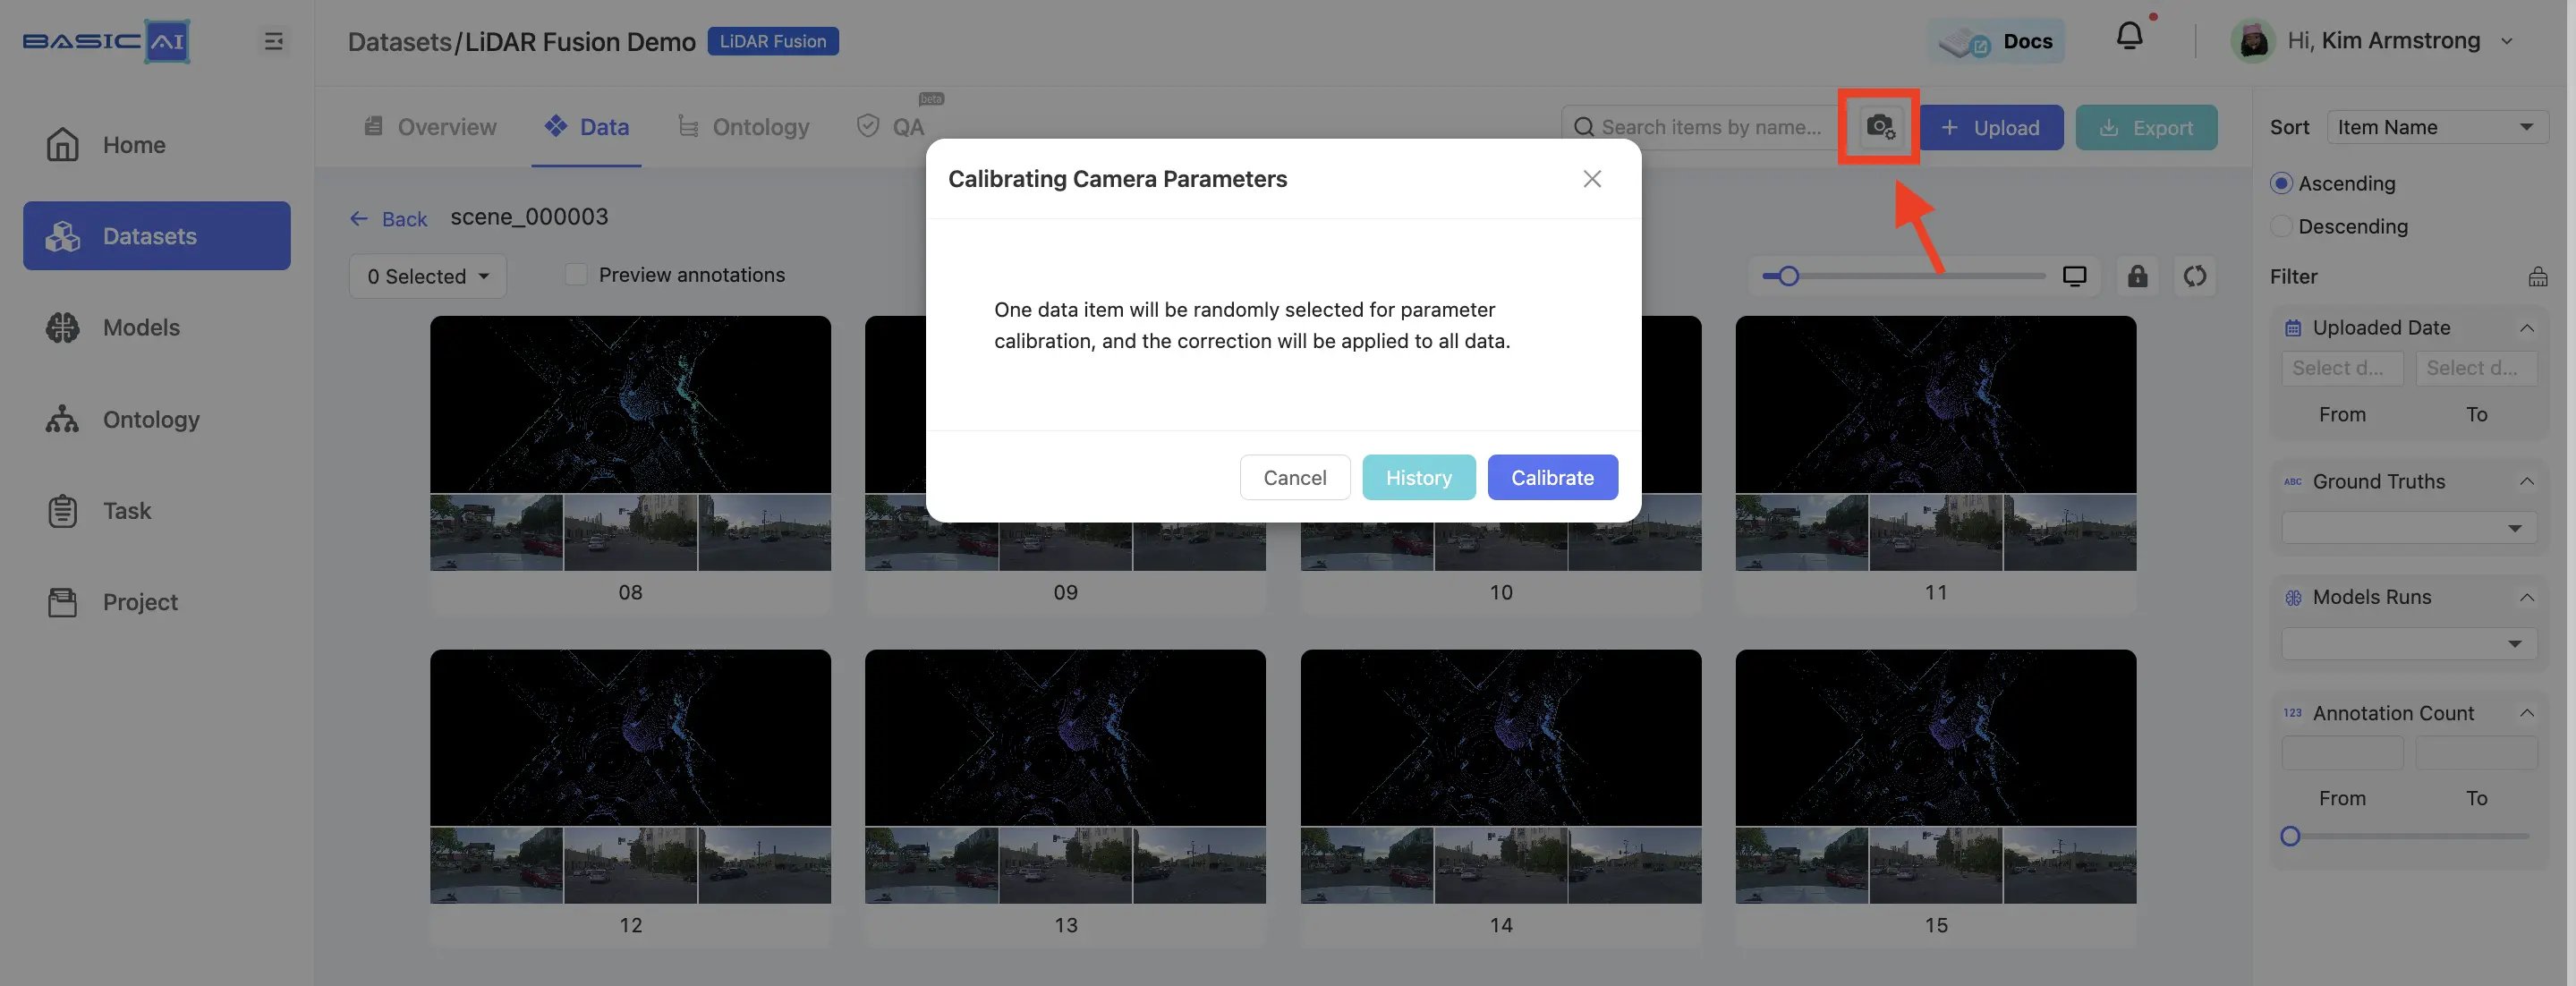
After uploading the LiDAR Fusion data and camera config, you can manually calibrate the camera parameters in the dataset.
This feature is only available if you already have camera parameters that are not very accurate. It does not work with completely absent or wildly inaccurate camera parameters.
Enter the dataset and click the Camera Calibration button located in the top-right corner. You can either create a new calibration or select an existing one here.
Select "Point" from the toolbar to annotate the point cloud data. Then, double-click on the images to adjust the positions of the projected points. Make sure that each image has at least THREE points associated with the point cloud result.
After adjusting the points, click Recalculate Calibration. Once the calibration is complete, create or project a point to verify whether the automatically mapped point positions are correct. If incorrect, readjust the positions of each pair of points in the images and point cloud.
Click the Update button located in the top-right corner to apply the current camera parameters.
Updated about 1 year ago