Segmentation - LiDAR Fusion
Guide for Segmentation Annotation Mode
Guides on segmenting and annotating point cloud data with BasicAI LiDAR Fusion Tool, an all-in-one smart data labeling platform.
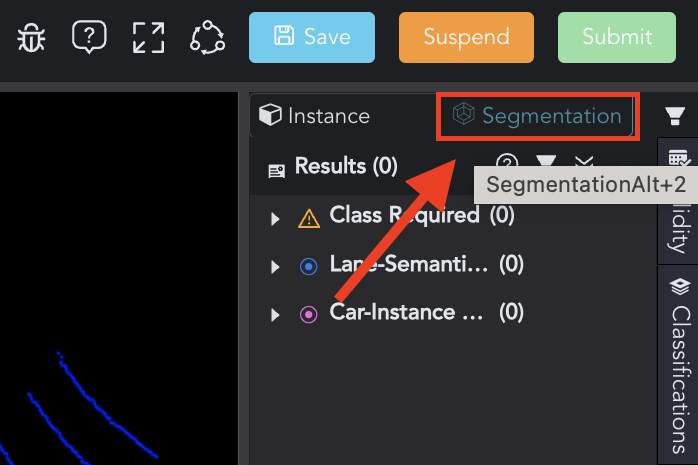
To segment and classify points in LiDAR Fusion Data, you need to choose Segmentation (Alt+2) in the Mode Switch.
In a specific mode, you can modify current results while only viewing results from another mode.
Recommended Workflow for SegmentationThis article only details the steps of 3D Segmentation and 2D Annotation. The remaining steps are similar to Instance Annotation Mode (click to view).

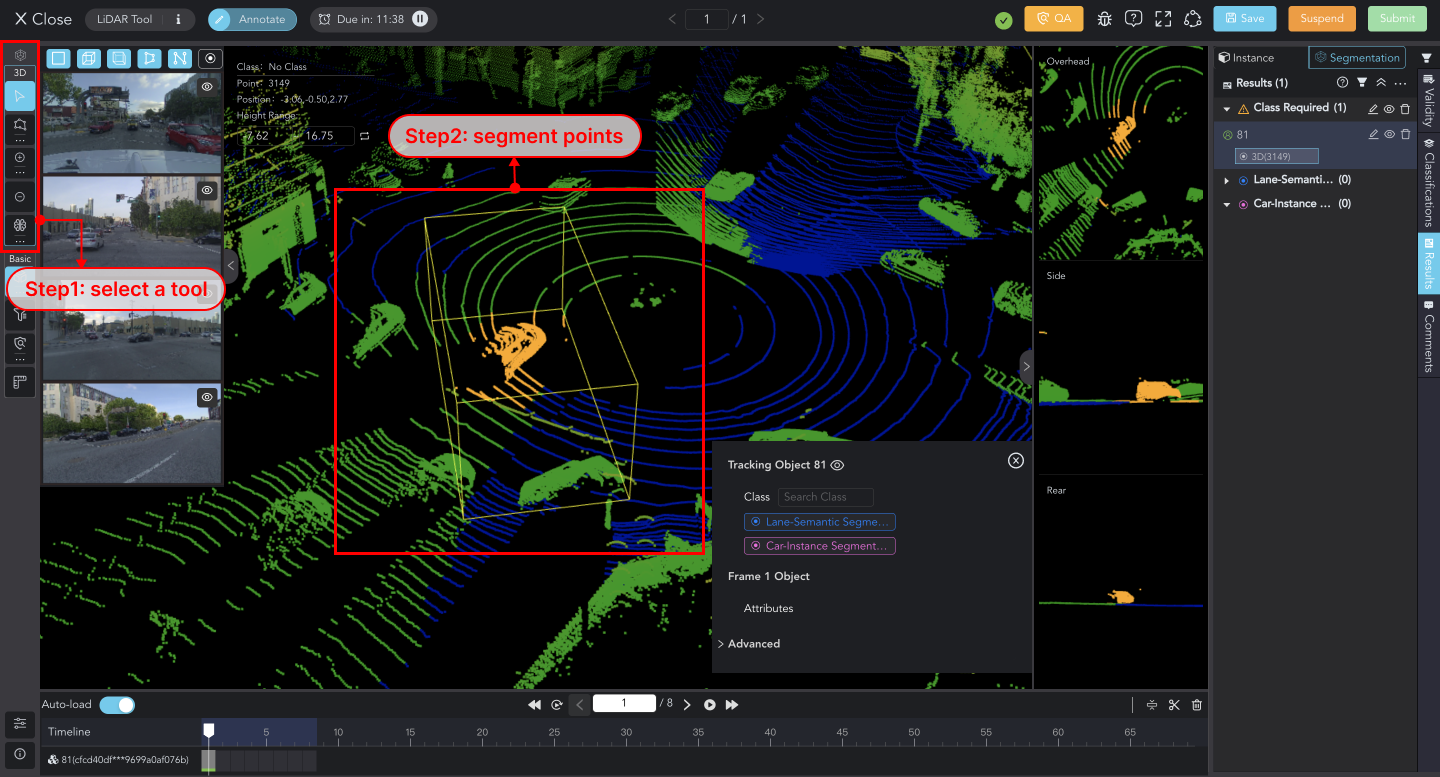
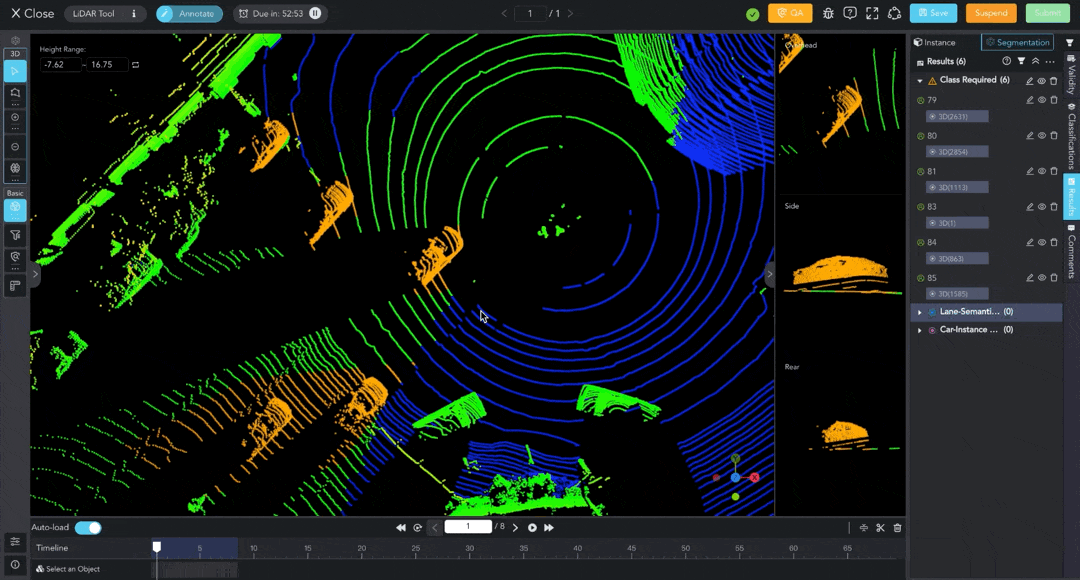
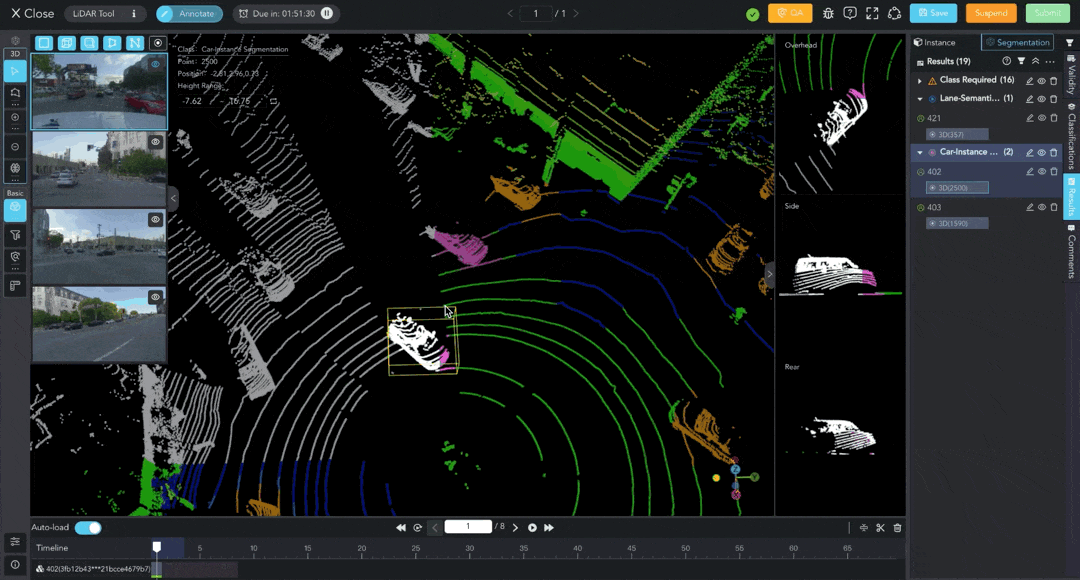
1. Segmentation in 3D
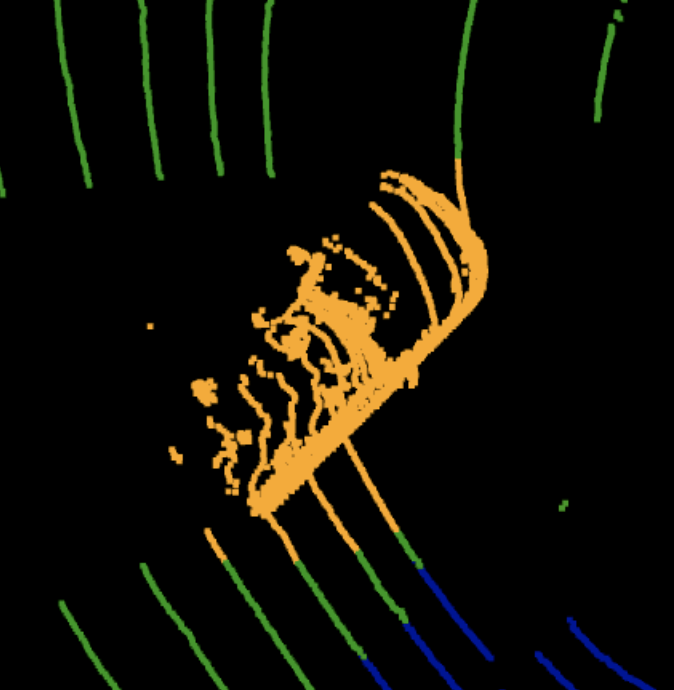
First, select tools from the Toolbar to segment points on the Point Cloud Data.
Create Seg. (F)
There are four brush types to generate segmentation results. You can switch by clicking ... below the button or hitting the X key.
- Lasso: Click and hold to draw a range line. Release to finish drawing. The starting and ending points will automatically connect to close the loop.
- Polygon: Click on the canvas to add points that will be connected in a sequence. Alternatively, like the Lasso tool, you can click and hold to draw lines. Hit the Space/Enter key to finish drawing and close the shape.
A polygon drawn on a plane may appear 2D, yet it truly signifies a 3D area observable from various perspectives.
- Rectangle: Click and hold to draw a rectangle. Release to finish.
Similar to a polygon, it represents a 3D area observable from different perspectives.
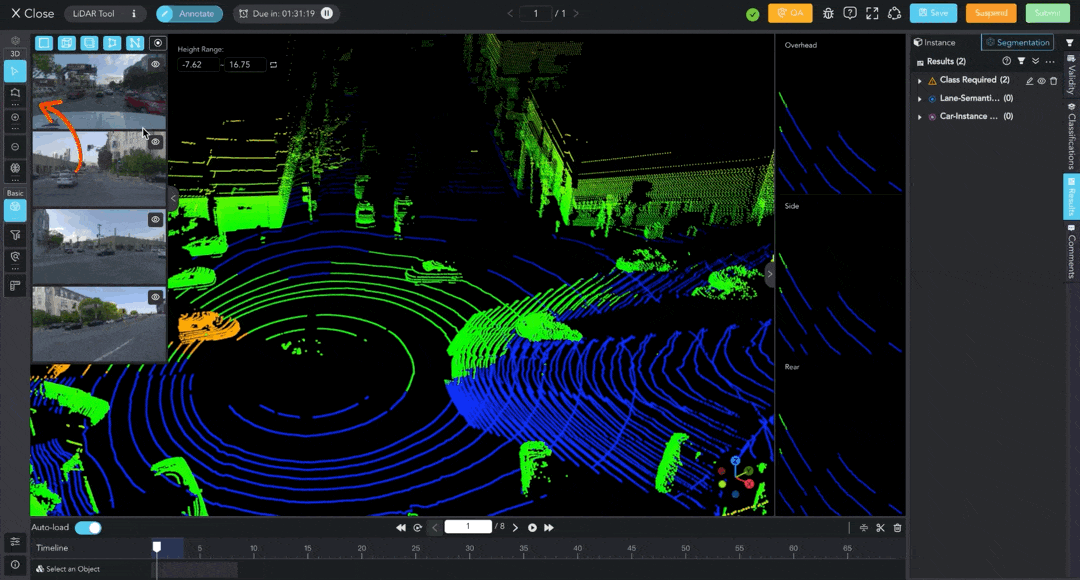
- Point: Click to segment a single point.
Add Point (A)
Select the result you want to modify, and click Add Point (shortcut A). Then, you can draw on the canvas to include the new points in the current result.
The drawing method aligns with the selected brush type for
Create Seg..
Click ... below the button or press W to switch between two modes:
- Exclude Existing Results: This mode will exclude the already labeled points while adding new points. Also, the original label of those excluded points will be maintained.
- Cover Existing Results: This mode allows you to add new points even if they have already been labeled. In this case, the label of the selected object will be changed.

Exclude Existing Results
Cover Existing Results
Remove Point (D)
Select the result you want to modify, and click Remove Point (shortcut D). Then, you can draw on the canvas to eliminate the points from the current result.
The drawing method aligns with the selected brush type for
Create Seg..
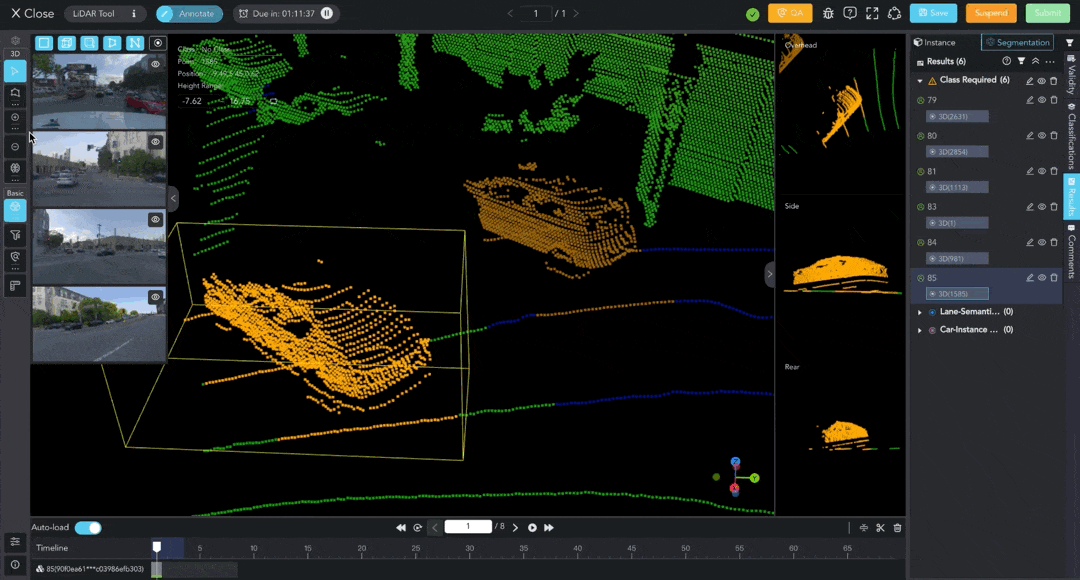
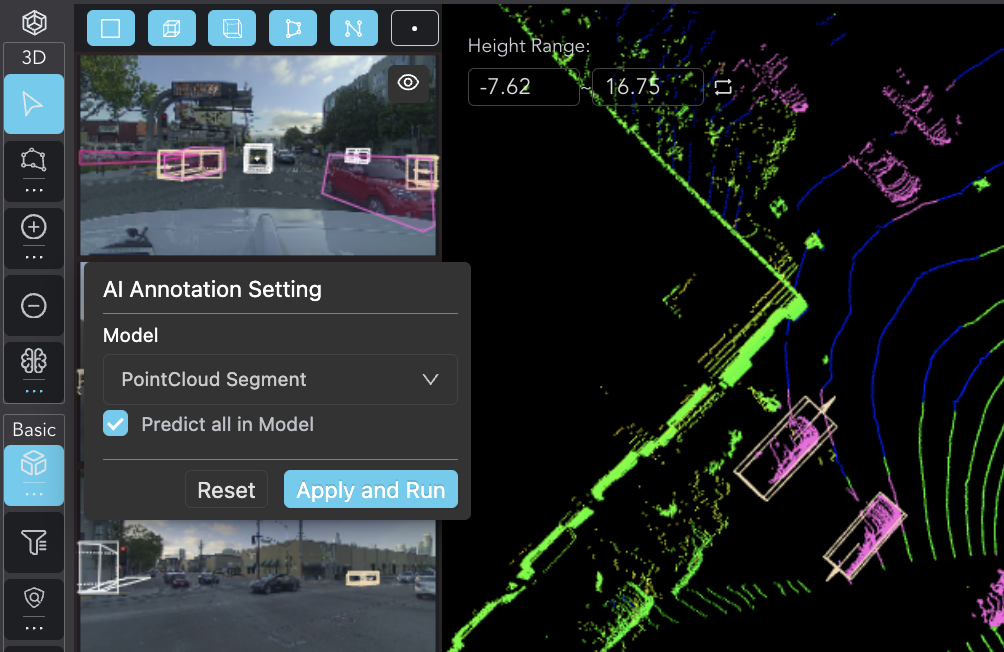
Run Model
You can configure the model before running by clicking ... below the model icon. Select the model and choose whether to predict all the points, then apply the settings and run. Click the model icon again to see the AI segmentation results.
Adding model results may overwrite the annotated points, please proceed with caution.
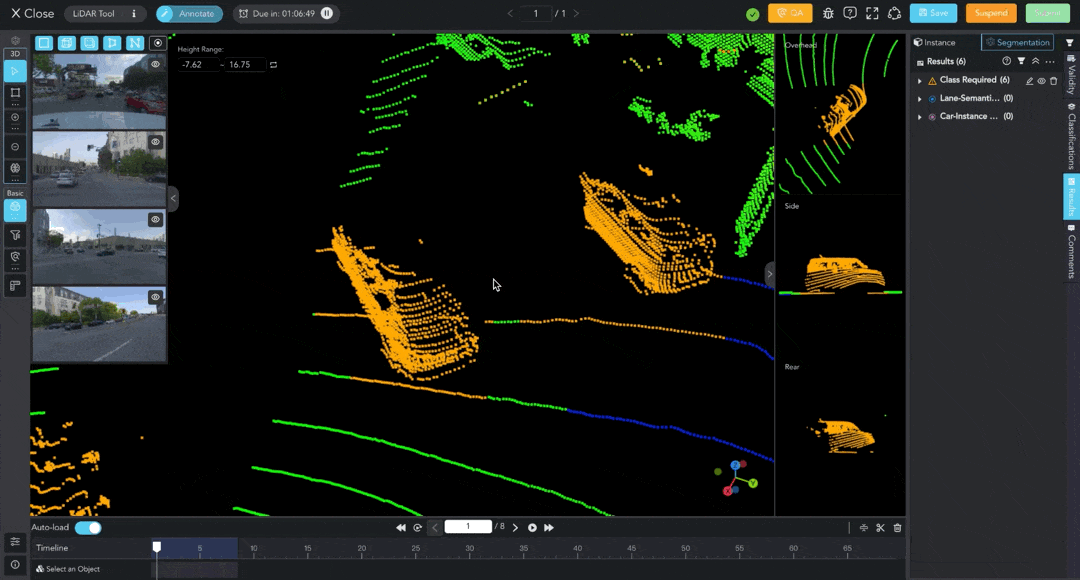
Contour (C)
Displaying boundaries can help to highlight and inspect segmentation results. By default, this feature is enabled.
You can click ... below the button to set the Contour Type (Cuboid/Polygon).
Contour Off
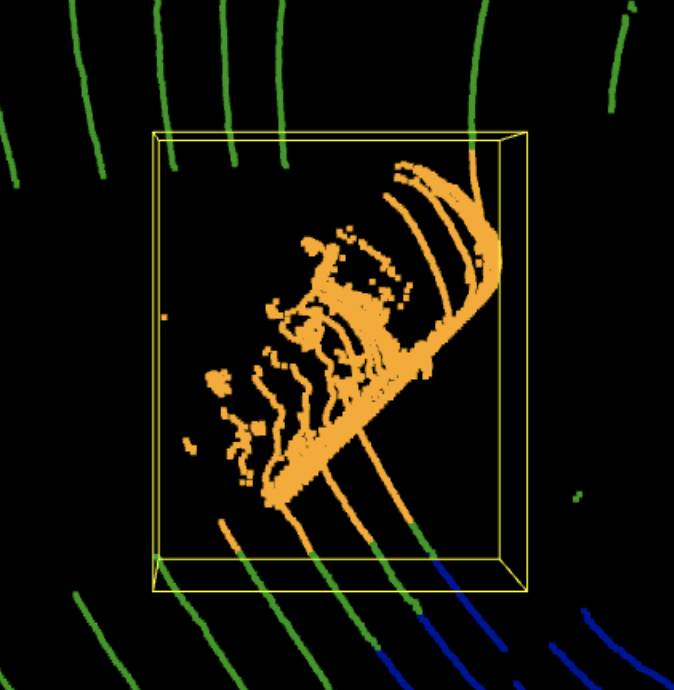
Contour On-Cuboid
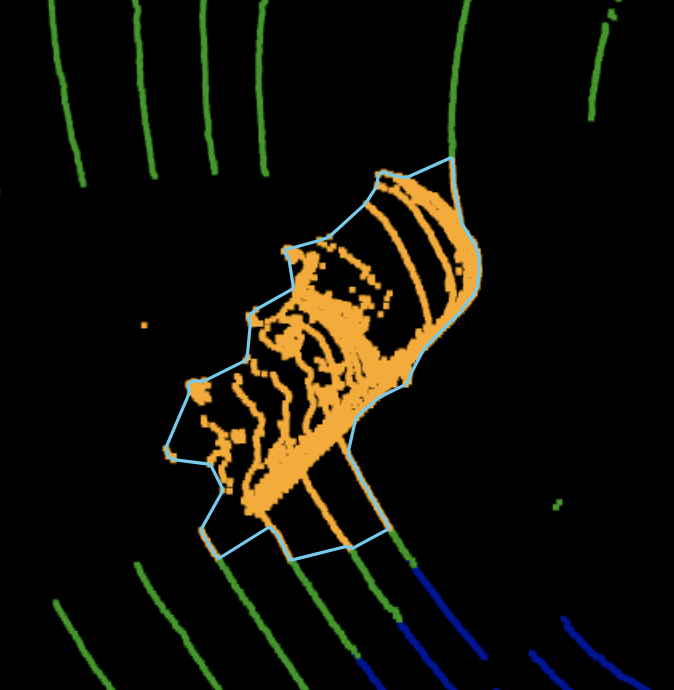
Contour On-Polygon
Single Display(B)
Display only the points of the selected result while masking out the rest.
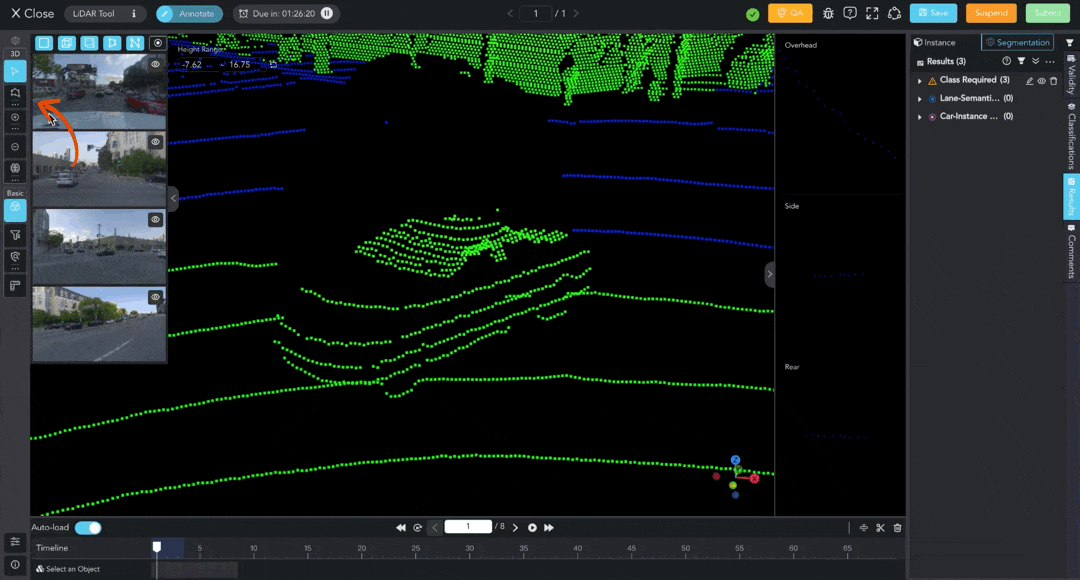
Detect Unlabeled Points
When enabled, all unlabeled points will be highlighted in red. You can click ... to set whether to display the Hint Box.
The top left corner shows the number of unlabeled points. Use Previous or Next to navigate between them.

Measuring Tool
Similar to the Measuring Tool in Instance Annotation Mode. Click to view.
2. Annotation in 2D
Segmentation results from Point Cloud Data can be automatically projected onto 2D Camera Data, but creating 2D results must be done manually.
Remember to choose the 'Point' result type; otherwise, the projected object will not be visible.
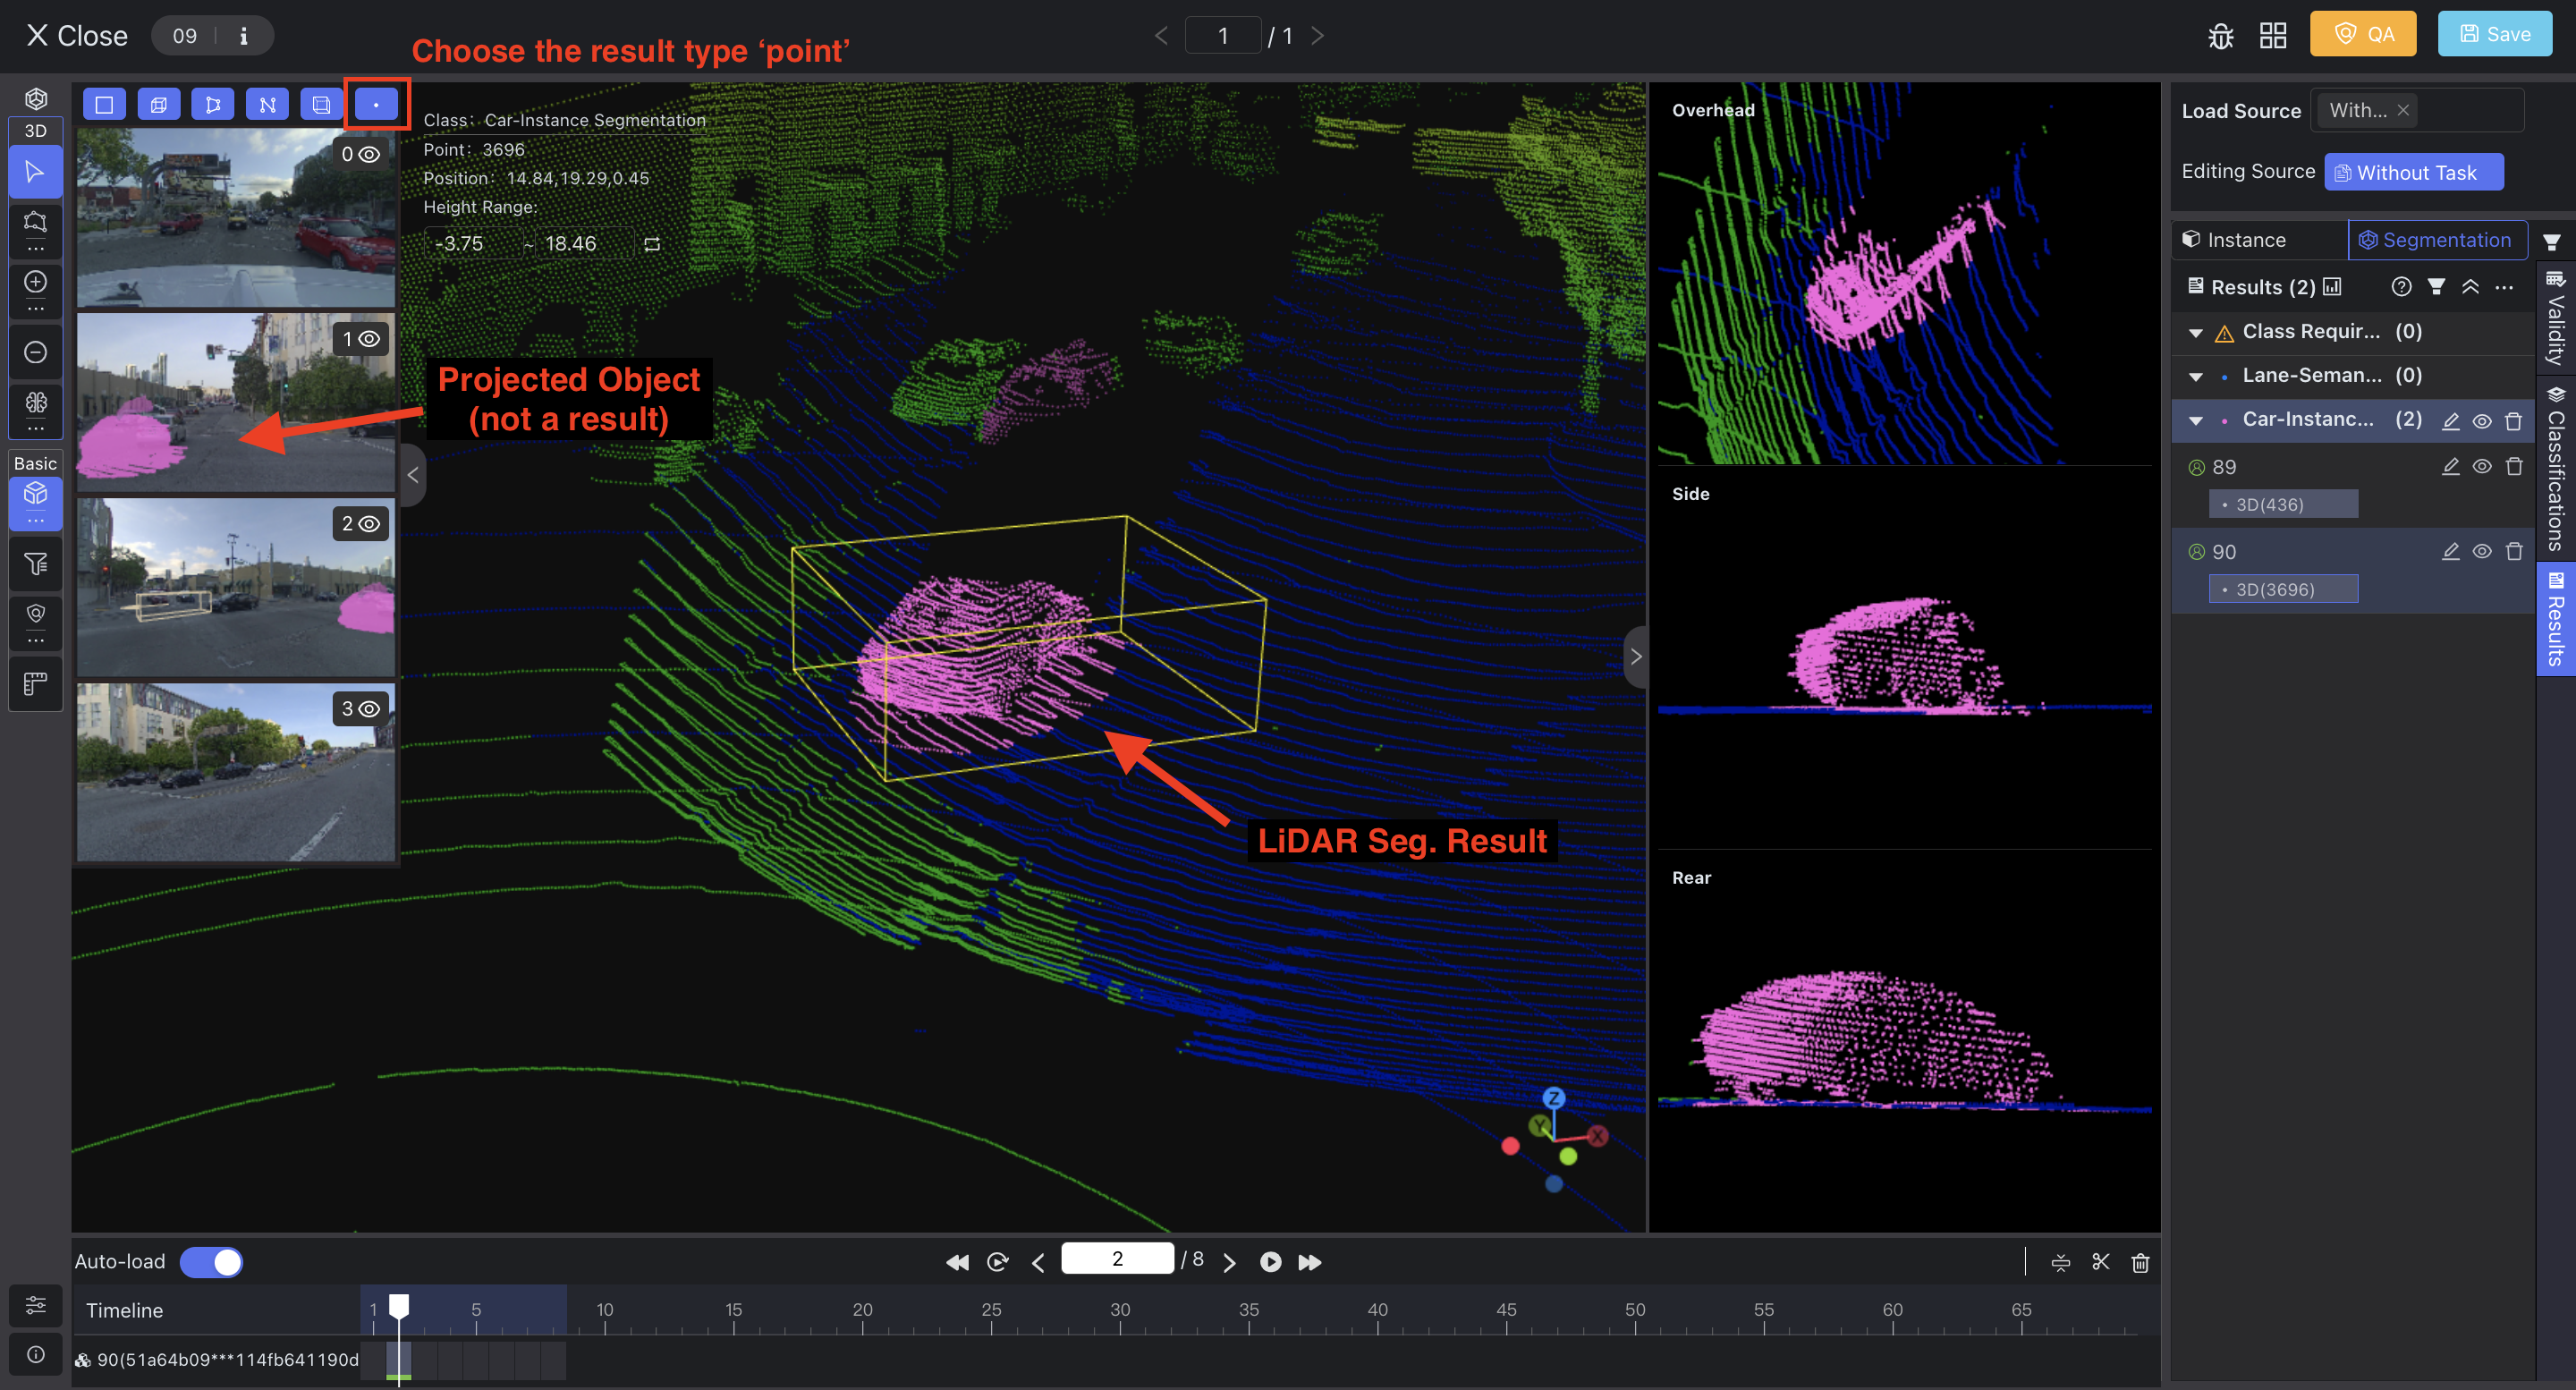
Double-click an image to enter 2D Annotation Mode . You can select an object and then use the Polygon tool to add 2D results or create new objects directly on the image. Remember to provide class and attribute information.
💡TIPS: Click the eye icon on the image to highlight the field of view on the Point Cloud Data, which helps to position the object.
For more details, please refer to the 2D Annotation Mode in Instance Annotation. Click to view..
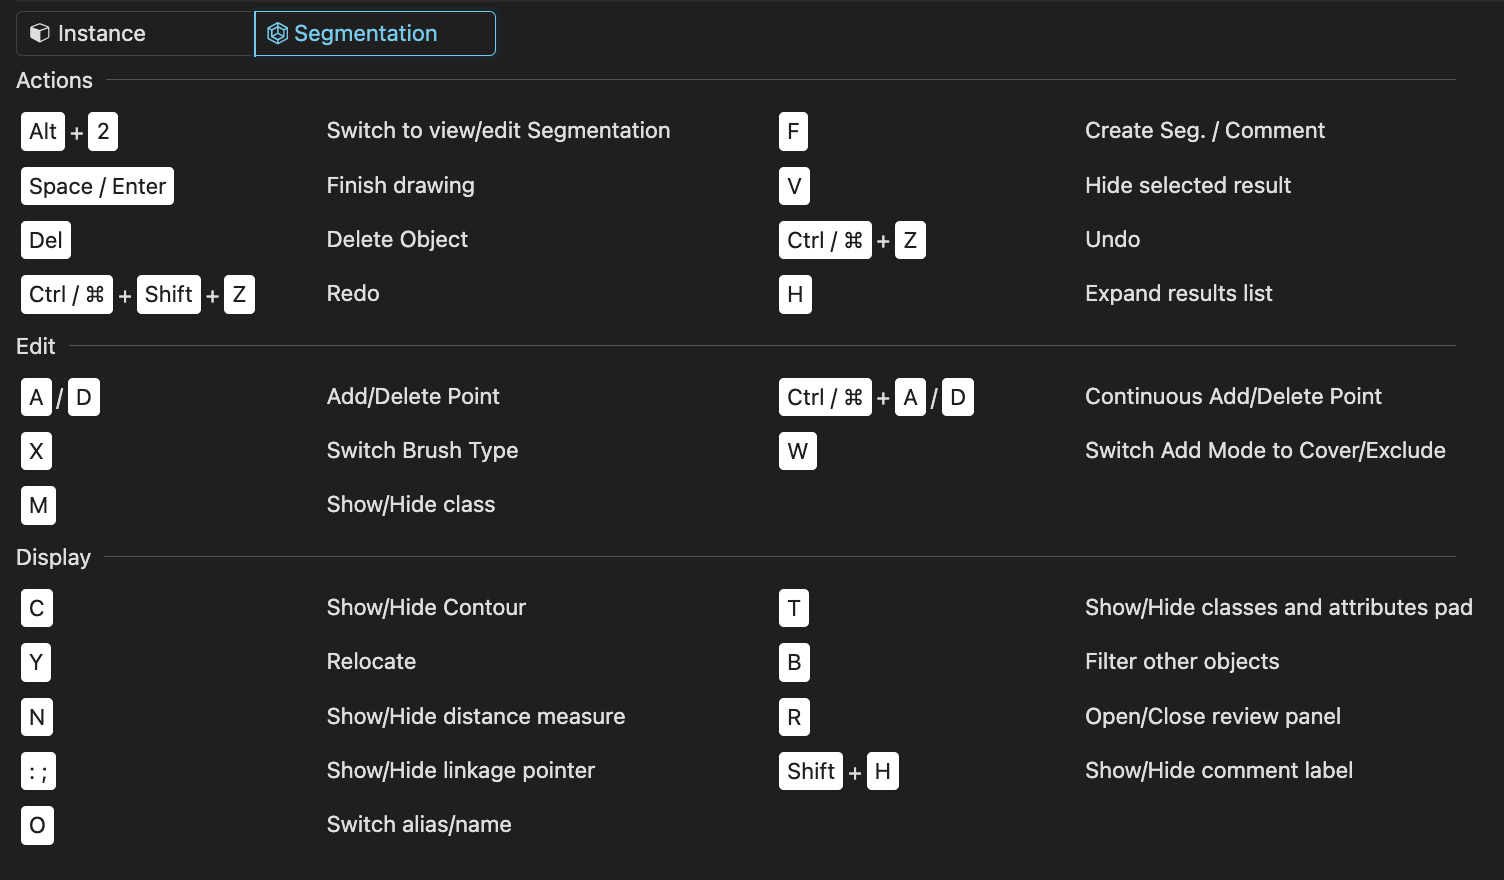
3. Shortcut Keys
Updated about 1 year ago