Inspector
🔍 Inspectors are the judges who determine task approval.
As an "Inspector," your role is to ensure the overall quality of the annotated data and determine whether to accept the task.
You are presently in the "Acceptance" stage of the task queue.
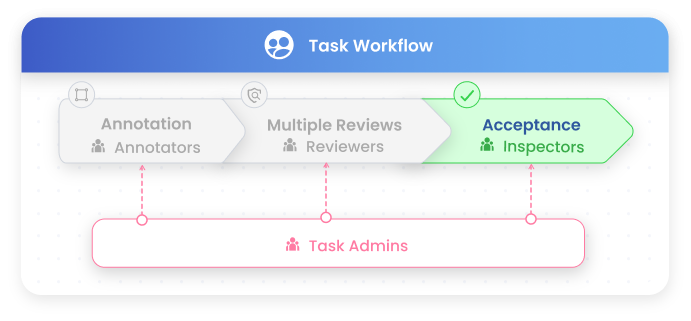
Workflow for Acceptance 💻
You can begin the acceptance task by following these steps:00:00 - Step 1: Find Your Task
00:43 - Step 2: Start Inspecting
01:41 - Step 3: Reject & Accept
02:00 - Step 4: Revise
02:08 - Step 5: Re-Review
Step 1: Find Your Task
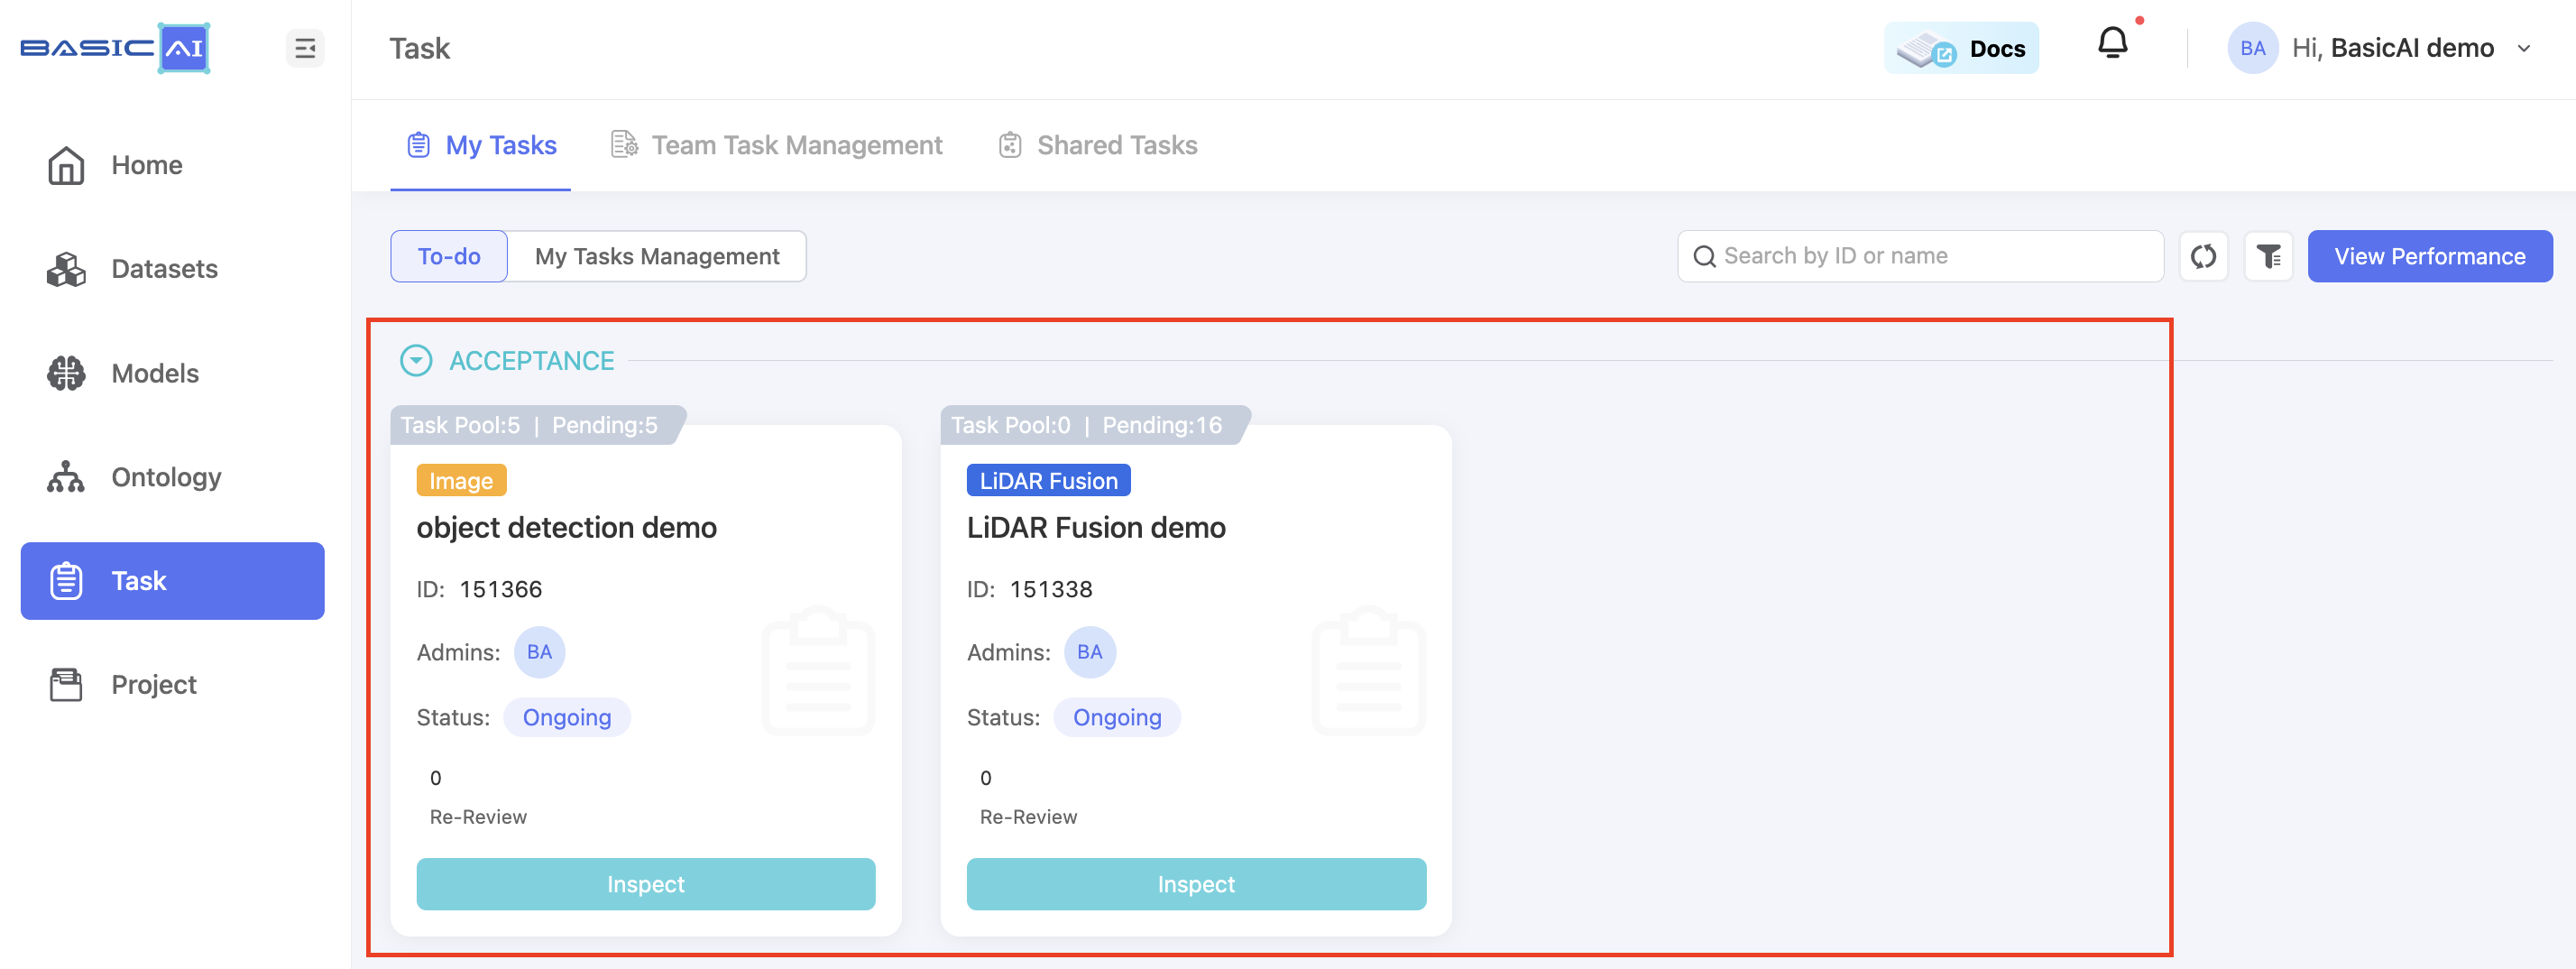
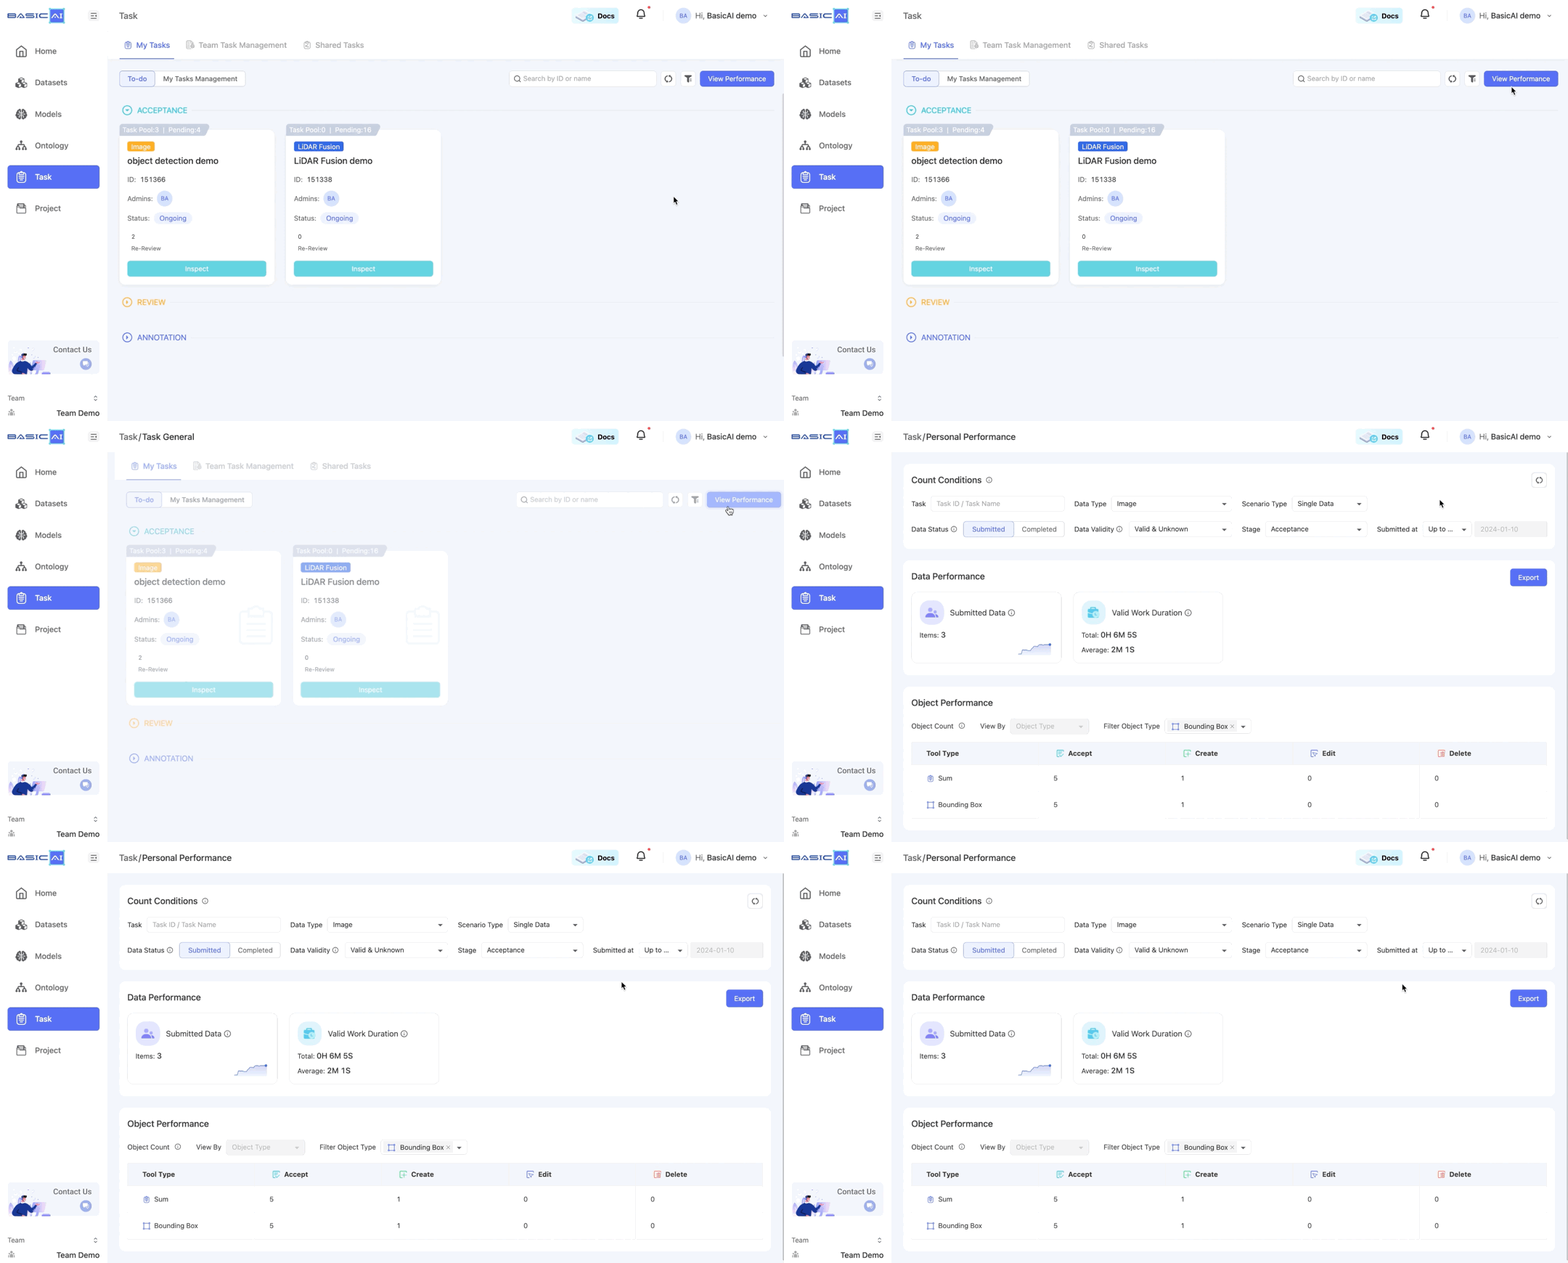
Navigate to the Task Tab and locate the ACCEPTANCE category under My Tasks - To-do. Here, you will find all the tasks assigned to you as an inspector. To enter the data list, click on a task card's Inspect button.
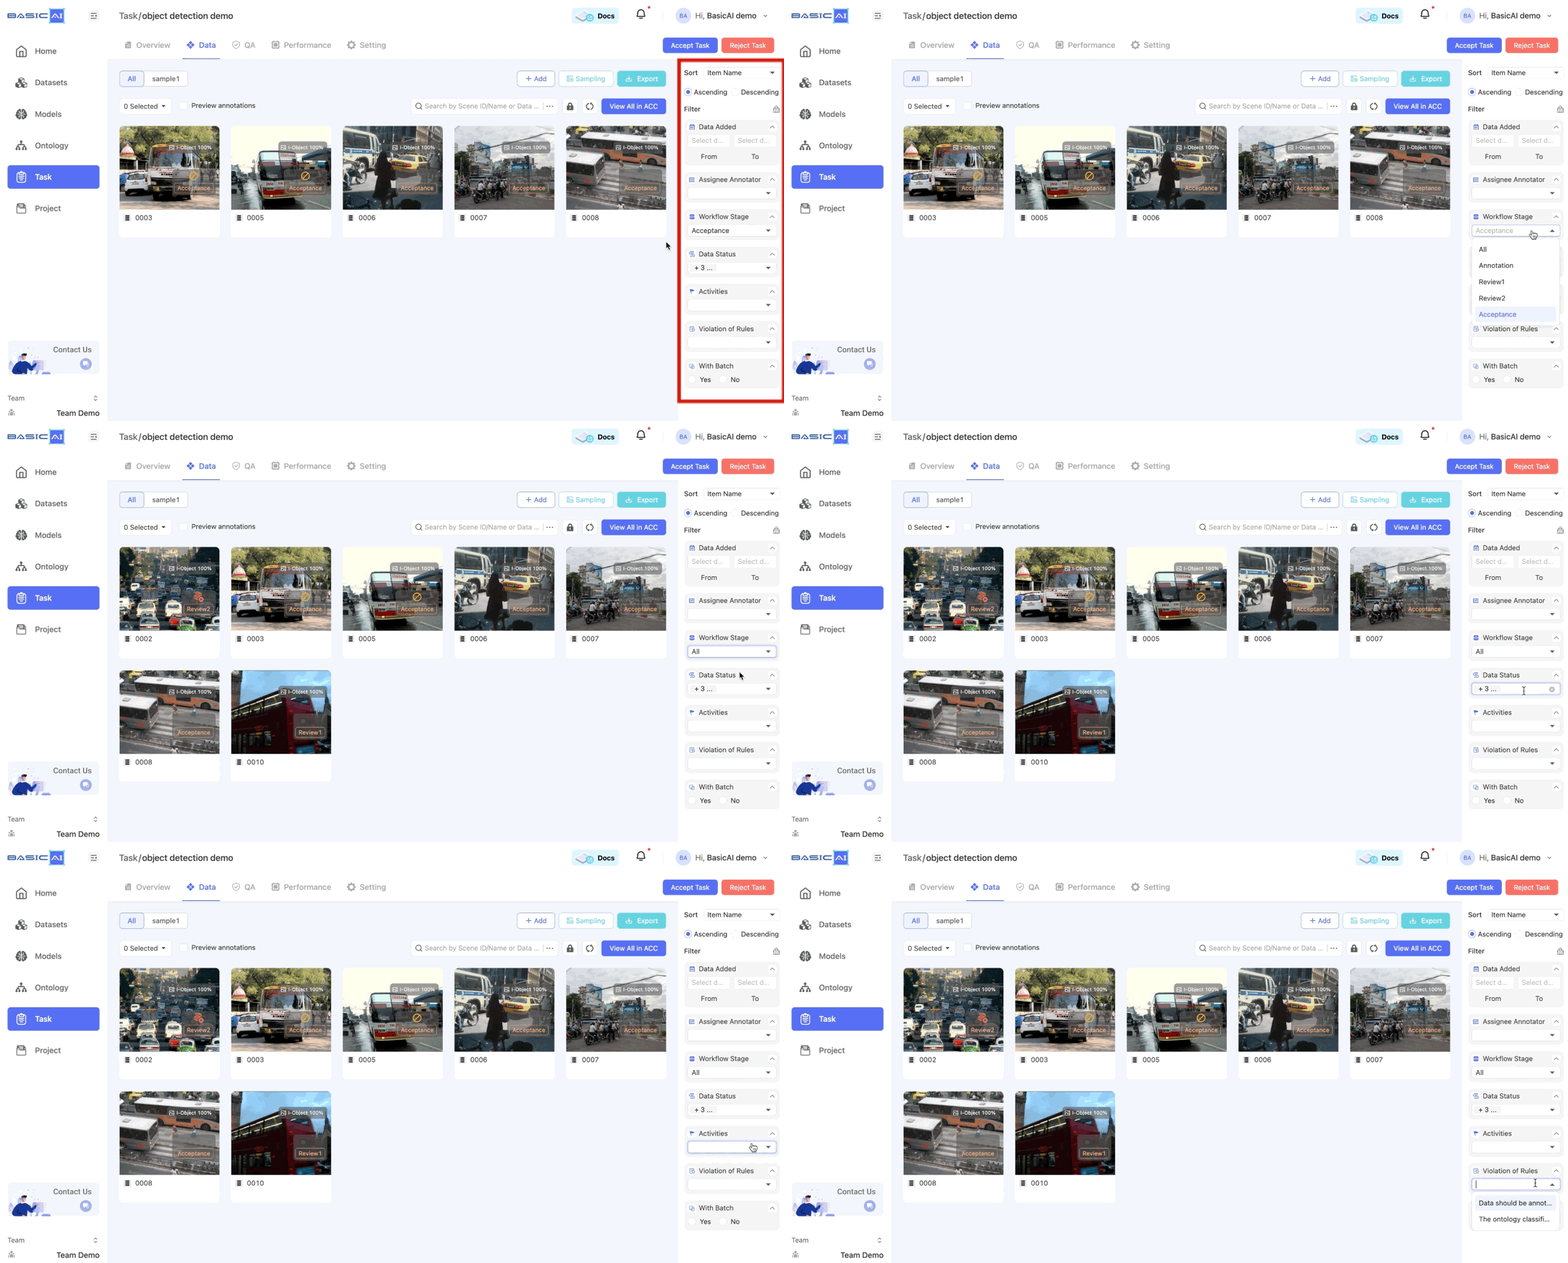
All the data in this task is available here. You can filter and organize your data by Assignee Annotator (the person who submitted the data during the annotation stage), Workflow Stage, and Activities such as comments and rejections. It also allows for monitoring the rule violations identified by quality check jobs.
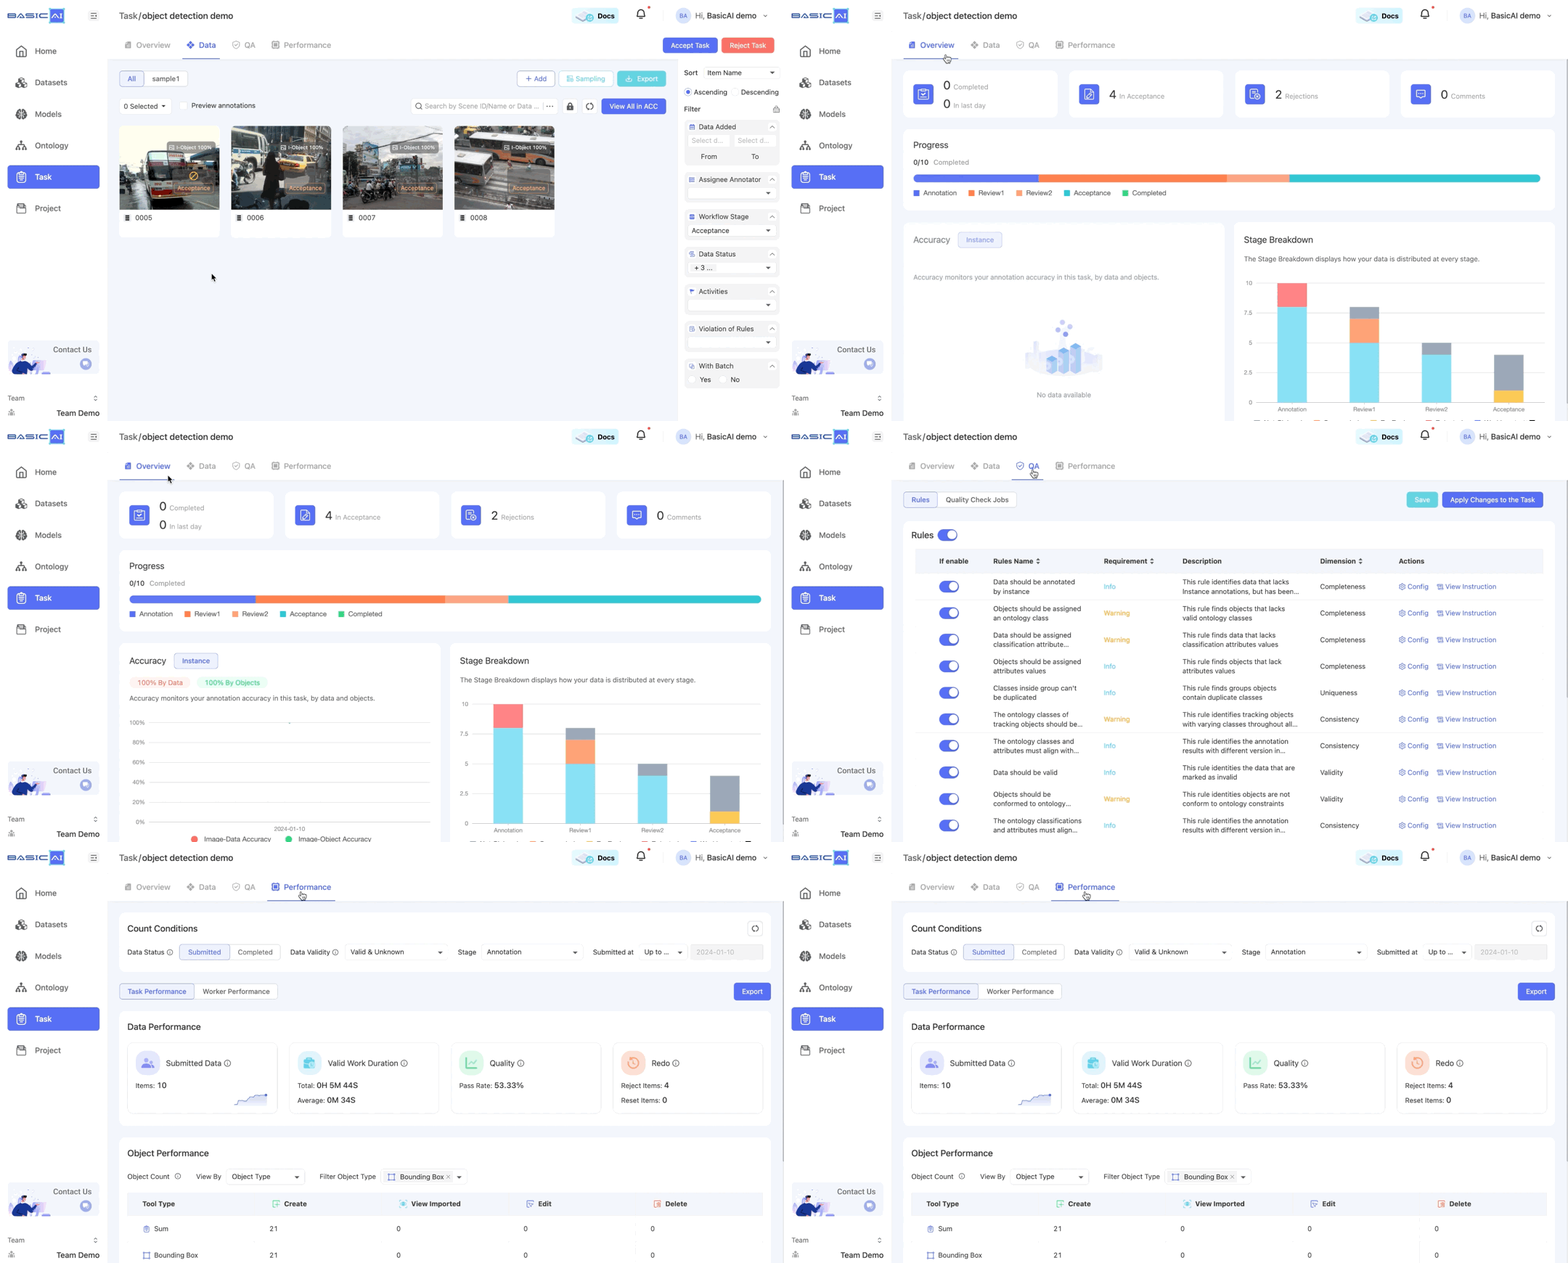
In addition to the data list, you can also access the task overview, QA rules, and performance lists.
Step 2: Start Inspecting
It is necessary to inspect data before approving or rejecting it.
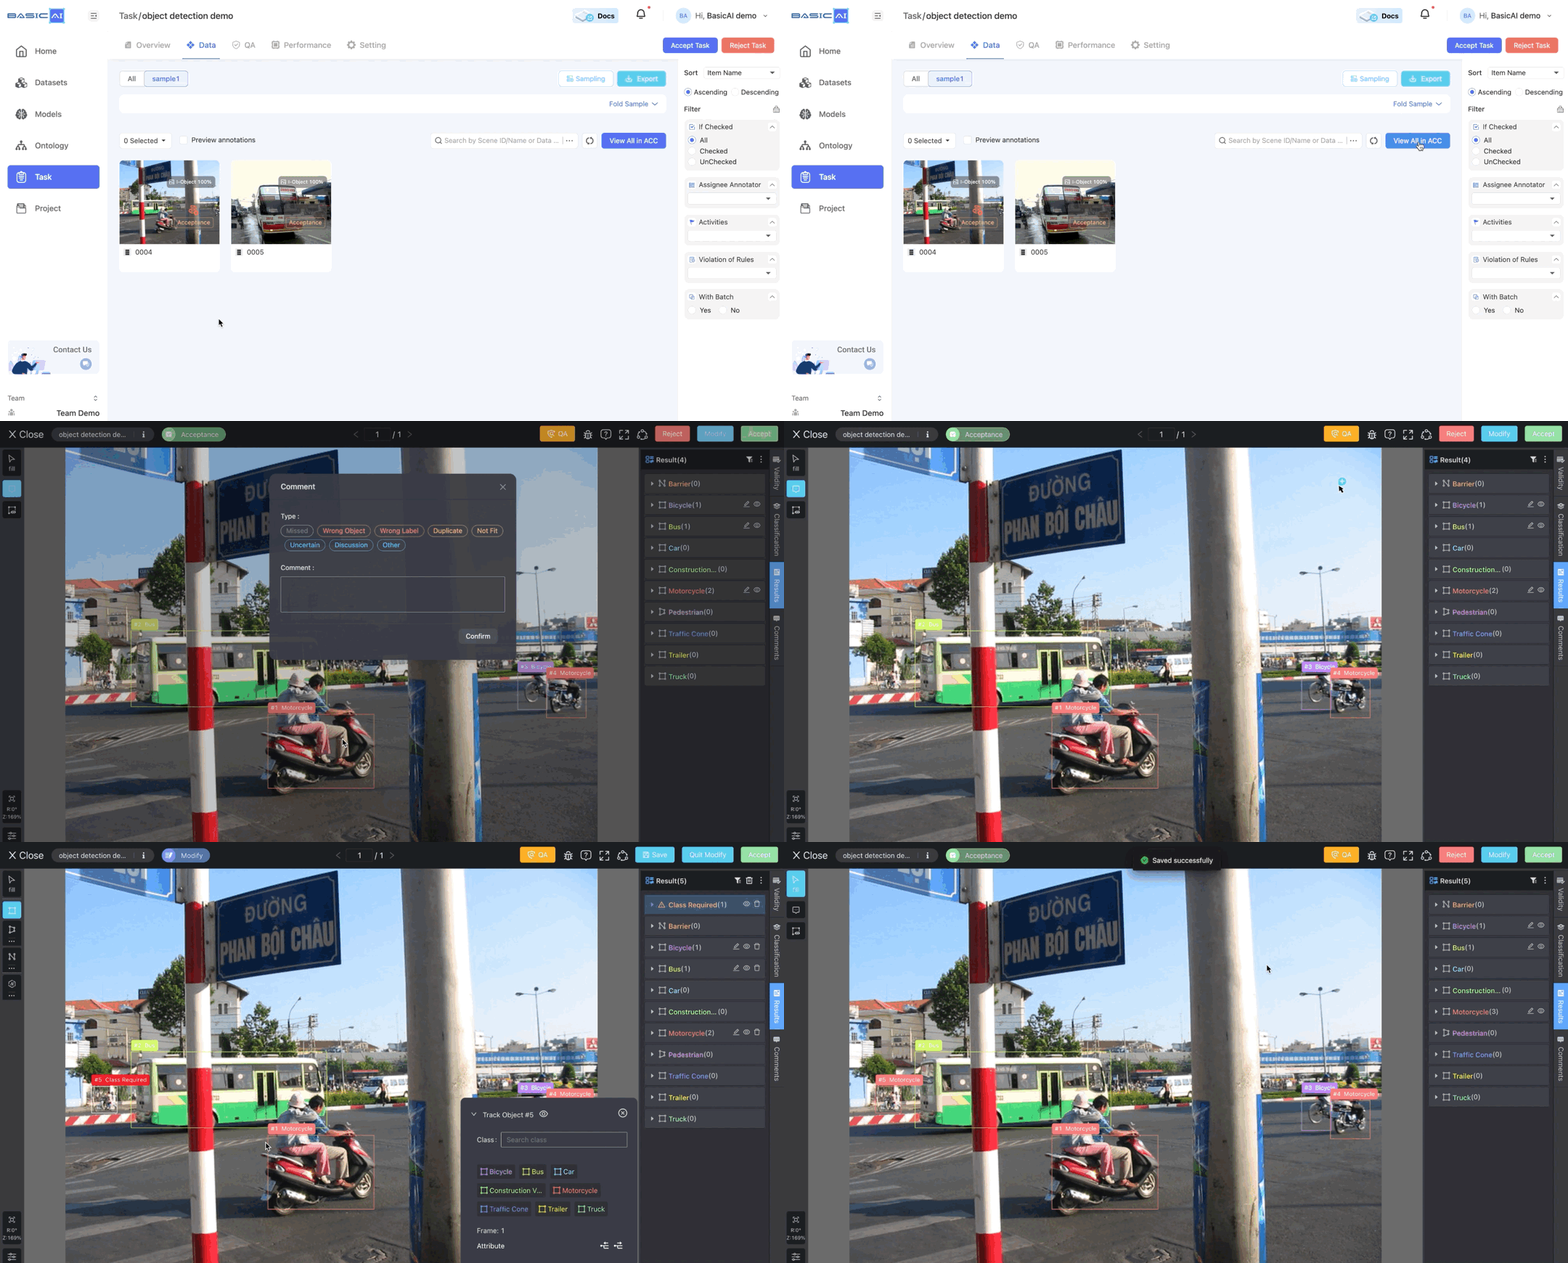
For data in the acceptance stage, click the View in ACC button on a data card or the View All in ACC button in the upper-right corner to access the tool page. You can comment or modify the data, like a reviewer.
For data not yet in the acceptance stage, you can click the View in QA button on data cards to access the tool page and leave comments.
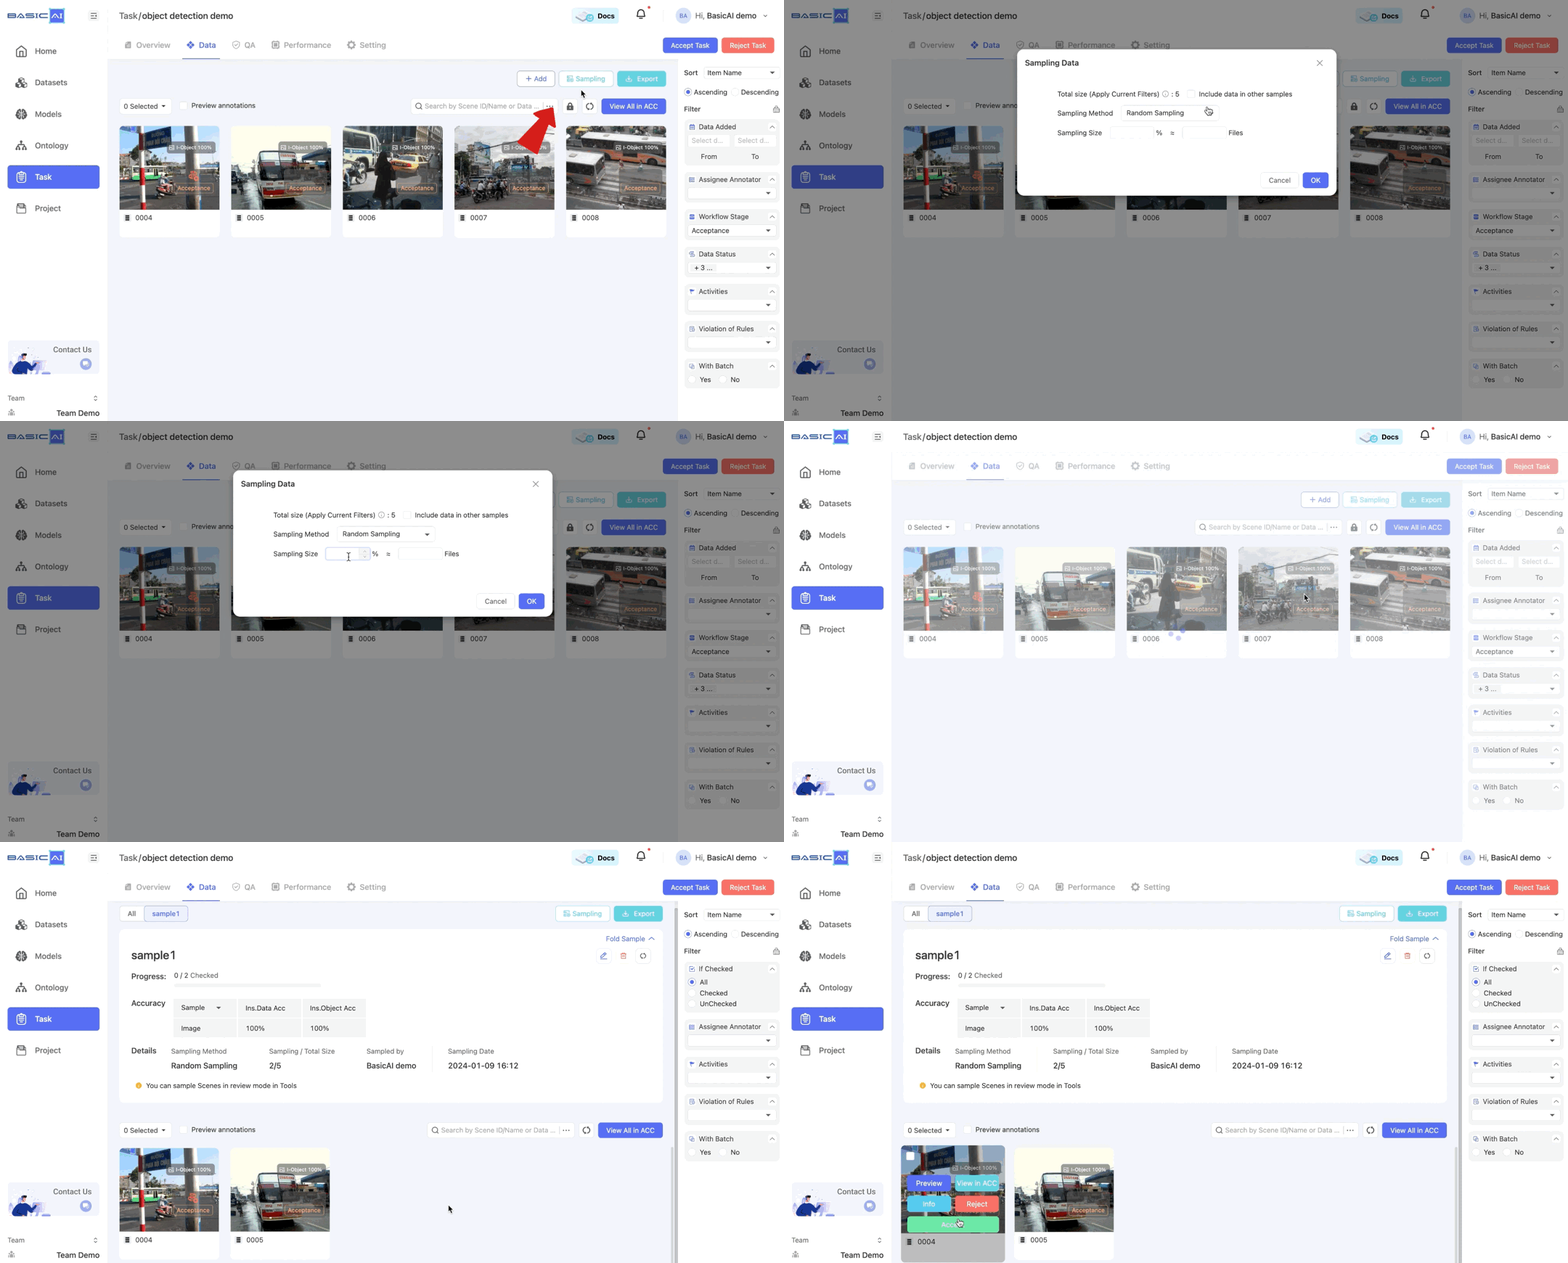
For tasks with a large amount of data, we recommend using a sampling approach for inspecting. Click the Sampling button and customize the sampling method and size according to your preferences. Next, switch to the sample category to inspect the data.
Sampling is a commonly used data inspection method, allowing you to select a part of the data based on a specific proportion for acceptance.
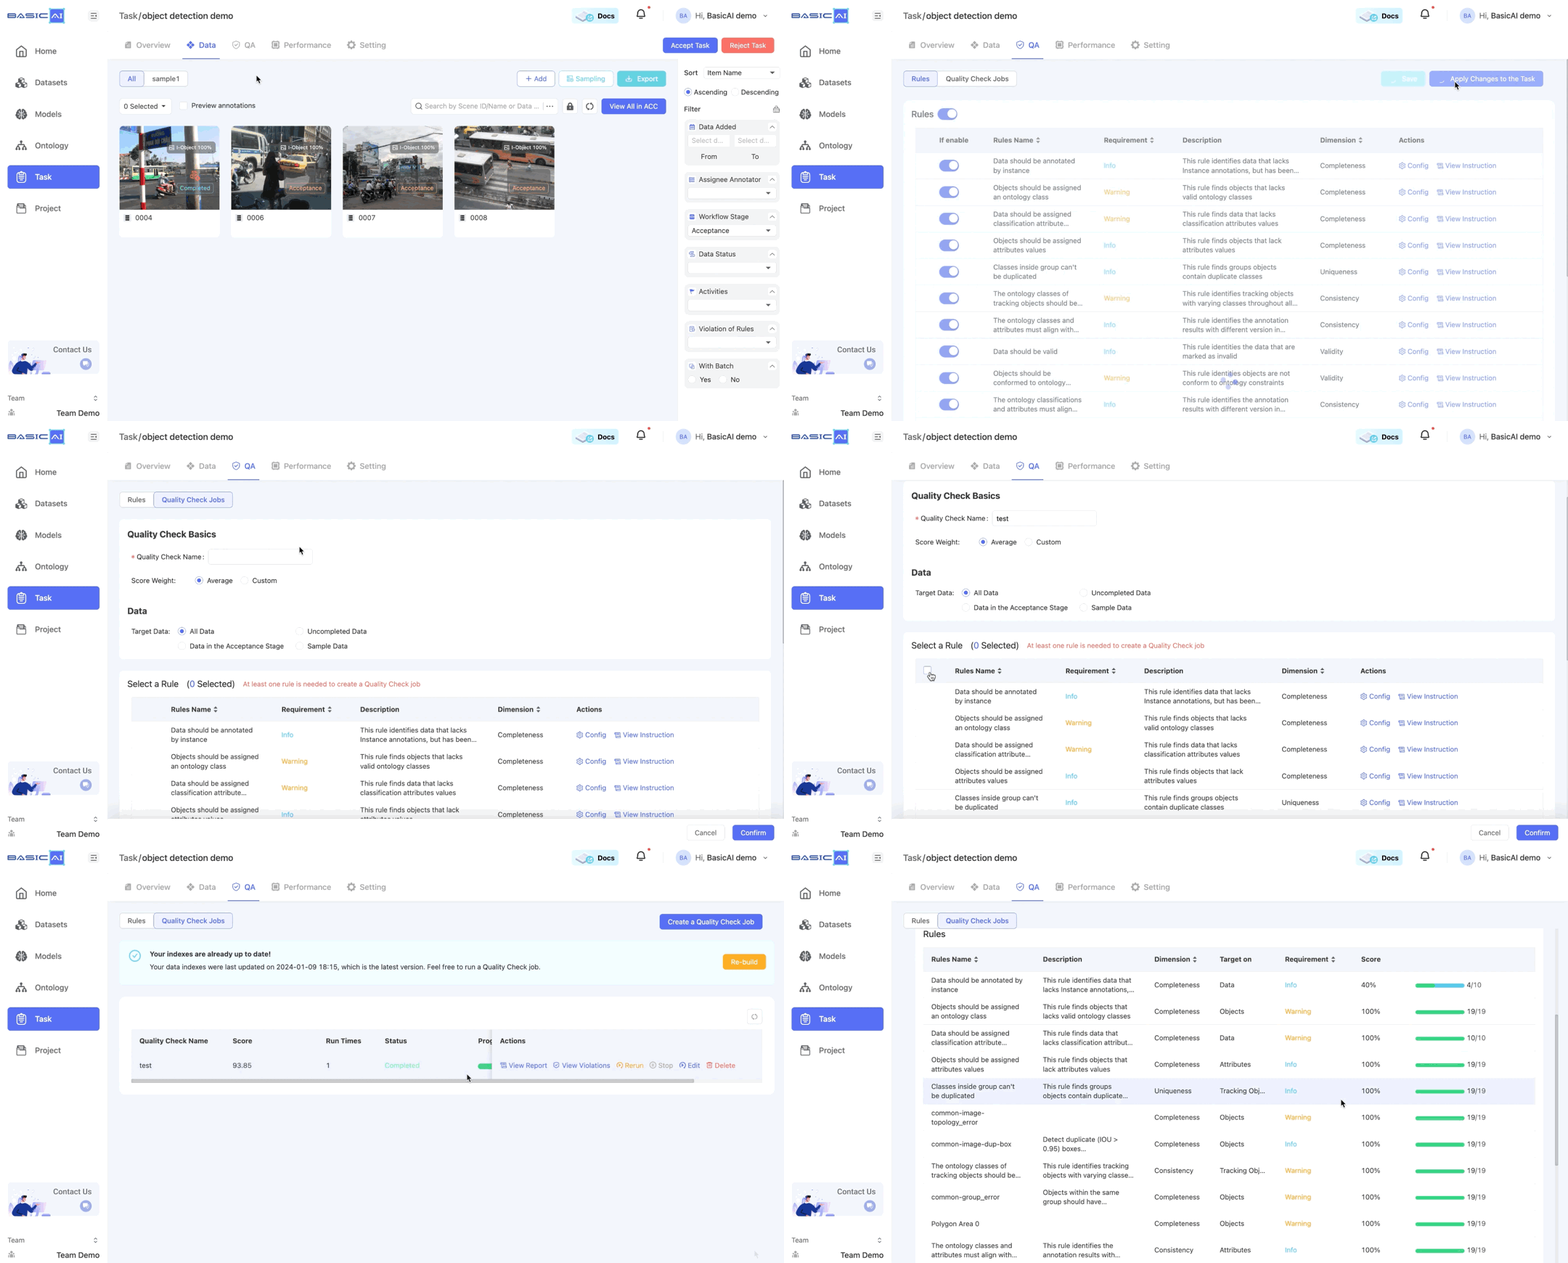
You can change the QA rules for the task and conduct batch quality checks in the QA tab. Click on the Create a Quality Check Job button, select the relevant data and rules, and view the report after running it.
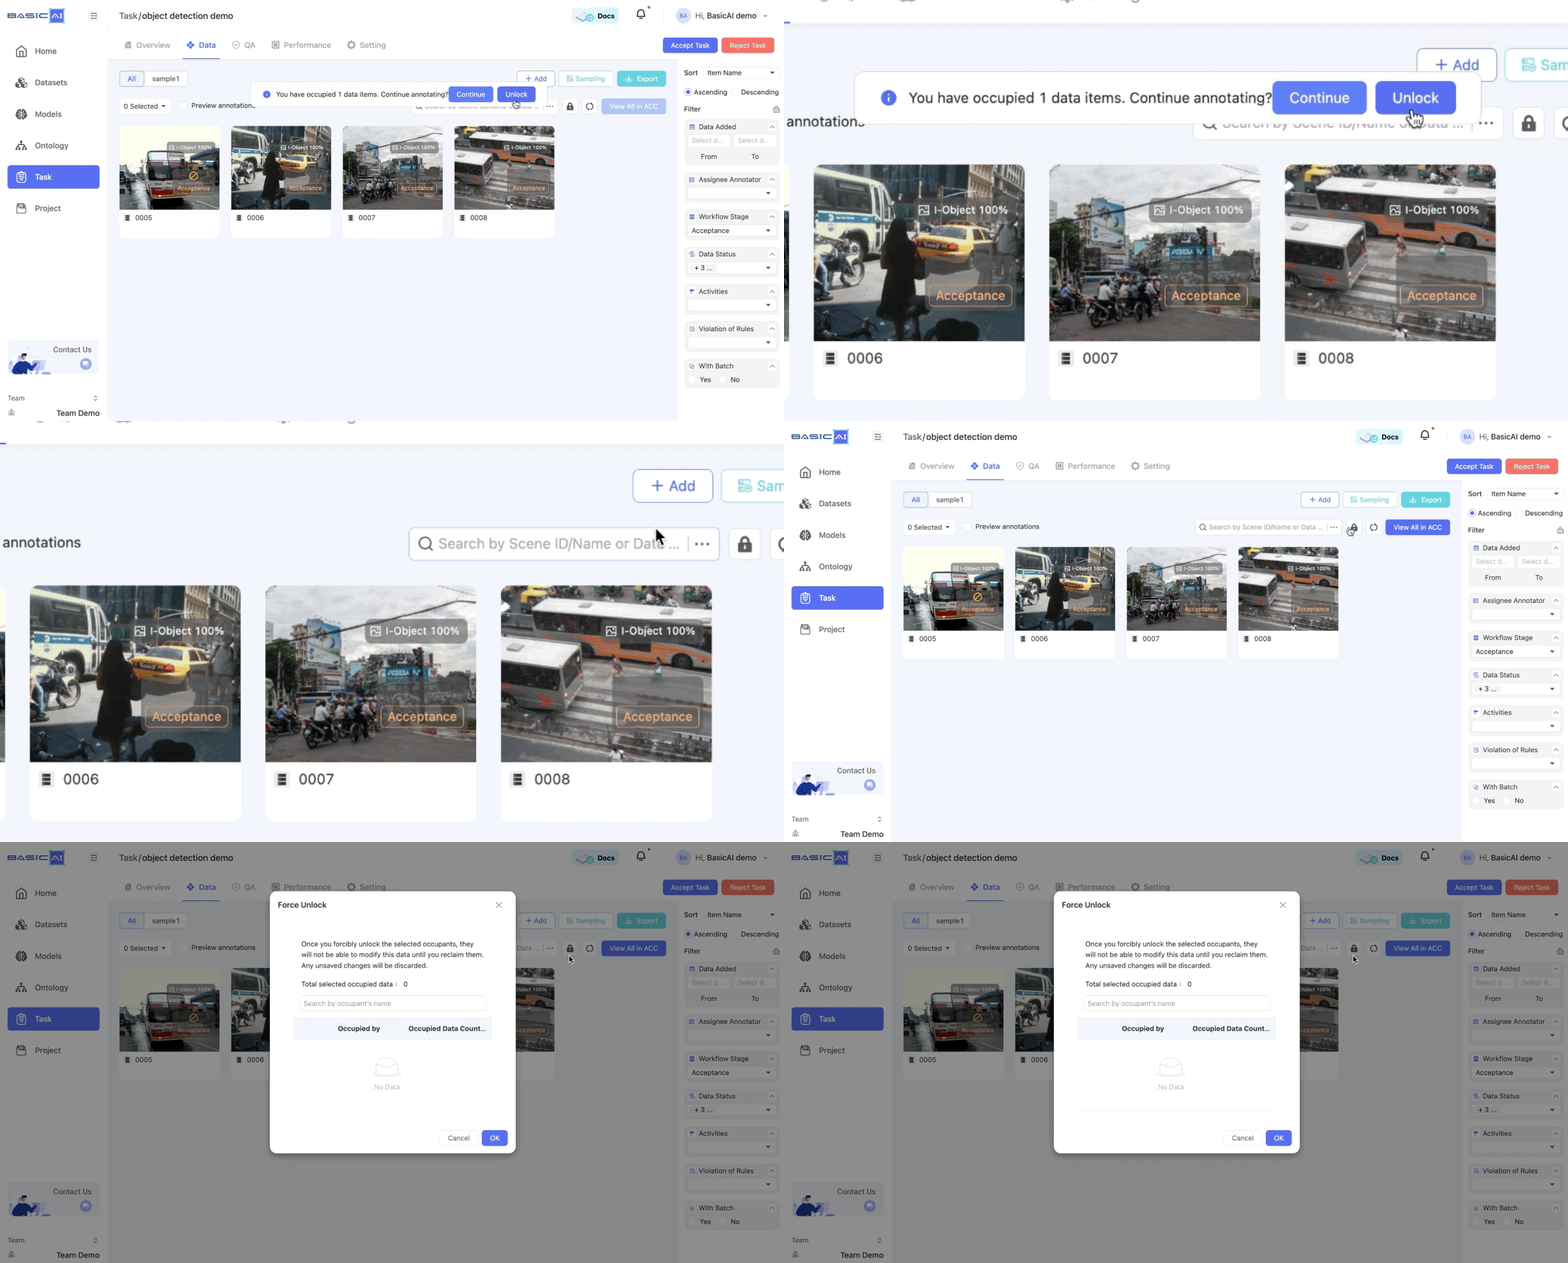
The data viewed on the tool page will be locked. You can unlock the items when switching back to the data list. Additionally, if someone else has occupied the data, you can forcibly unlock it by clicking the unlock icon.
Once unlocked, any unsaved changes will be discarded.
Step 3: Reject & Accept
After inspecting the data in the acceptance stage, you can accept or reject it.
Click the Reject button on the data card or tool page and fill in the required information. The rejected data will be returned to the specific stage and worker.
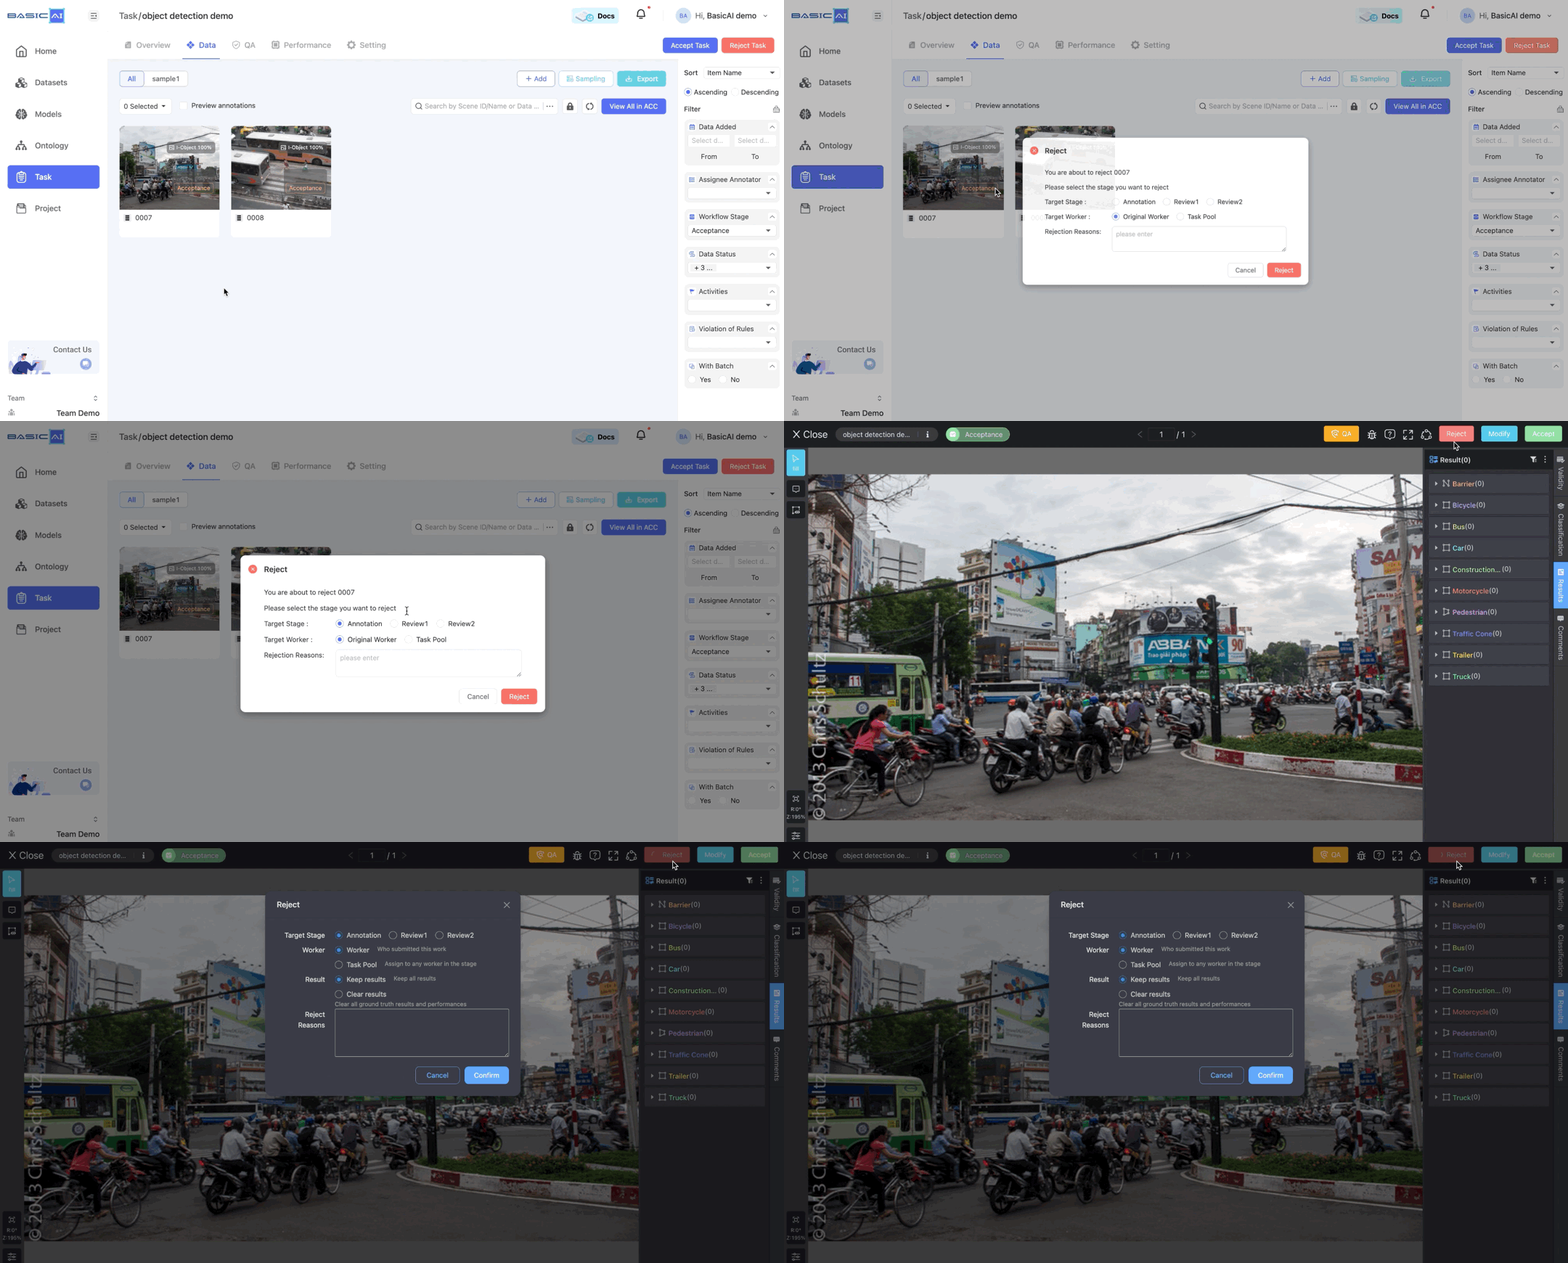
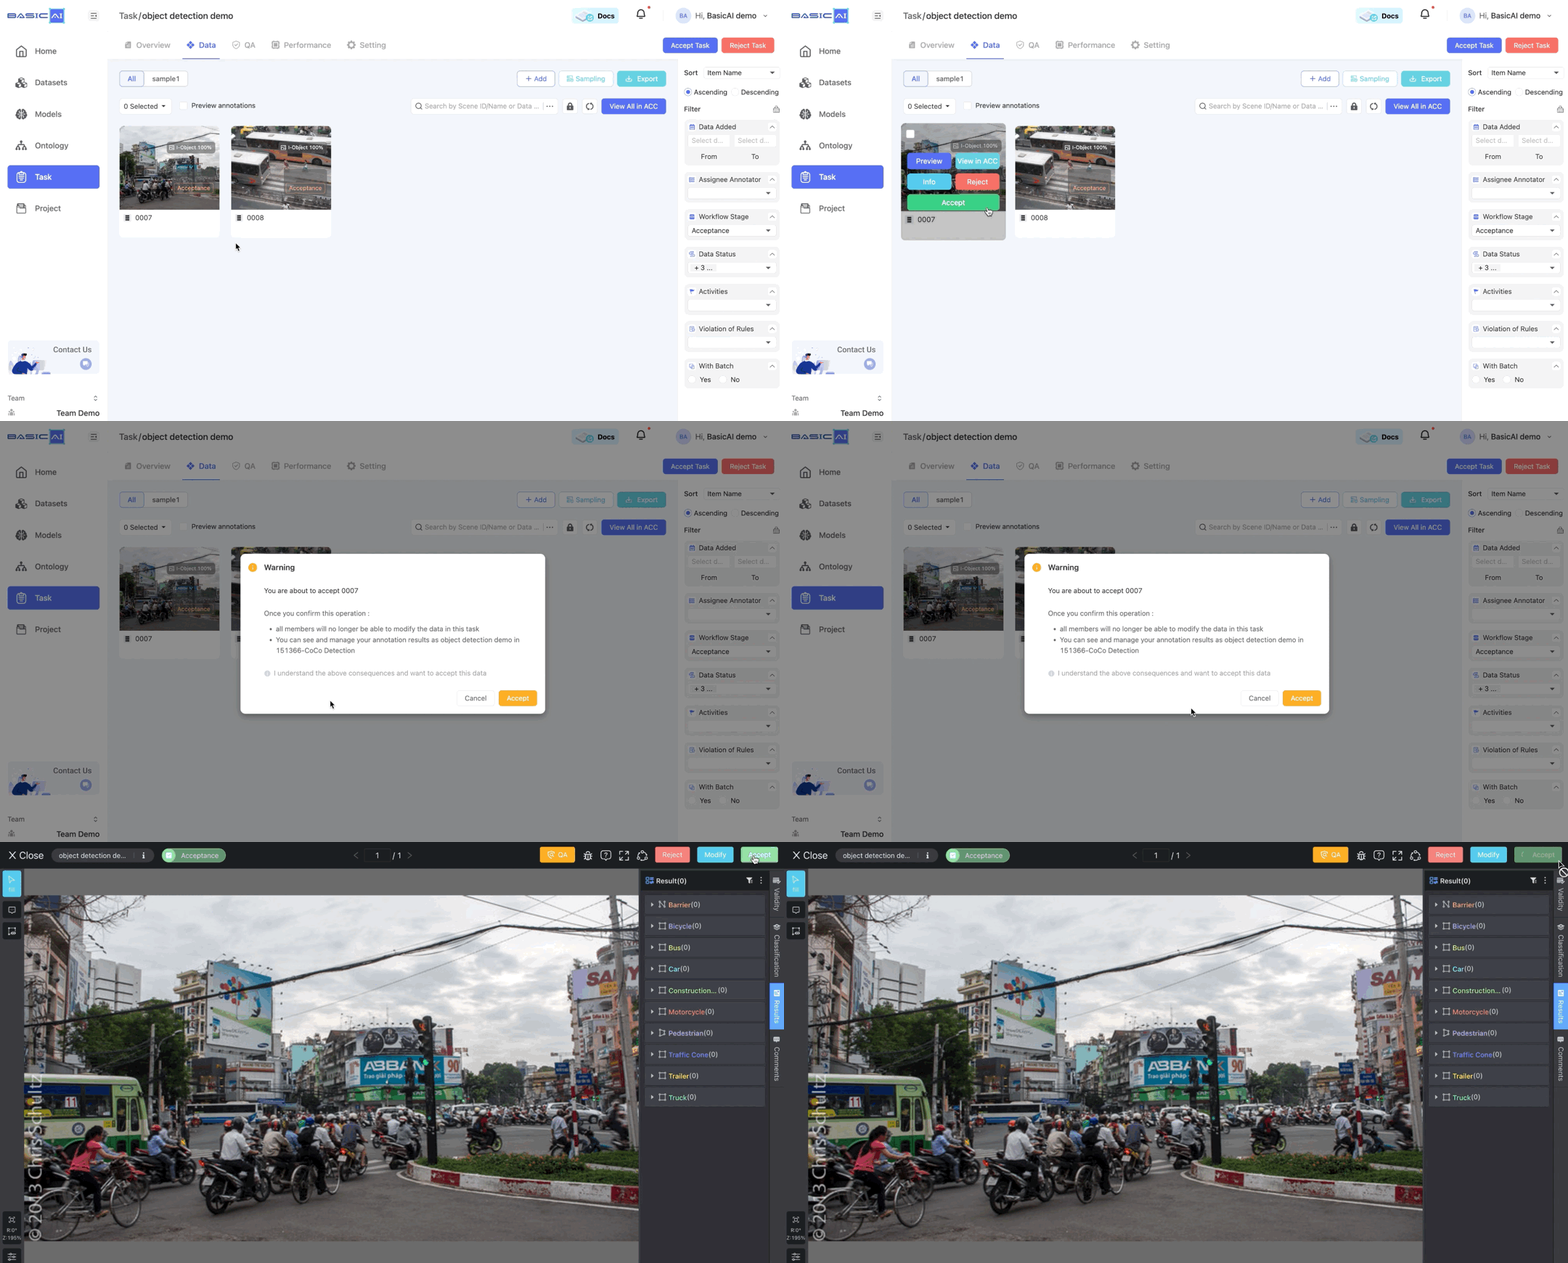
Click the Accept button on the data card or tool page to approve the data. Once accepted, the annotation results will be synchronized with the dataset.
Step 4: Revise
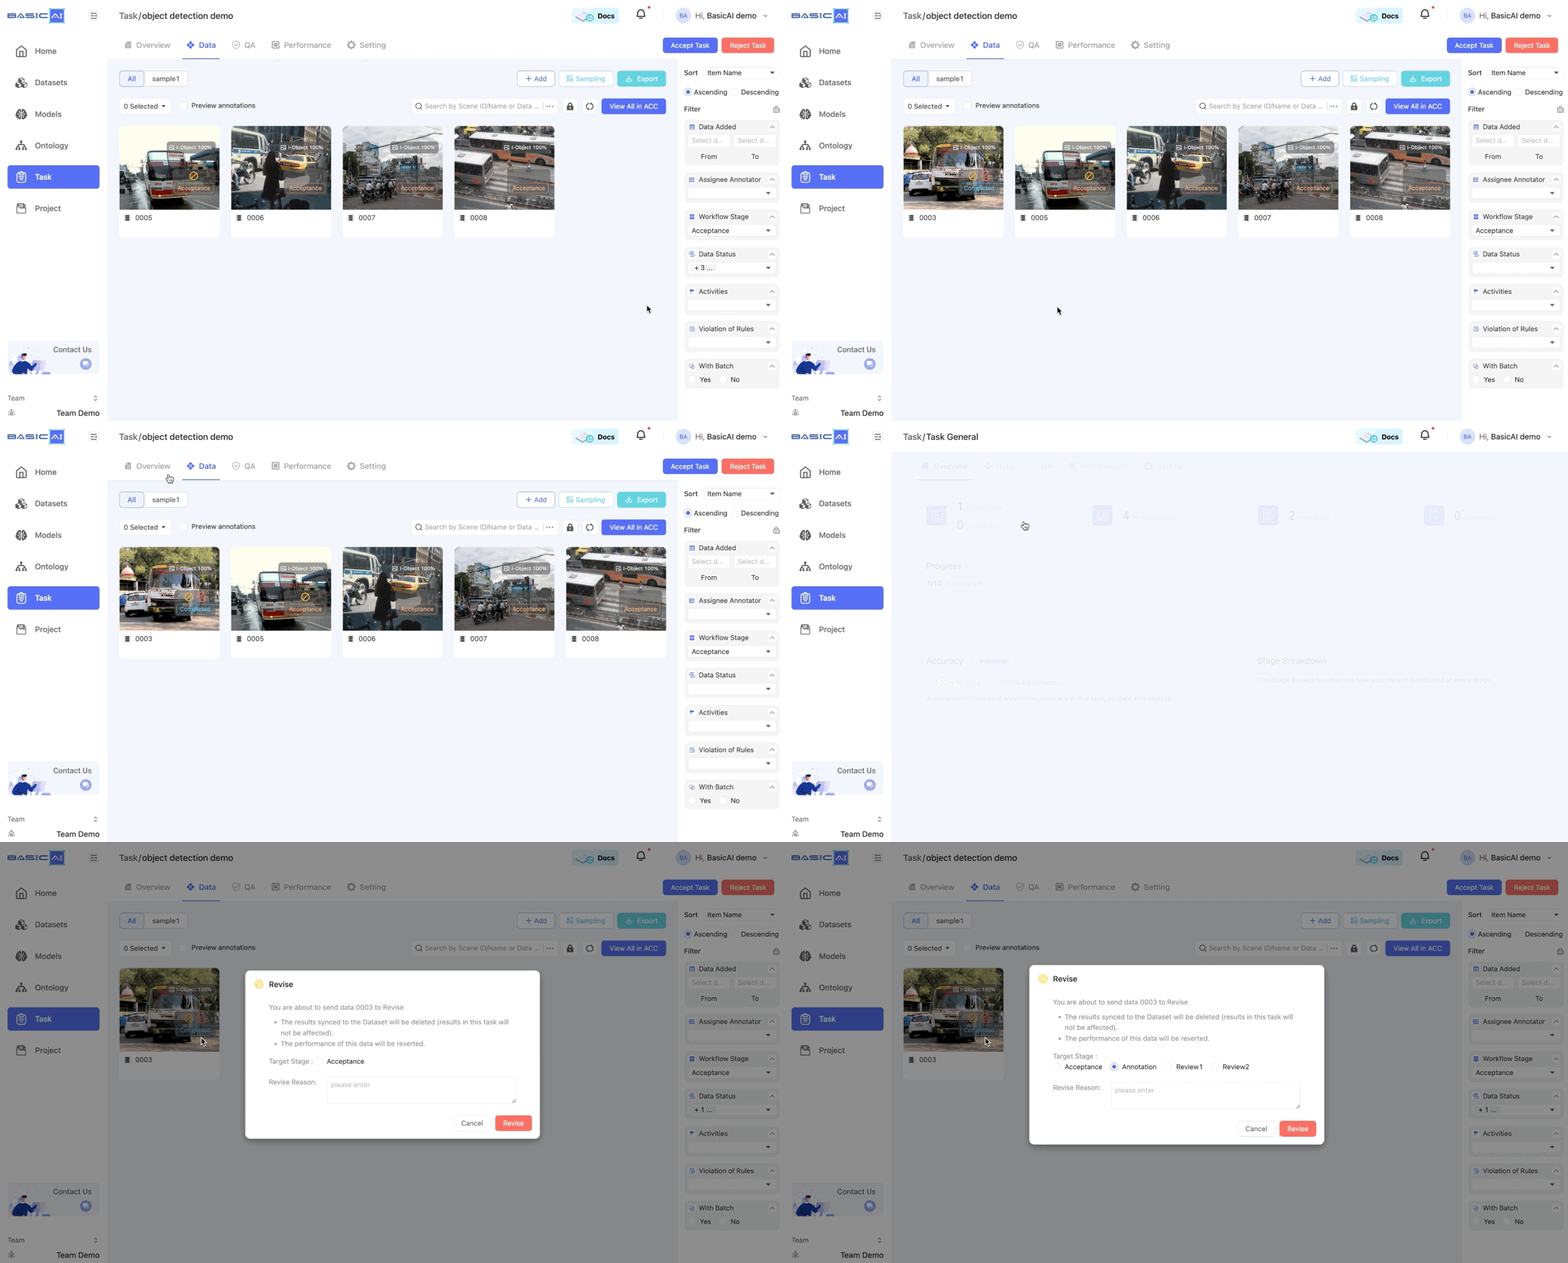
At times, approved data may require revision. Utilize filters or navigate from the overview tab to find it and click the Revise button on the card.
As you can only revise data individually, please use caution when approving data in bulk.
Step 5: Re-review
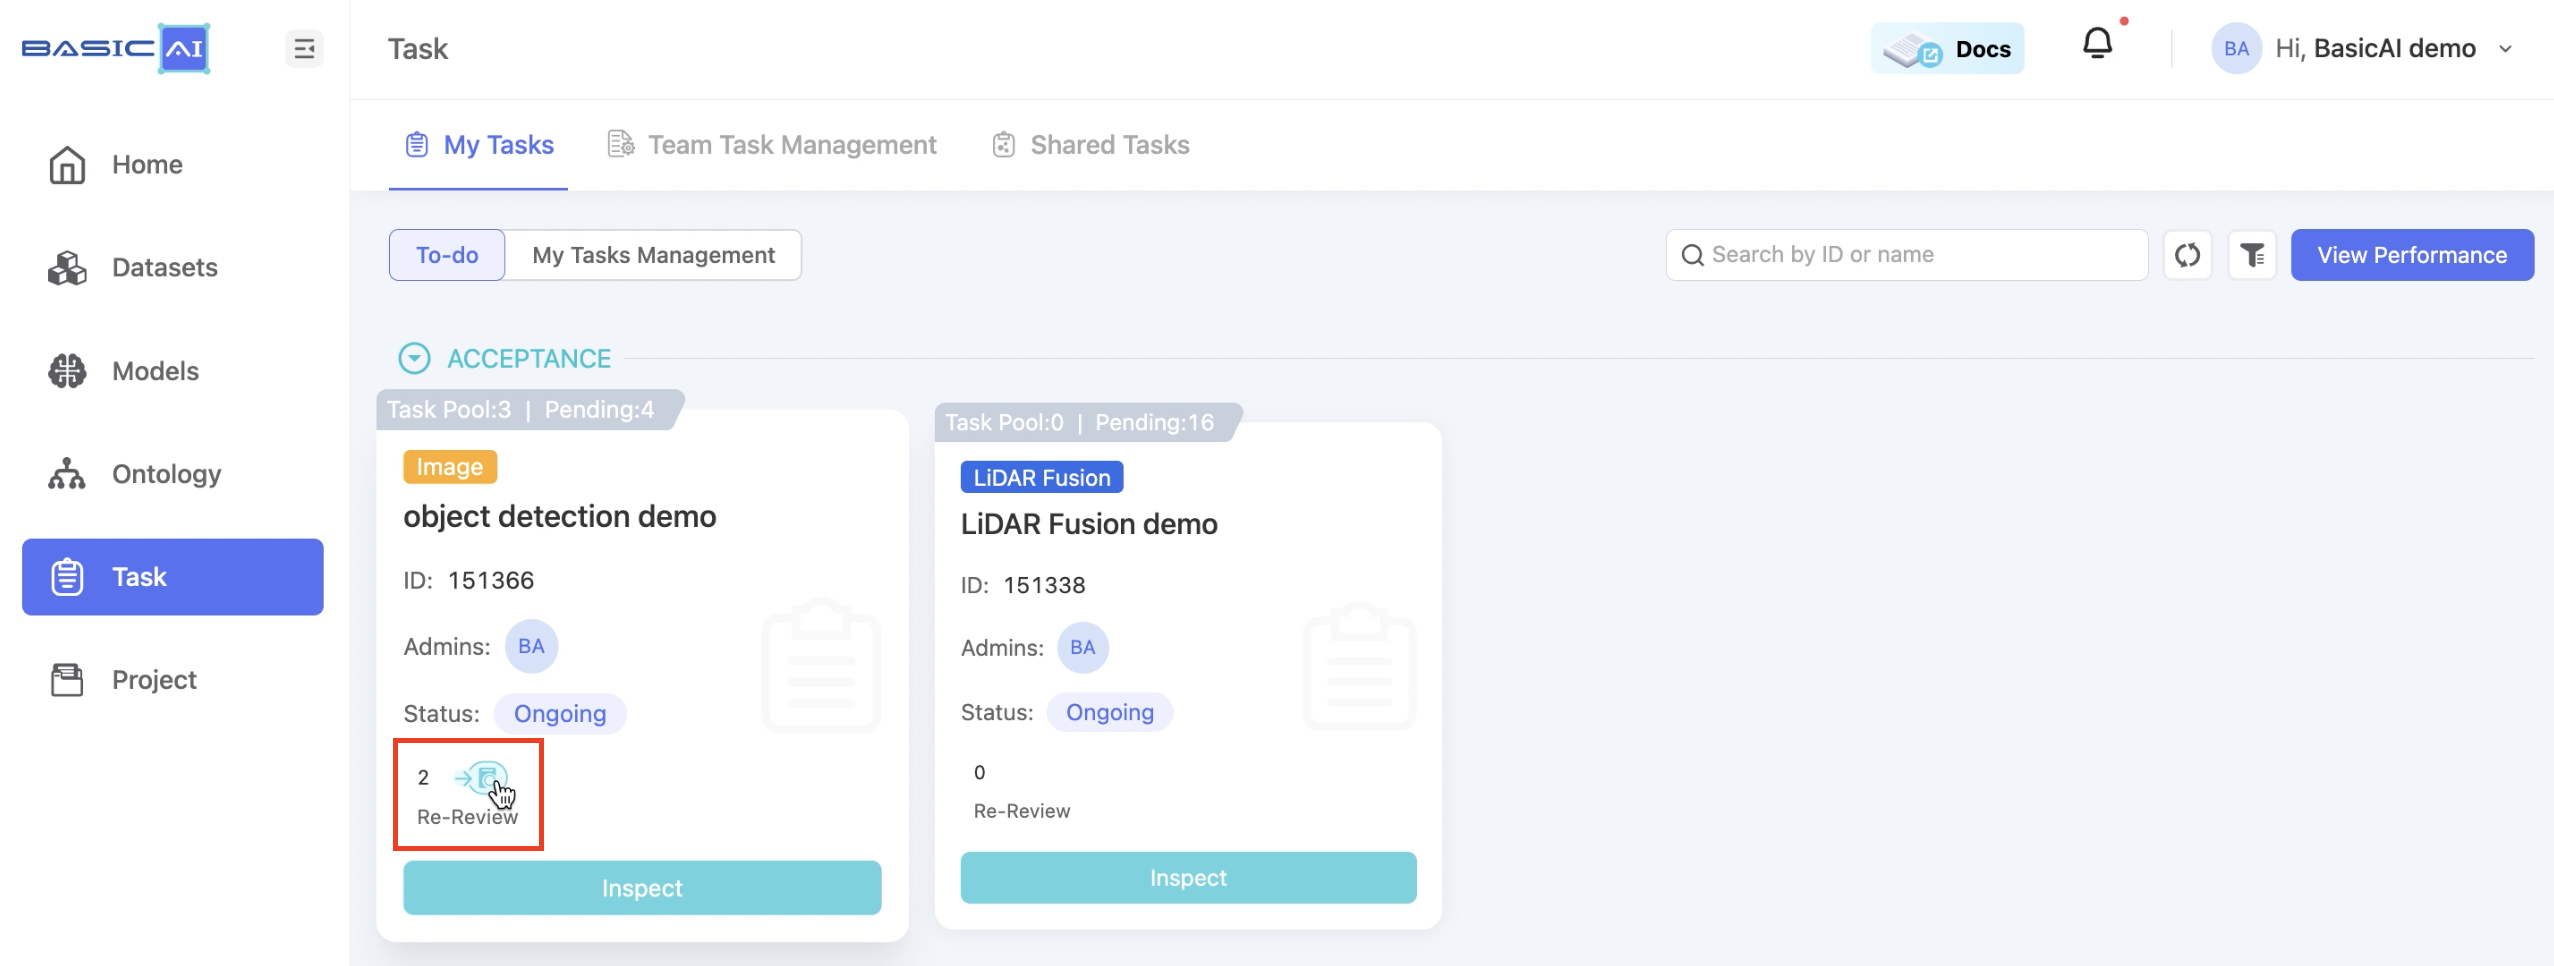
Once annotators or reviewers correct the data you have rejected or revised, the resubmitted data will be shown on the task card. Click the icon to re-review it.
View Your Performance 📊
Click the View Performance button to assess your performance by reviewing key metrics such as valid work duration, submitted data items, etc. For further details, please consult the documentation Performance.
Contact the Task Admins 📧
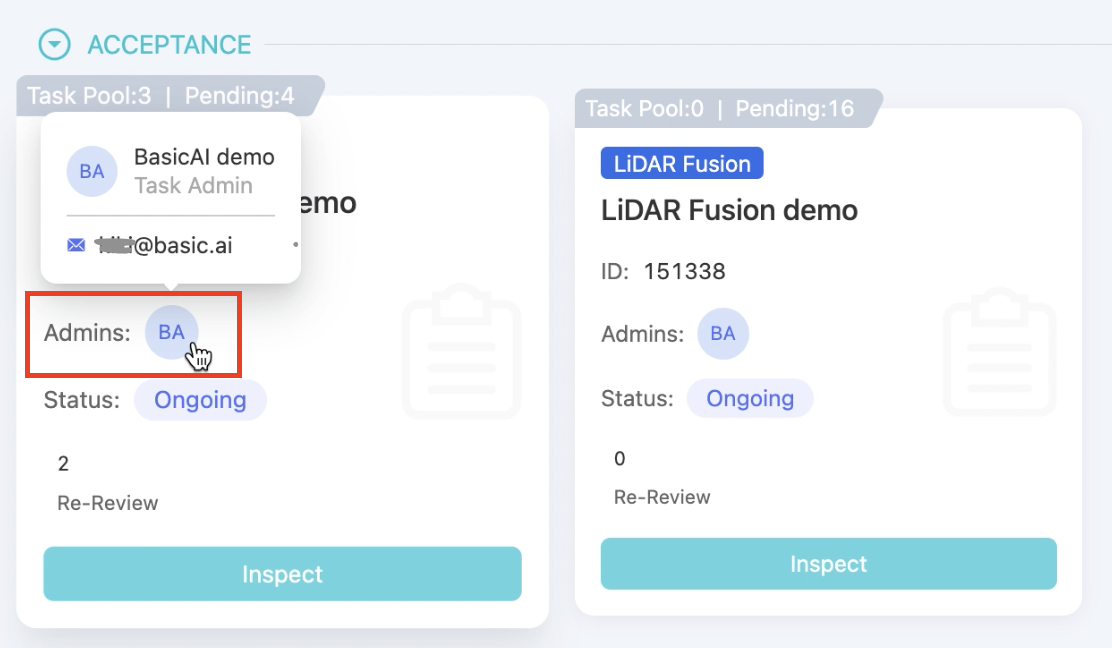
If you experience any problems, you can reach out to the task admins for help. Click on the avatars on the task card to get their contact information.
Updated 9 months ago
