Customized ZIP Architecture
👷♂️ Parsing ZIP by customized folder architecture.
In BasicAI, duplicate batches, scenes, and data names are NOT allowed. However, it is possible to encounter duplicate files across different folders within your ZIP files.
Encountering a duplicate data error?You can utilize the customized ZIP architecture feature to organize and map duplicate files to BasicAI Batch, Scene, and Data.
Follow these steps to parse the ZIP and rename specific batches/scenes/data without any conflicts:
Step 1: Upload Config
Click the + Upload button in the data list and choose any upload method. Be sure to switch on the Config tab.
Select to parse ZIP by Folder Architecture - Customized. You could configure it through the Pending Zips after uploading.
Additional configuration options, such as frame extraction (for video files) and annotation uploads, should be set according to your needs.
Frame extraction is only available for video files. Enabling this option for incompatible data will result in the ZIP upload failing.
Step 2: Pending Zips
After successfully uploading the compressed file, you will see a Pending Zips button. Click on it to configure the ZIP.
Select the ZIP
Click on the Pending Zips dropdown menu to choose the data you wish to parse. All unprocessed ZIPs will be listed here.
You can delete a ZIP except for the one currently being processed.

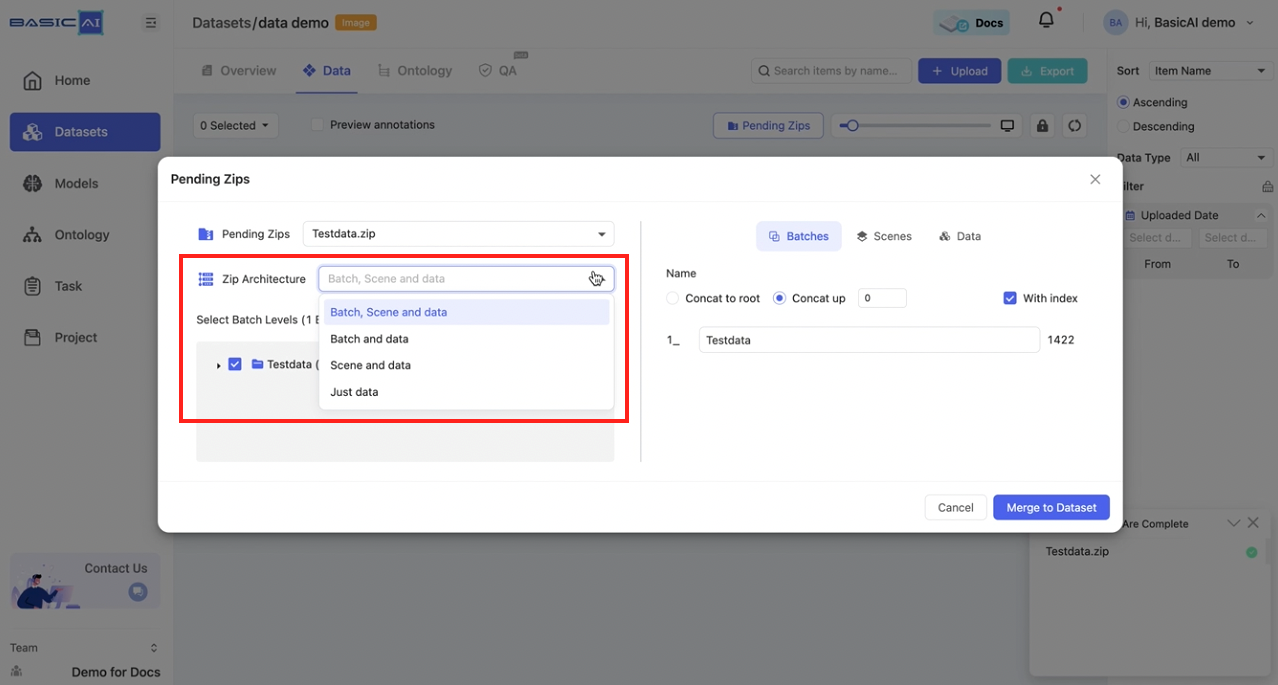
Decide Your ZIP Architecture
Select the structure you wish to parse from the Zip Architecture dropdown menu. For detailed explanations of batch, scene, and data, please refer to Term Dictionary.
Your option will impact how you configure your ZIPs.
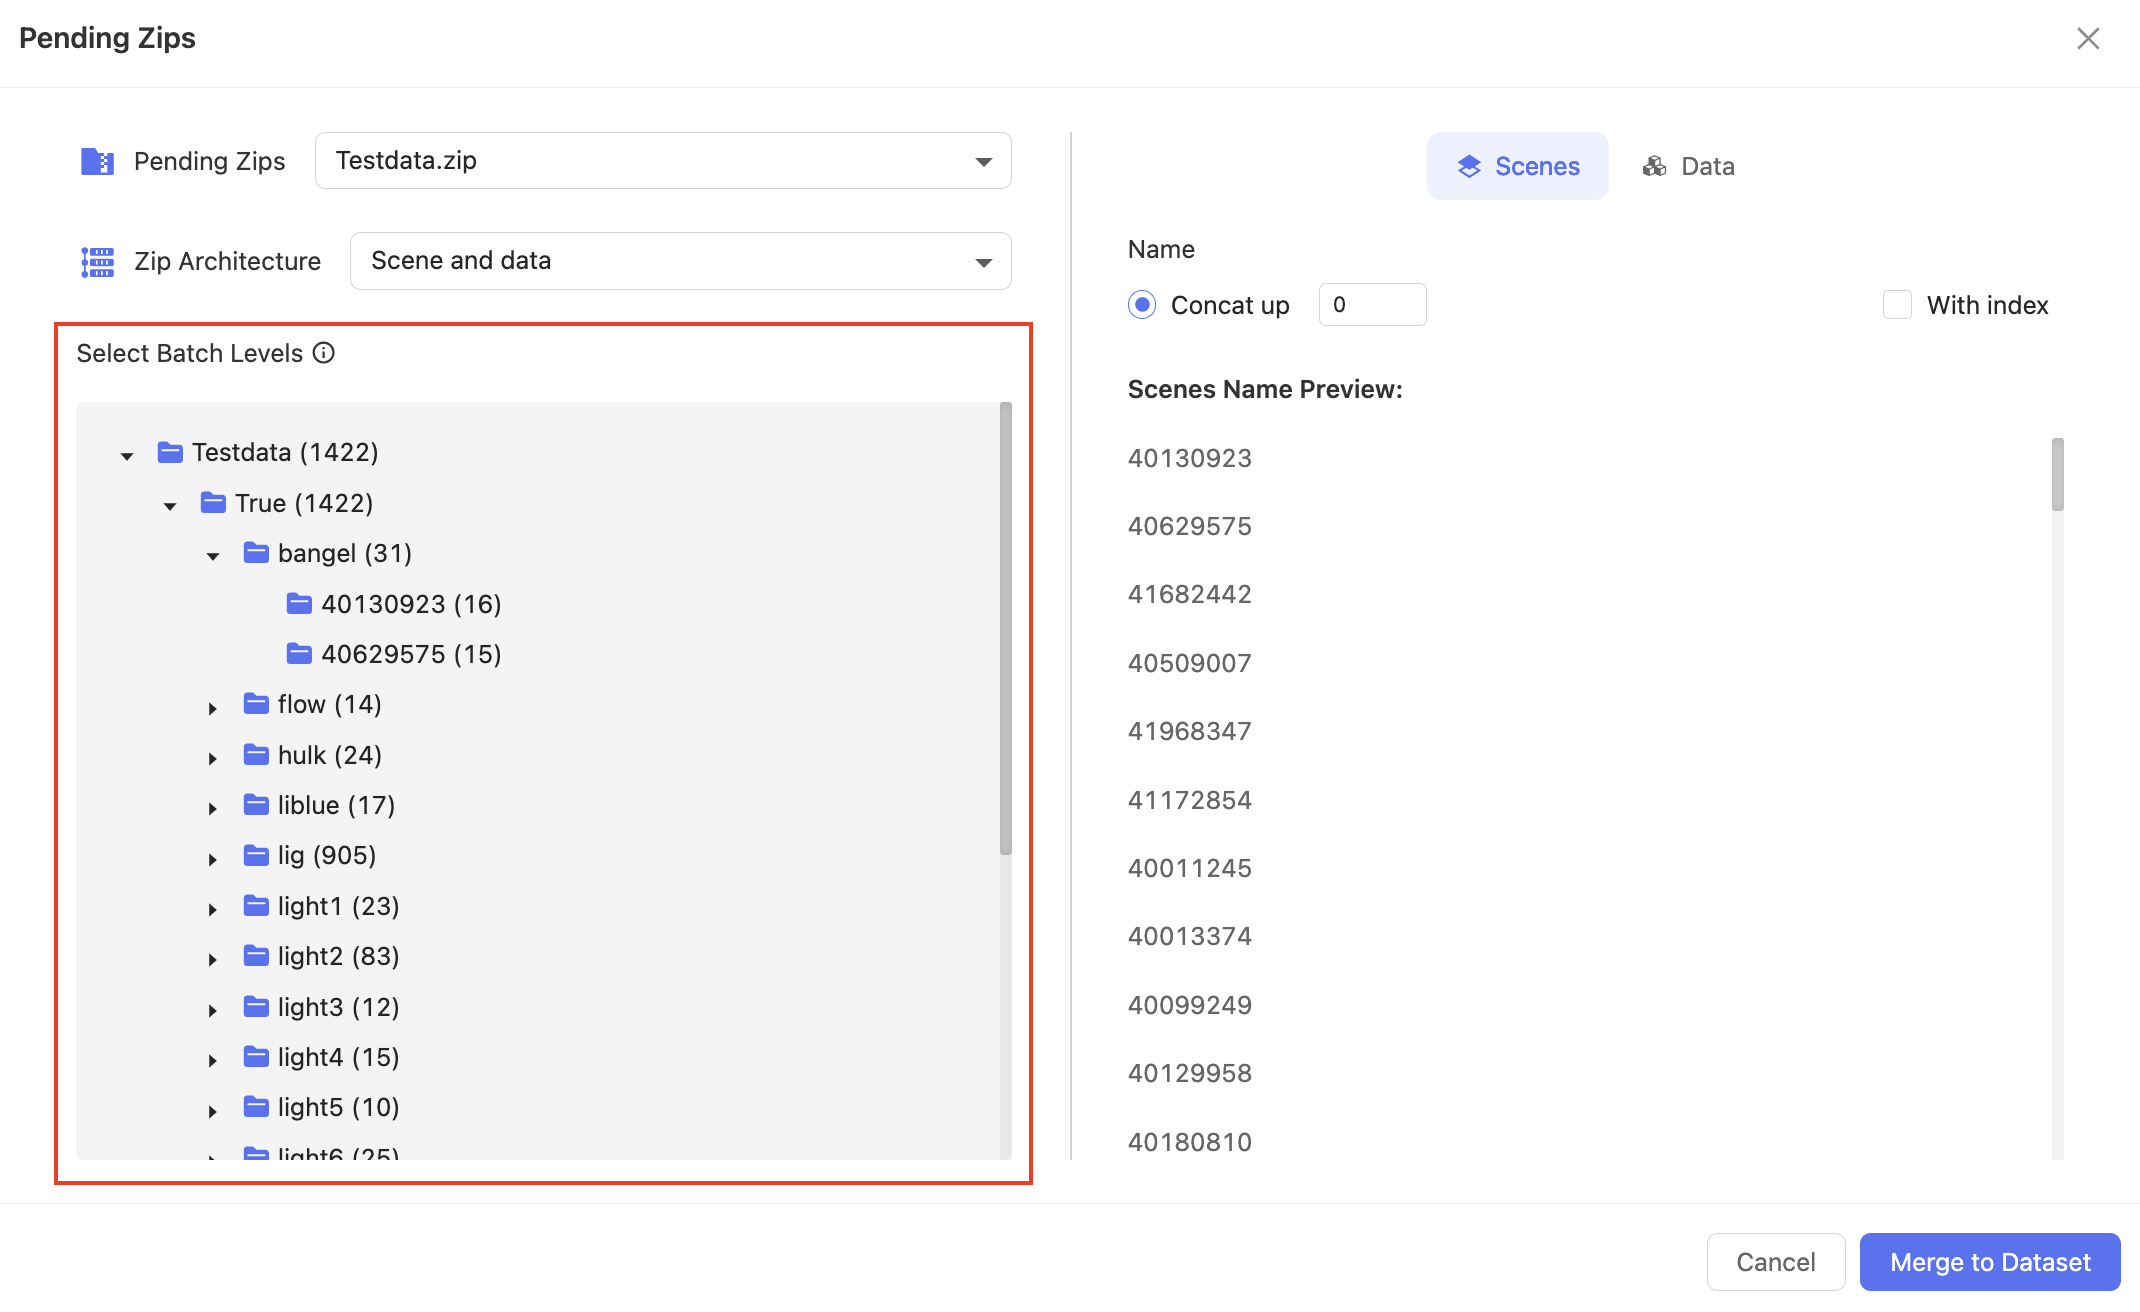
Select Batch Levels
The structure of the ZIP will be displayed in this section, showing folders and the number of data items they contain (excluding specific data).
For instance, the image's "Testdata(1422)" denotes a folder called Testdata containing 1422 data items.
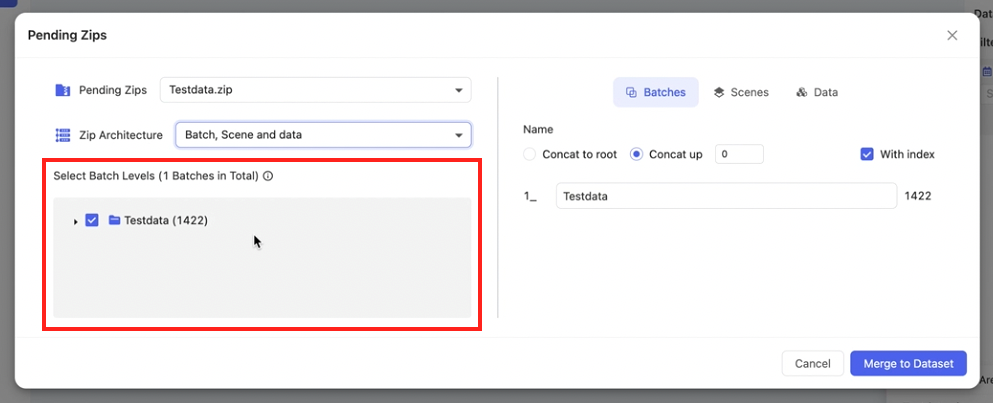
The structure and operations displayed here will vary based on the selected Zip Architecture option above. Let's categorize and explain them accordingly. Click to expand!
📖 Batch, Scene and data
In this case, the top-level folder is selected by default.
Click to deselect the folder, and the next level will be expanded automatically, with all folders at that level being selected.
Since there is a layer of Scene (the last folder) above Data, the selection is only supported from the second-to-last level upwards. Otherwise, an error message will be displayed.
📖 Batch and data
In this case, as there is no Scene, the Data is directly contained within the last Batch level (the last folder), so it allows for selecting all levels, meaning only the bottommost level does not allow deselection.
Other operations resemble the Batch, Scene, and Data scenario.
📖 Scene and data
In this case, you won't be able to select the Batch folders. Instead, you can click on the folder icon to view the next level of folders until you reach the Scene level.
📖 Just data
Like the Scene and data scenario, you can click on the folder to view the next level until you reach the last folder.
Name Batches, Scenes and Data
In the configuration section on the right, you can view and edit the names of batches, scenes, and data within the compressed file.
The tabs for Batches, Scenes, and Data will change based on the selected option in theZip Architectureon the left.
Batches are initially named corresponding to the folder structure in the ZIP. You can directly enter characters to rename them.
By choosing Concat to root, batch names will automatically be based on the path concatenated to the root (top-level folder).
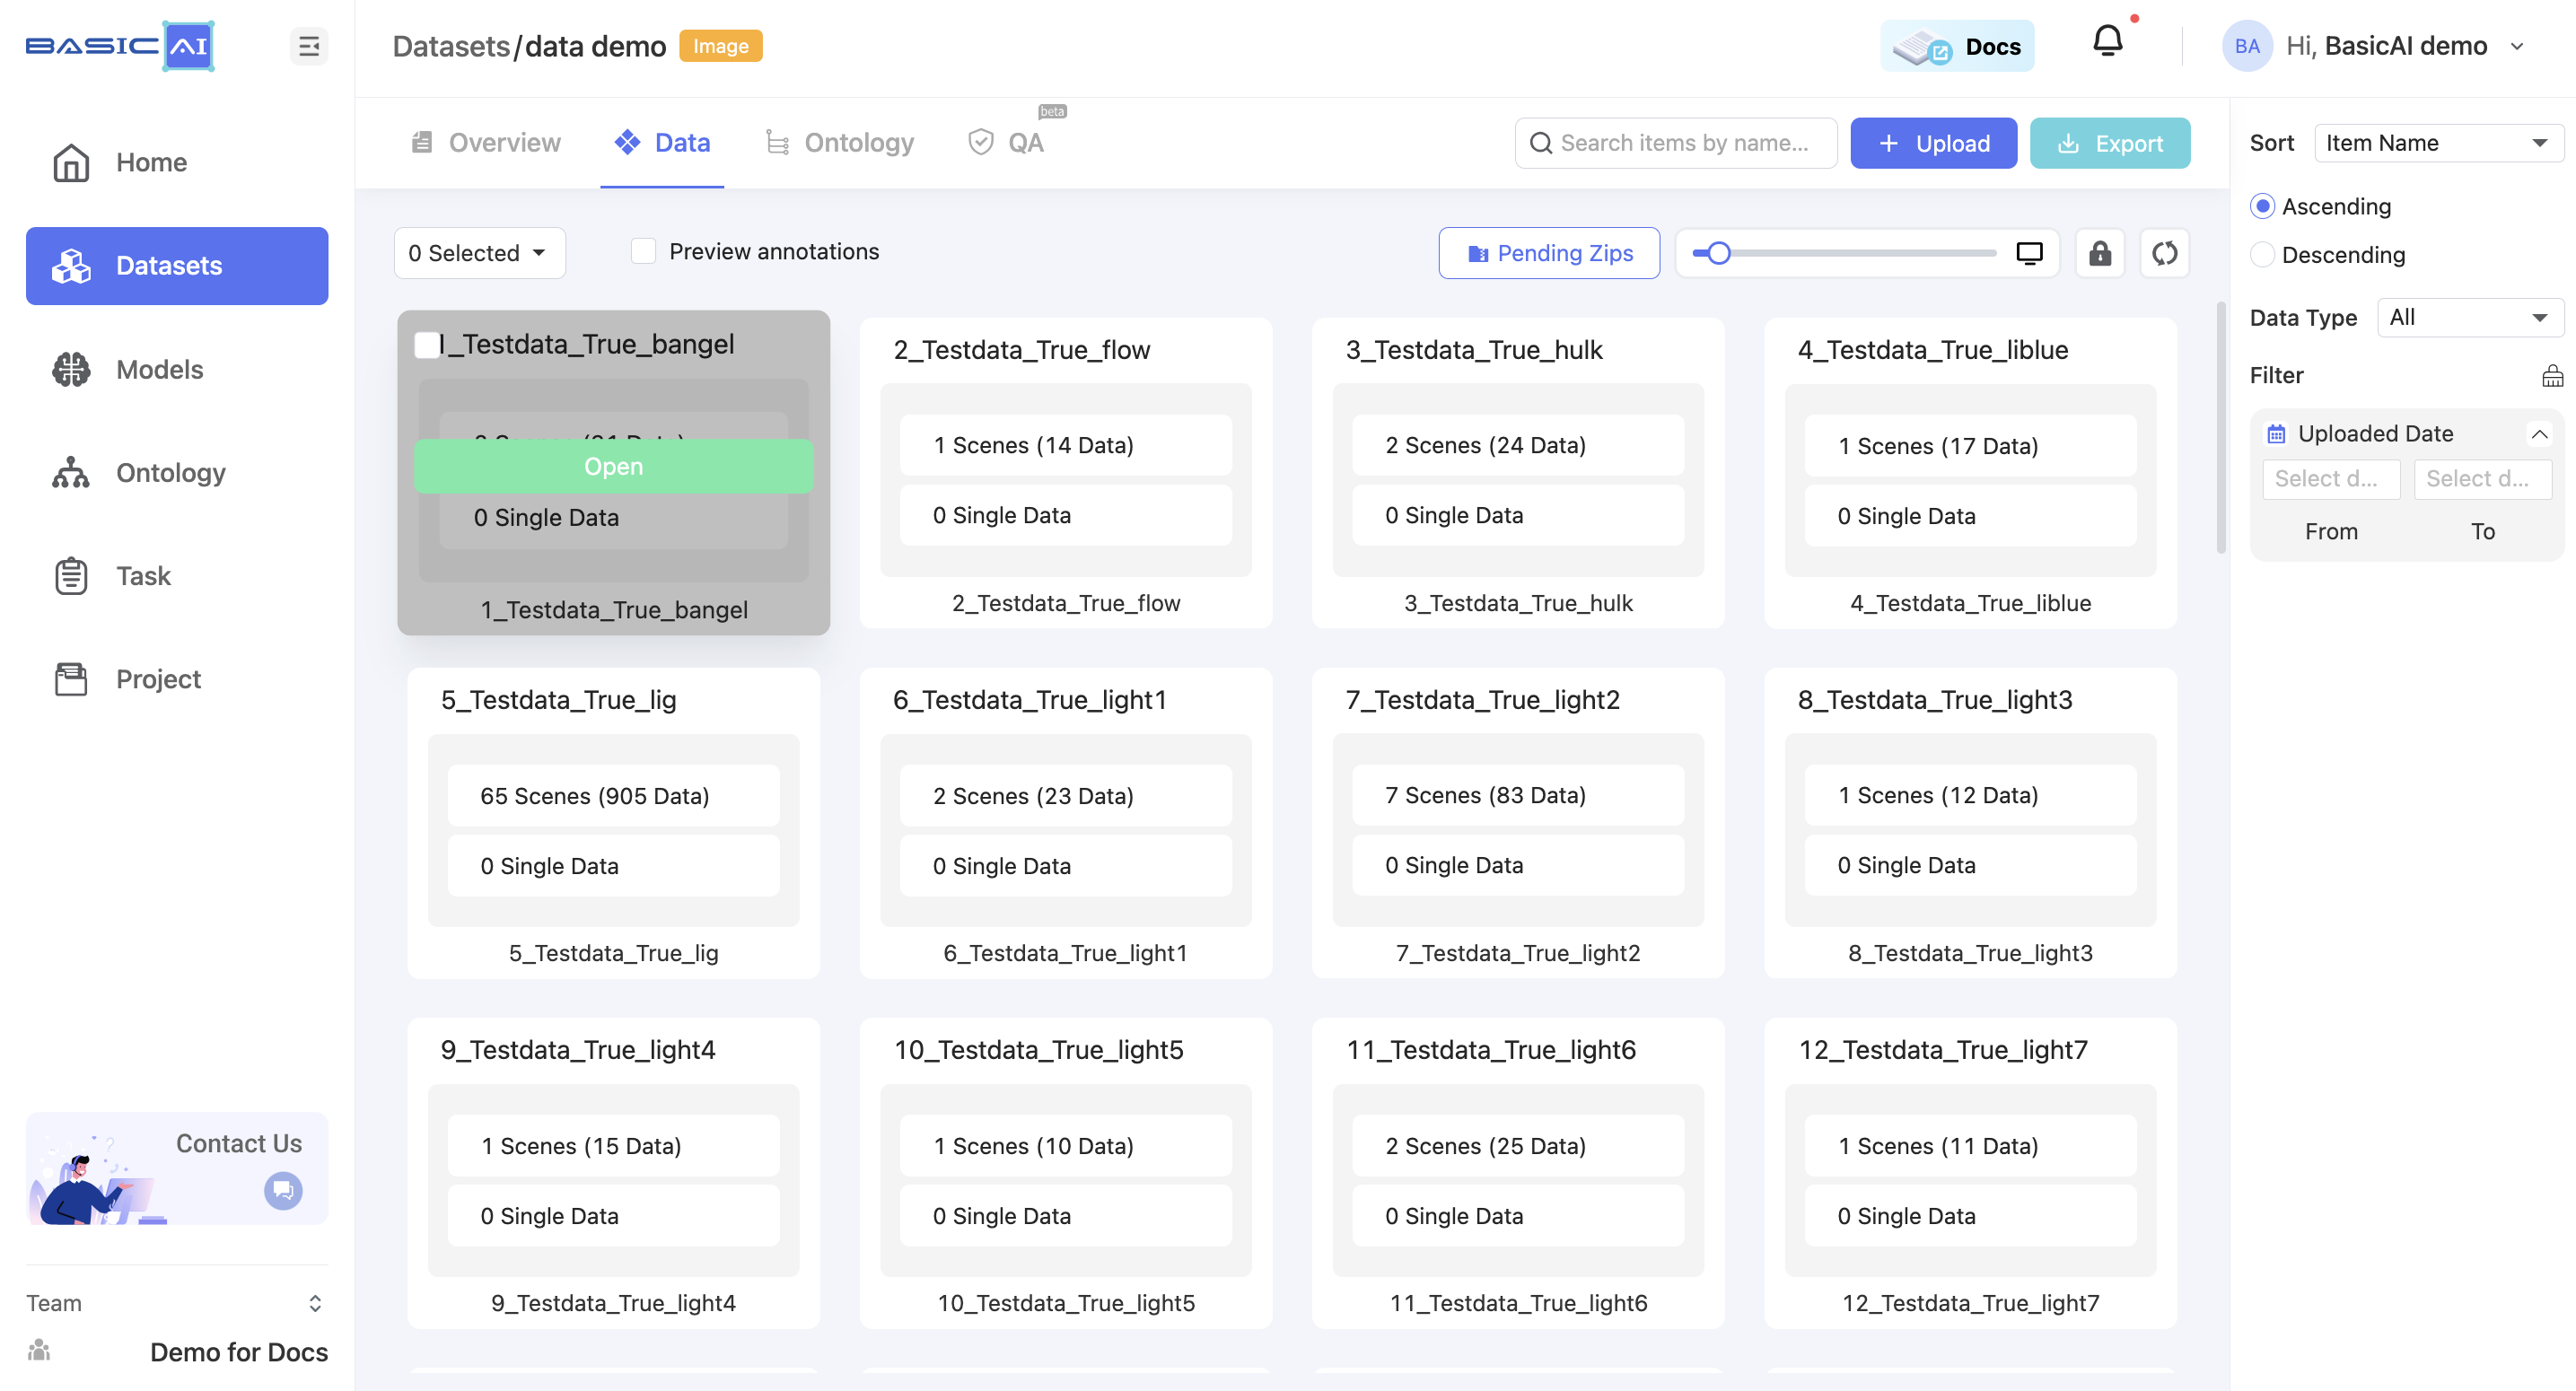
For example, if the batch path in the image is Testdata/True/bangel and you select Concat to root, it will be renamed as Testdata_True_bangel.
By choosing Concat up and specifying the number n, you can concatenate the current batch to the top n levels and utilize it as the new name.
If the input number is greater than the root depth of the current batch, then the value of n will be set to the depth of the batch.
For example, if the batch path in the image is Testdata/True/bangel and you select Concat up, it will be renamed as bangel when n=0, True_bangel when n=1, Testdata_True_bangel when n>=2.
The With index option is selected by default. When it is deselected, the sorting in the batch name will be disabled.
For the Scenes and Data tabs, the Concate up settings mirror those of the Batch. The With index option is deselected by default for both.
Here, the maximum value of n is determined by the distance between the current data/scene and the upper level (the scene, the selected batch, or the root).
Merge to Dataset
After configuring the ZIP, click the Merge to Dataset button to include the batches, scenes, and data in the dataset.
Step 3: View in Dataset
Once loaded, the batches, scenes, and data from the compressed file will be displayed in the data list according to the naming configuration. You can then manage them as needed.
Updated about 1 year ago