Tool Guide
This article will explain how to use different annotation tools available on the Toolbar.
TipsUsing keyboard shortcuts can enhance efficiency. You can hover over each tool's icon to find its hotkey. Press Esc to cancel the drawing.
1. Bounding Box
Choose the Bounding Box (BBox) tool, click on the image to set the start and end points, and a bbox will be created.
By selecting the created bbox, you can adjust it directly with the mouse or use hotkeys for more precise edge movement.
| Hotkey | Function |
|---|---|
| Shift+↑↓ | Move the top edge 1px |
| Ctrl/⌘+↑↓ | Move the bottom edge 1px |
| Shift+←→ | Move the left edge 1px |
| Ctrl/⌘+←→ | Move the right edge 1px |
| Ctrl/⌘+Shift+↑↓←→ | Move the object 1px |
| Shift+🖱Drag | Translate the entire object |

You can rotate the bbox using the rotation axis above it or draw a rotated bbox directly using the Measure Line.

2. Polygon
Select the Polygon tool and click on the canvas to add points that will be connected sequentially to form the polygon. Press the Space/Enter key to finish drawing and close the shape.
You can press the A key to draw horizontally, and press the Ctrl/⌘+A to draw vertically.
If the number of polygon sides is specified, you can find a new tool labeled ‘polygon+number’ by clicking … below the tool icon. When drawing, the shape will automatically close once you reach the number of sides.

You can switch on the Shared Edge Mode by clicking … below the tool icon.
By Edges (Ctrl/⌘+K): When creating a new polygon, it will automatically share edges with the intersecting polygons.
By Points (K): When creating a new polygon, you can connect two points on an existing shape to share edges. Use L to switch the shared edges.
Shared by edges
Shared by points
Hold down Shift to select two overlapping (completely containing) polygons. Then, click Hollow Out at the top left corner or press the H key. The smaller polygon will be hollowed out from the larger one (the main body).
The process can be repeated ONCE if the hollowed result contains another polygon.
You can click the button at the top left corner to cancel the hollow. The result will be split into the main body and several NEW polygons.
Only the main body, which is the largest polygon, will preserve the original ID and its Class & Attributes.
Hold down Shift to select multiple overlapping polygons. Then, click Crop at the top left corner:
Crop1 (Do not crop the first object, C): Use the first selected result as a tool to clip the overlapping parts from the other results.
Crop2 (Crop the first object, Ctrl/⌘+C): Use the other results as tools to clip the overlapping parts from the first selected results.
Do not crop the first object
Crop the first object
If a result is cropped and split into multiple parts, the largest inherits the original ID, while the others generate new ones.
Cropping two completely containing results is equivalent to hollowing out one result from the other.
You can adjust the Pixel Precision in the Settings at the bottom left of the tool page. High pixel precision can lead to the cropping situation mentioned below.

By selecting the created polygon, you can add, delete, and drag points on it. Hold the Shift key to drag the entire shape directly.
3. Polyline
Select the Polyline tool and click on the canvas to add points, connecting to form a polyline. Press the Space/Enter key to finish drawing.
You can press the A key to draw horizontally, and press the Ctrl/⌘+A to draw vertically.
To create a copy of a polyline, select it and hold down Ctrl/⌘ while dragging the mouse. The new result will only inherit the class & attributes of the original polyline.
When creating a new polyline, you can share points with existing polylines and polygons.
You can also switch on the Shared Edge Mode by clicking … below the tool icon, connect two points on an existing shape to share edges. Use L to switch the shared edges.
Similar to polygons, you can add, delete, and drag points on created polylines. Hold the Shift key to drag the entire shape directly.
Select a point (non-endpoints) on a polyline and press Shift+F. The original polyline will be split into two separate polylines, inheriting the original's class, attributes, and group information.
Hold down Shift to select TWO polylines. Then, click Merge at the top left corner:
Merge 2 into 1: Merge the start of the 2nd result with the end of the 1st, using the class, attributes, and hierarchical relationships from the 1st result.
Merge 1 into 2: Merge the start of the 1st result with the end of the 2nd, using the class, attributes, and hierarchical relationships from the 2nd result.
Select a point on a polyline and press Shift+E. You can draw a new polyline (dashed) from the selected point, then click on the nodes of the original polyline to complete the editing.
Please follow the direction of the original polyline.
4. Ellipse
Select the Ellipse tool and click on the canvas to add the center point. Click again to adjust the shape and then finish drawing.
You can adjust the shape and size of a created ellipse. Click its center point or hold the Shift key to drag the entire shape directly.
5. Circle
Select the Circle tool, click on the canvas to add the center point, and click again to finish drawing.
You can adjust the radius of a created circle. Click its center point or hold the Shift key to drag the entire shape directly.
6. Spline Curve
Select the Spline Curve tool and click on the canvas to add points, connecting to form a curve. Press the Space/Enter key to finish drawing.
By selecting the created curve, you can add, delete, and drag points on it. Hold the Shift key to drag the entire curve directly.
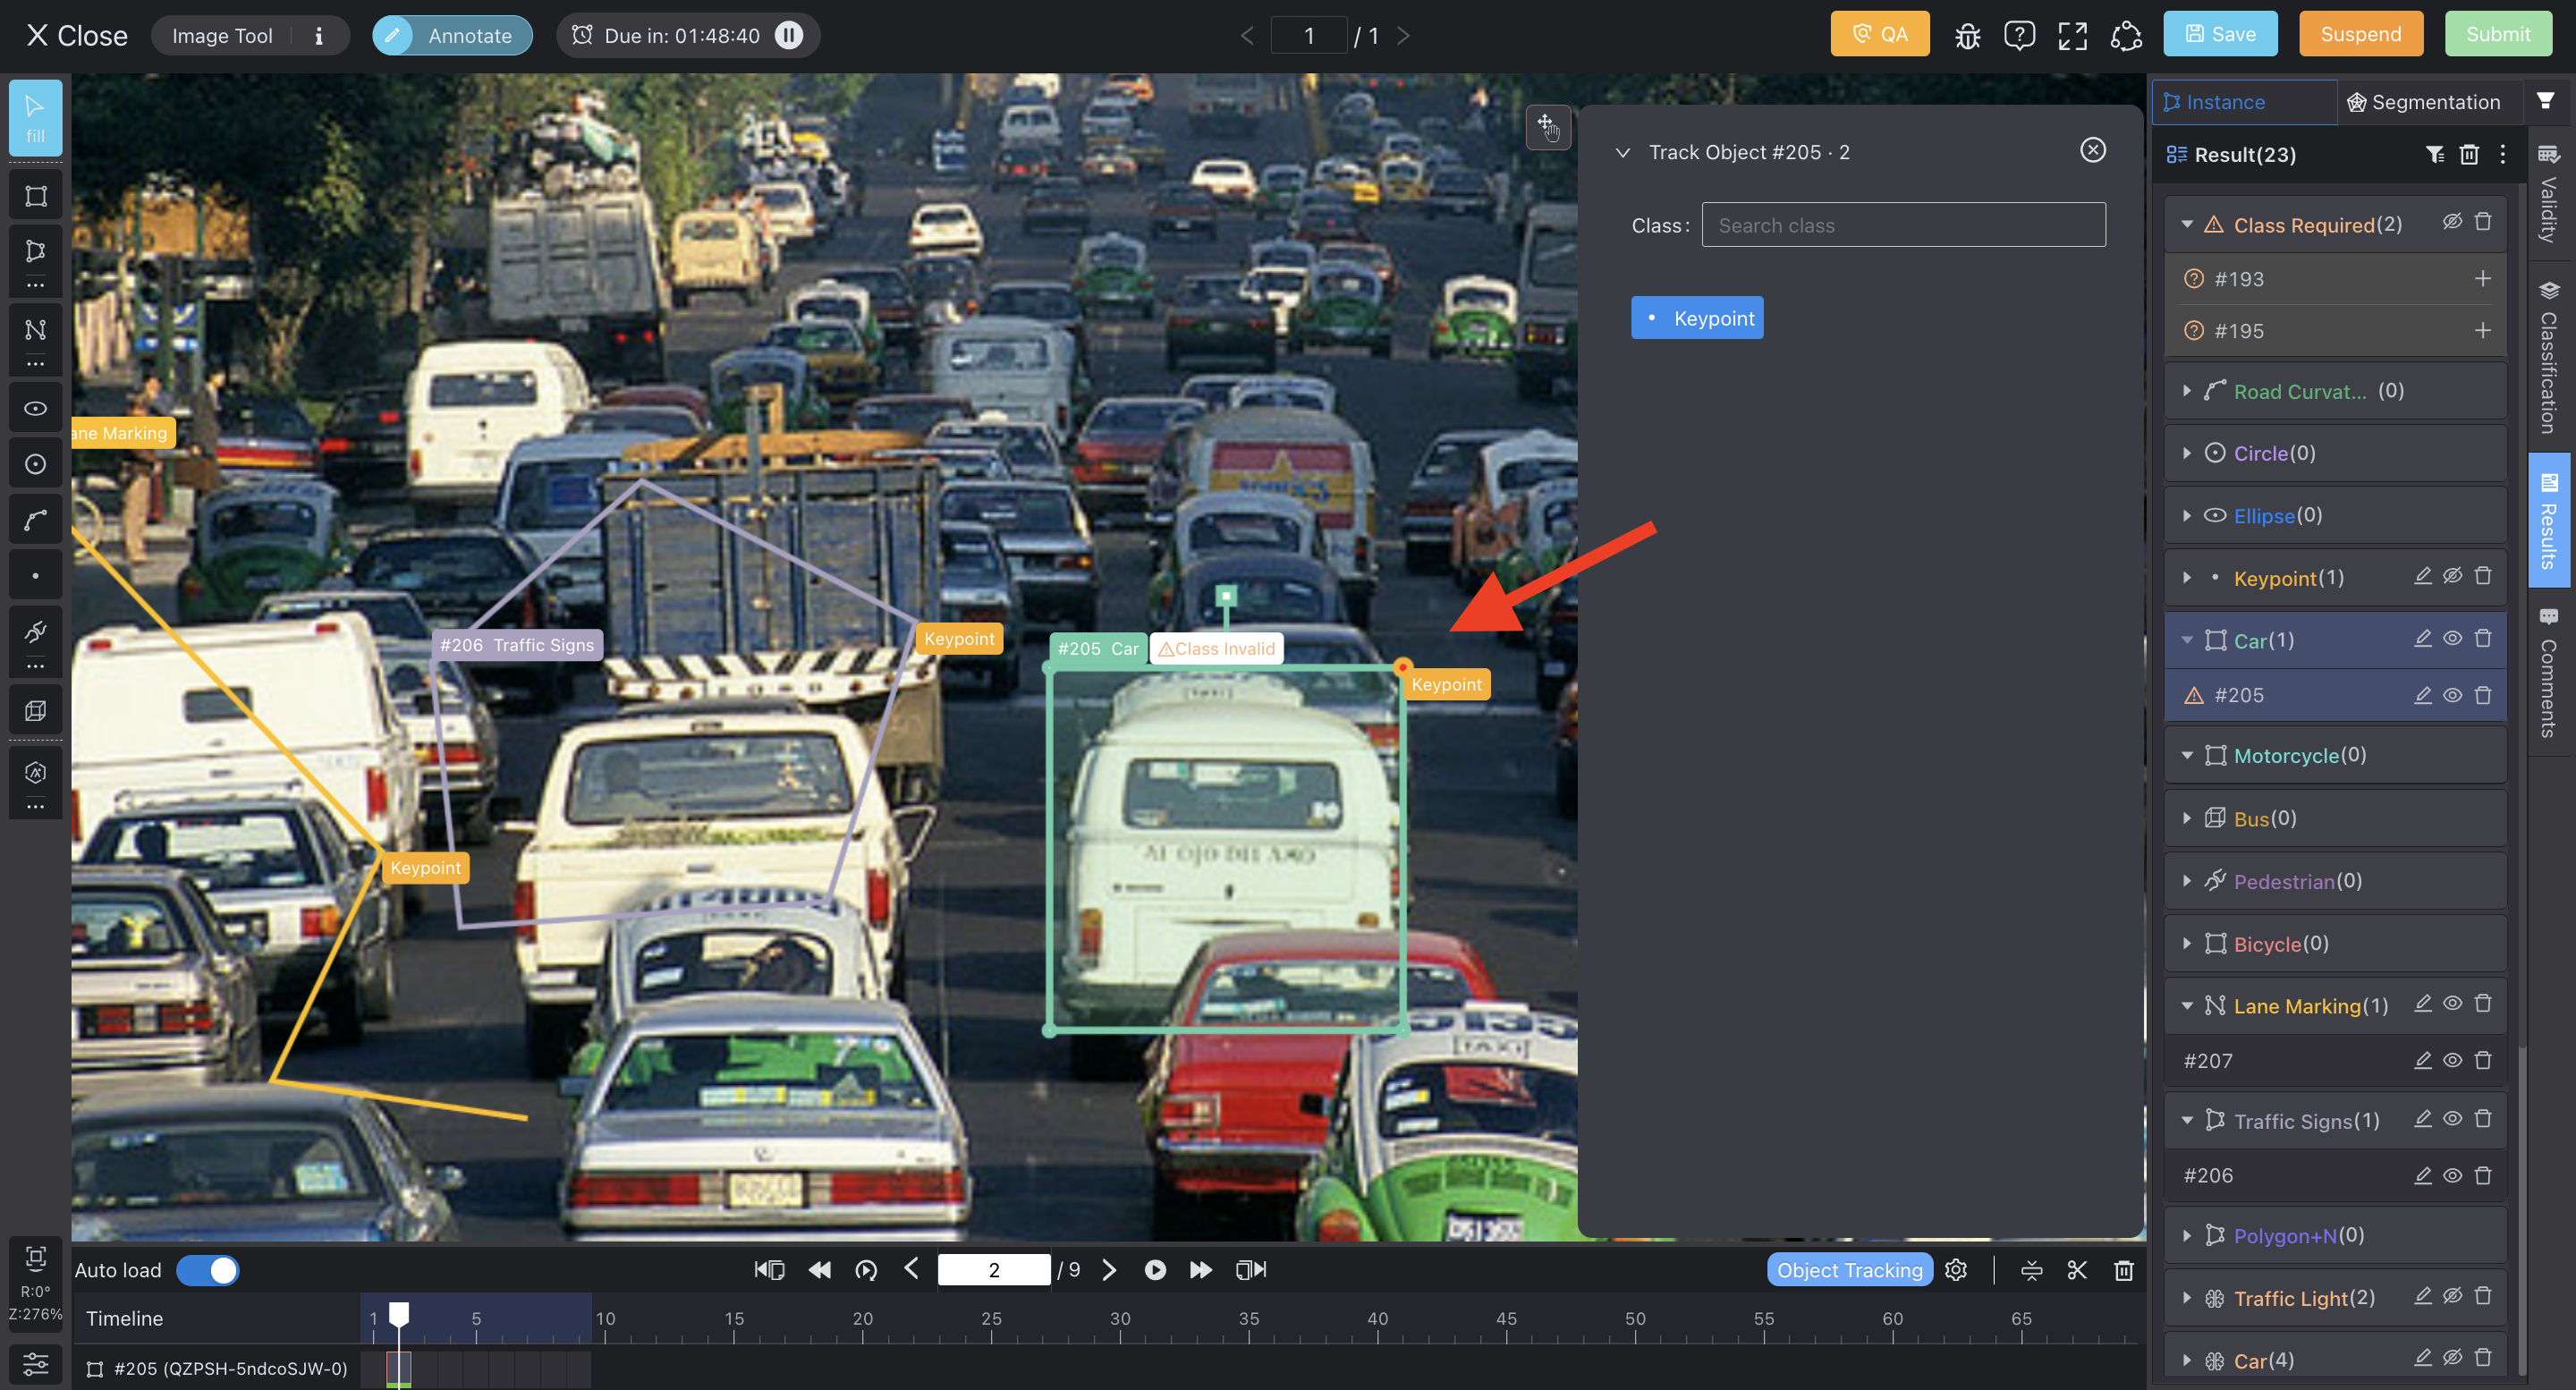
7. Keypoint
Choose the Keypoint tool and click on the image directly to add points.
You can also click on the edges of an existing shape to add nodes. After selecting these key points, you can annotate them (press T).
8. Skeleton
Before drawing, you can click on the ... below the Skeleton icon to adjust display settings for the sample and canvas skeletons.
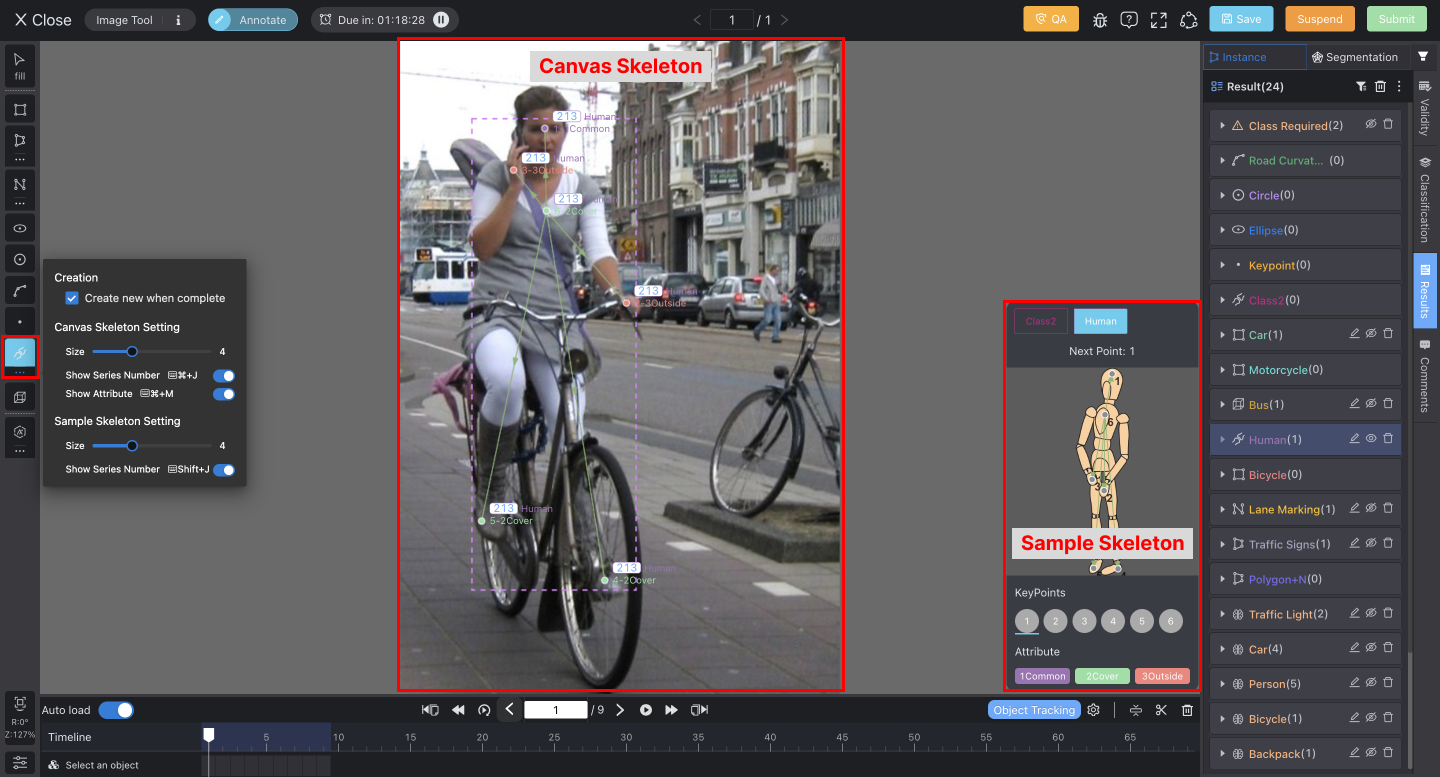
Switch classes at the top of the tool pad. Next, pick a numbered KeyPoint to position on the canvas (initially starting from 1) and choose an attribute for each point. You can scale and move the sample skeleton for a closer look at the specifics.
Once all KeyPoints are set, the skeleton will automatically close. Alternatively, you can manually finish the drawing by pressing Space/Enter.
When selecting points on the canvas skeleton, you can drag, delete, or modify their attributes.
If Equidistant Skeleton is enabled, you can click the Equal button and draw a curve/polyline. The KeyPoints will be evenly distributed along the drawn curve/polyline.
9. Cuboid
Select the Cuboid tool and draw two bounding boxes on the image, one for the front and one for the back. They will be automatically linked to form a pseudo 3D box.
You can drag the two boxes or nodes to adjust the shape of the cuboid.
10. Group
Hold down Shift to select multiple results. Then, press Ctrl/⌘+G to create a group.
Nested grouping is supported.
You can remove a specific object from a group by clicking UnGroup in the Results List. To dissolve the entire group, select it and press Ctrl/⌘+Shift+G.
11. Auxiliary Tools
Measure Line
Press Y to show the measure line while using other tools.
You can use keyboard shortcuts to rotate the angle of the measure line, easily drawing a rotated Bounding Box.
| Hotkey | Function |
|---|---|
| Y | Show the Measure Line |
| [/] | Rotate the Measure Line counterclockwise/clockwise |
| \ | Reset the rotation |
Measure Tools
Before using measure tools, you need to configure them in the settings located in the bottom left corner. Turn on the tab and add a circle or rectangle. You can customize the tools' color, name, and size.
After configuration, press U to show the measure tool.
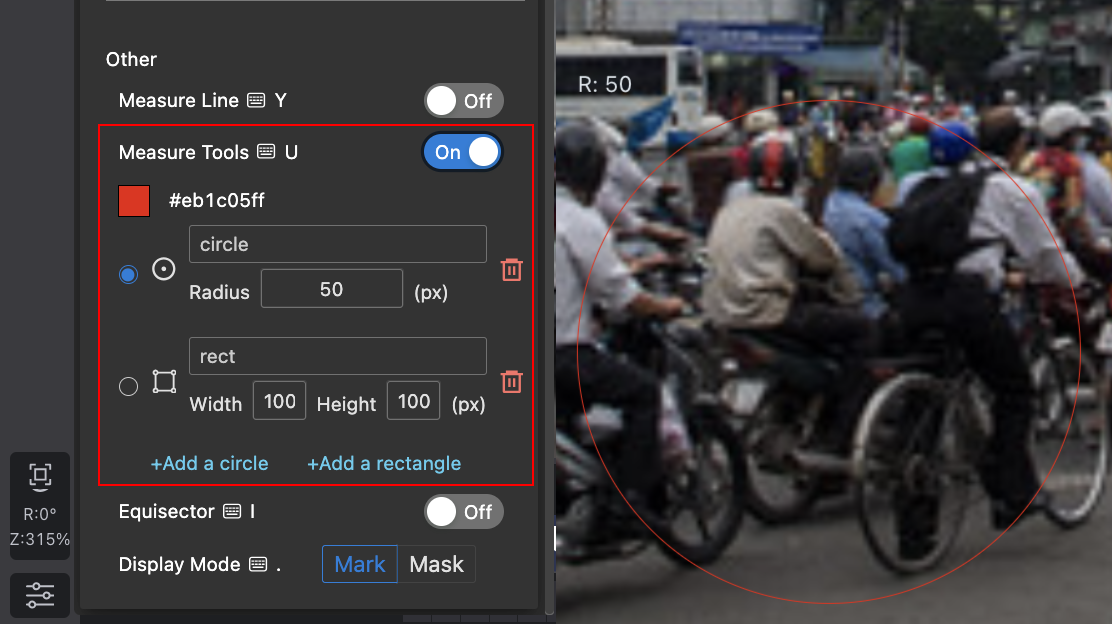
Circle

Rectangle
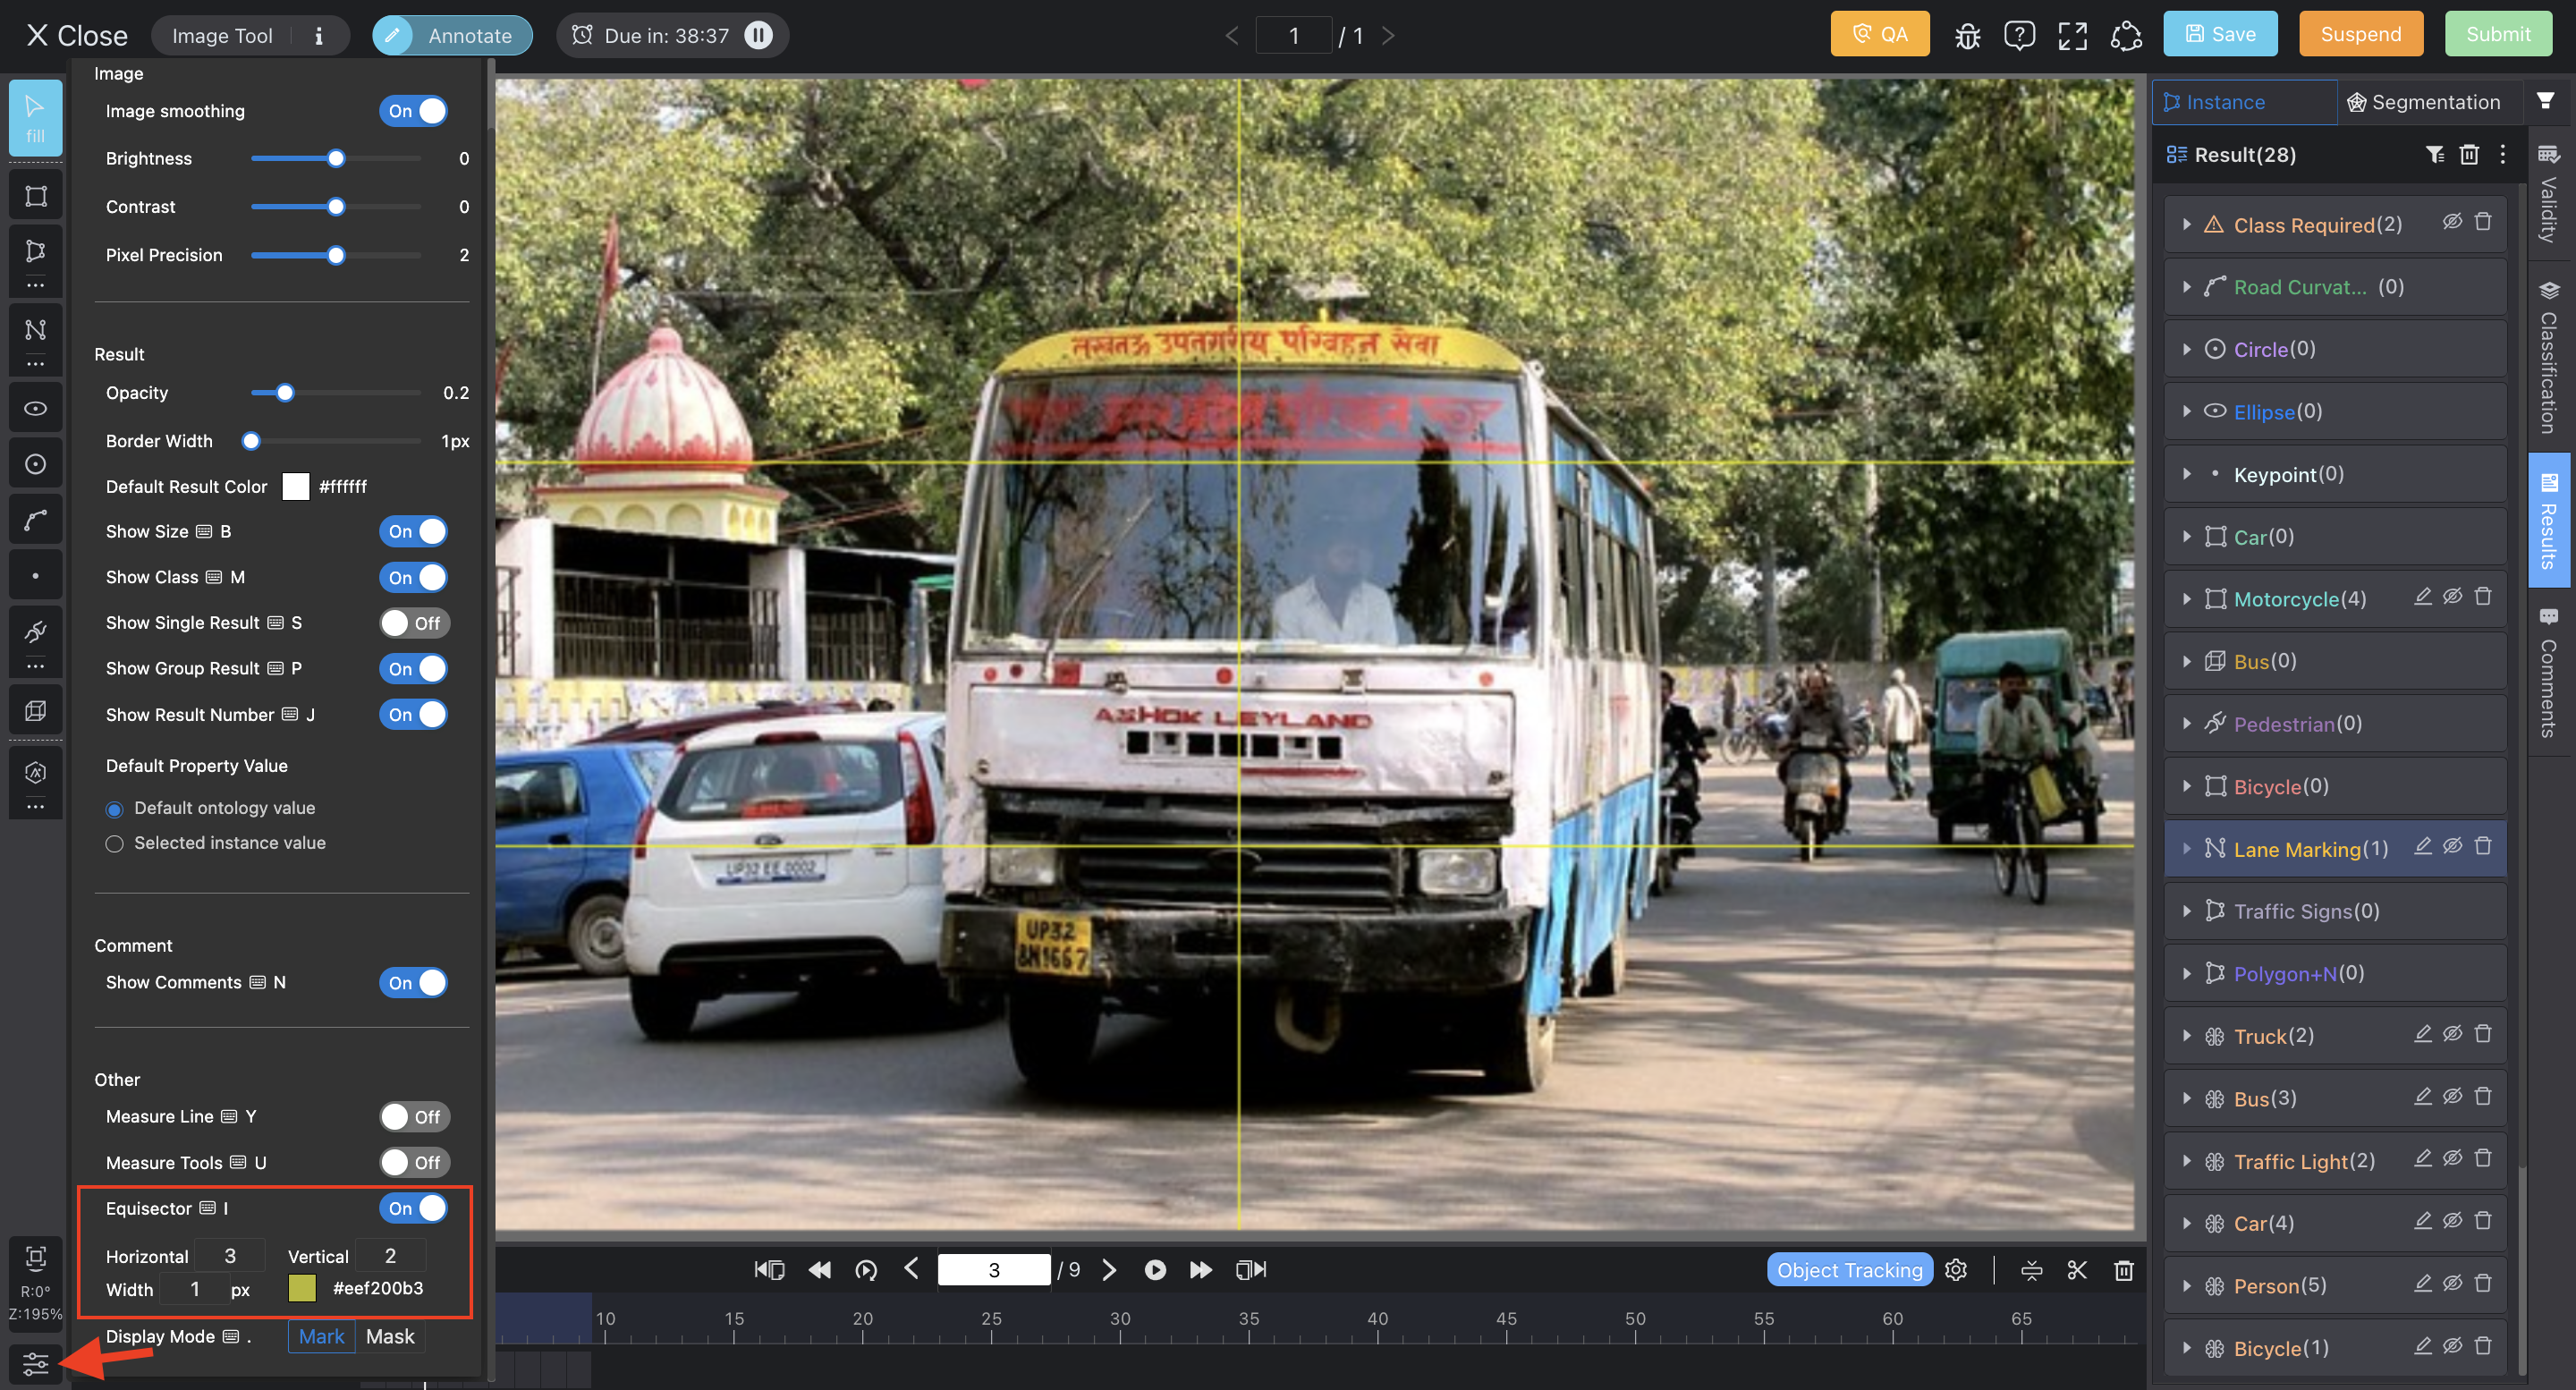
Bisector
Press I to show the bisector. You can customize the number of divisions, width, and color in the settings located in the bottom left corner.
Updated about 1 year ago