Text Annotation Tool
📜 Guides on how to use the Text Tool to annotate text entities or relations on BasicAI, an all-in-one smart data labeling platform.
BasicAI Text Tool is designed to mark or annotate specific information or structures in textual data, which can involve identifying and annotating entities in the text, determining keywords or phrases within the text, and annotating entity relationships in the text, among other aspects. In the future, we will continue to design various text annotation modes, such as multiple text comparison annotations, PDF document annotations, and large model dialogue annotations.
Currently on BasicAI, we support text Entity or Relation annotation for textual data using our text tools. This chapter will elaborate on the tool types and how to annotate text entities or relations on our platform.
Prerequisites
Before starting the annotation process, it is essential for you (or your project manager) to upload a dataset and configure the ontology.
📖 Click to view quick steps
1️⃣ Create aDataset or Task with the type of Text and upload data.
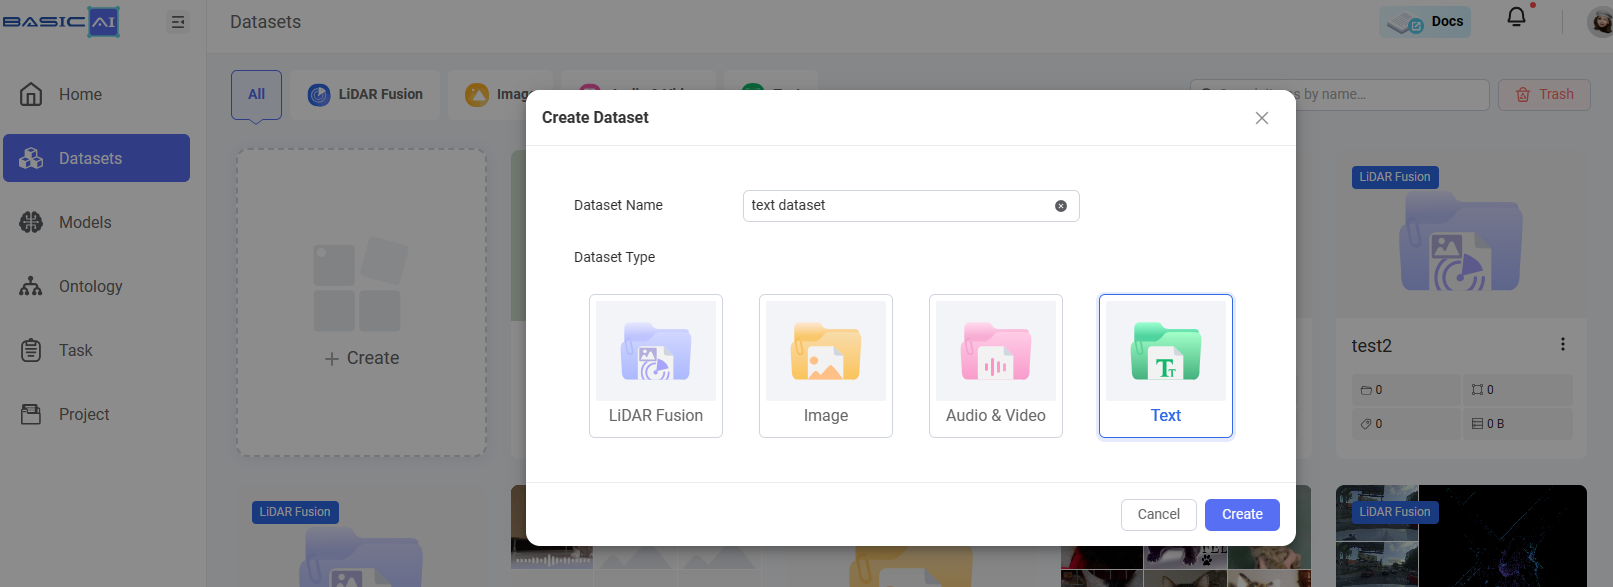
At present, our platform supports users to upload textual data in the following formats:
- Text files:
.txt/.csv/.xlsx/.xls - Compressed files:
.zip/.gzip/.tar/.rar
The file size limit is 1 GB. For files larger than this, we recommend uploading via URL or Object Storage. For more information about this, please navigate to Uploda Data.
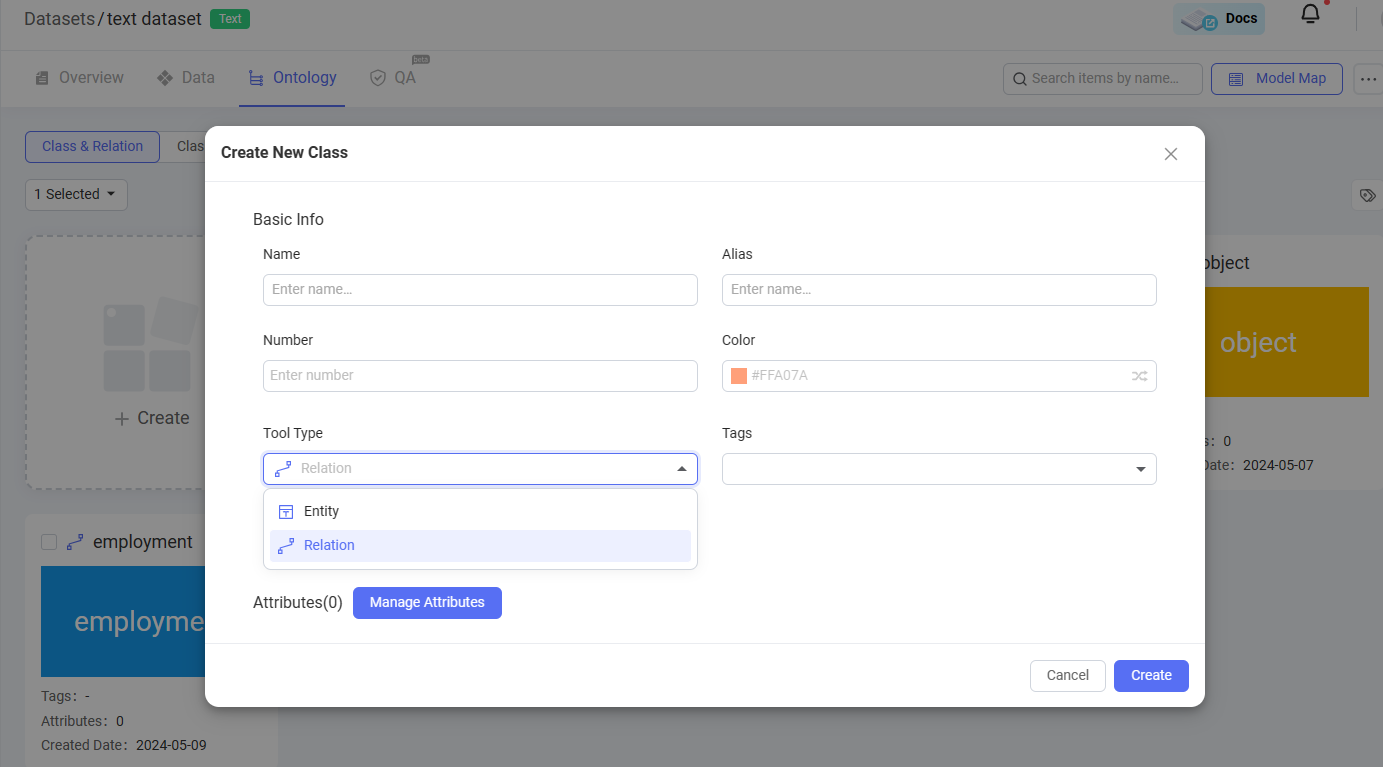
2️⃣ Configure theOntology based on task requirements.
After creating the dataset and uploading textual data, click the Ontology tab to configure ontology classes or classifications associated with the textual data. In the Class settings, there are two tool types available for choosing: Entity and Relation. Explanations of these two tool types can be found in the Tool Type guide. Please configure entity classes first before creating relation classes. You can add attributes to the created classes. For a detailed guide about how to configure ontology classes or classifications, please click Ontology Creation.
Start Annotation
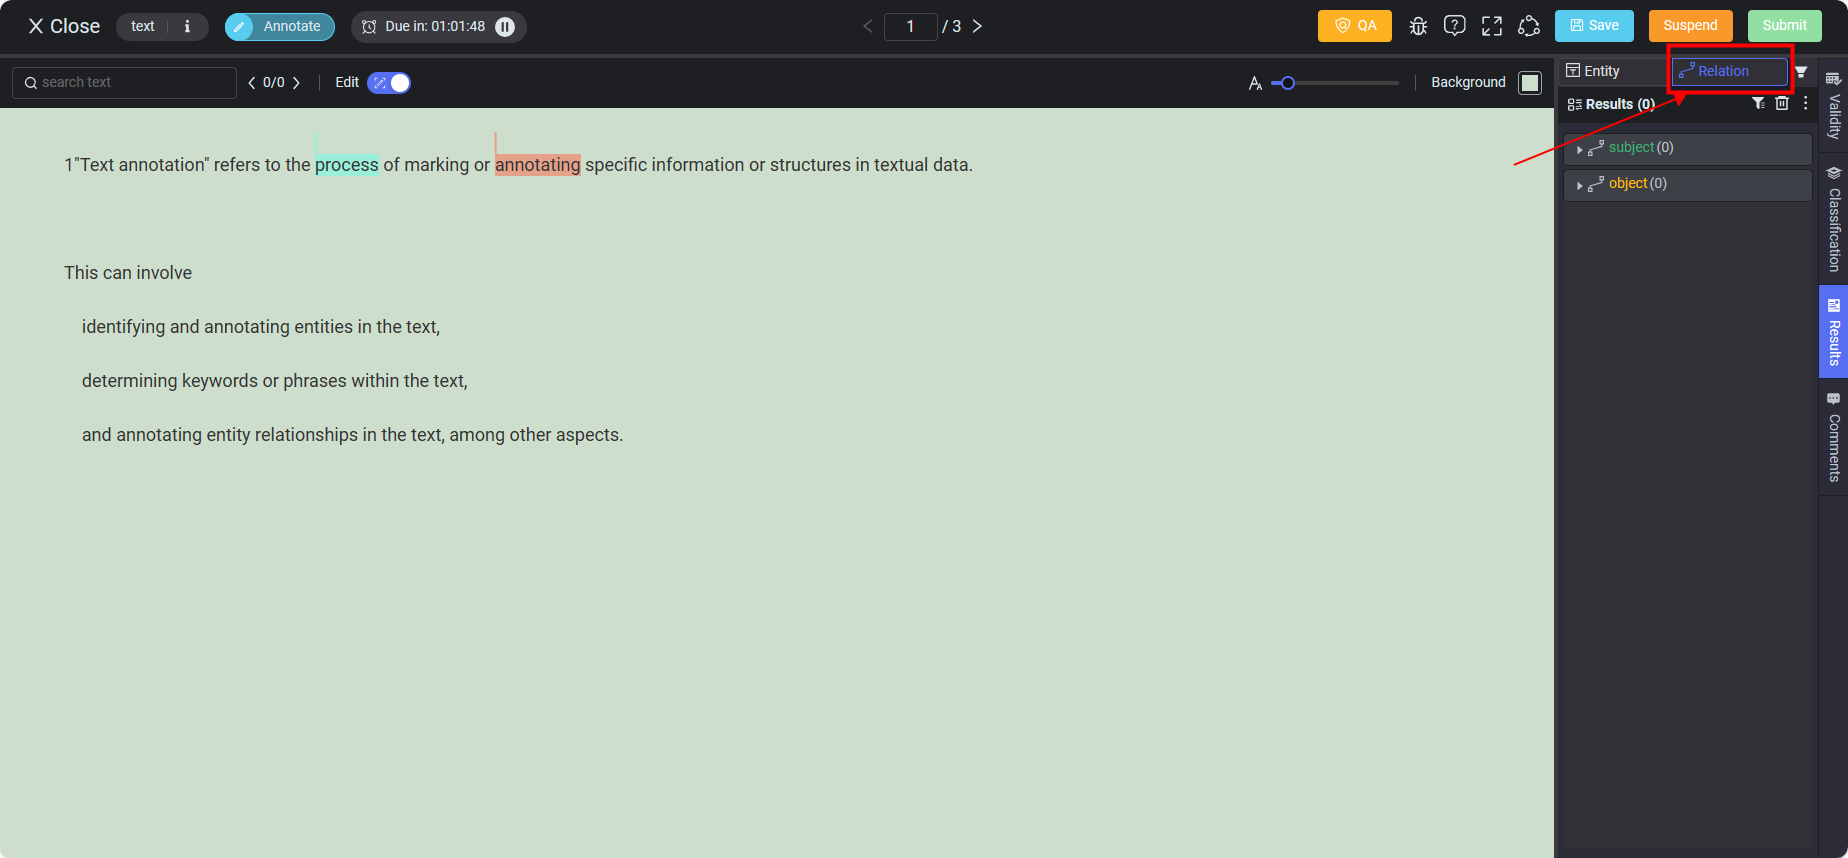
On the Text Tool page, annotators can perform text entity annotation or relation annotation work. Firstly, let's get familiar with the interface of the Text Tool page of BasicAI.
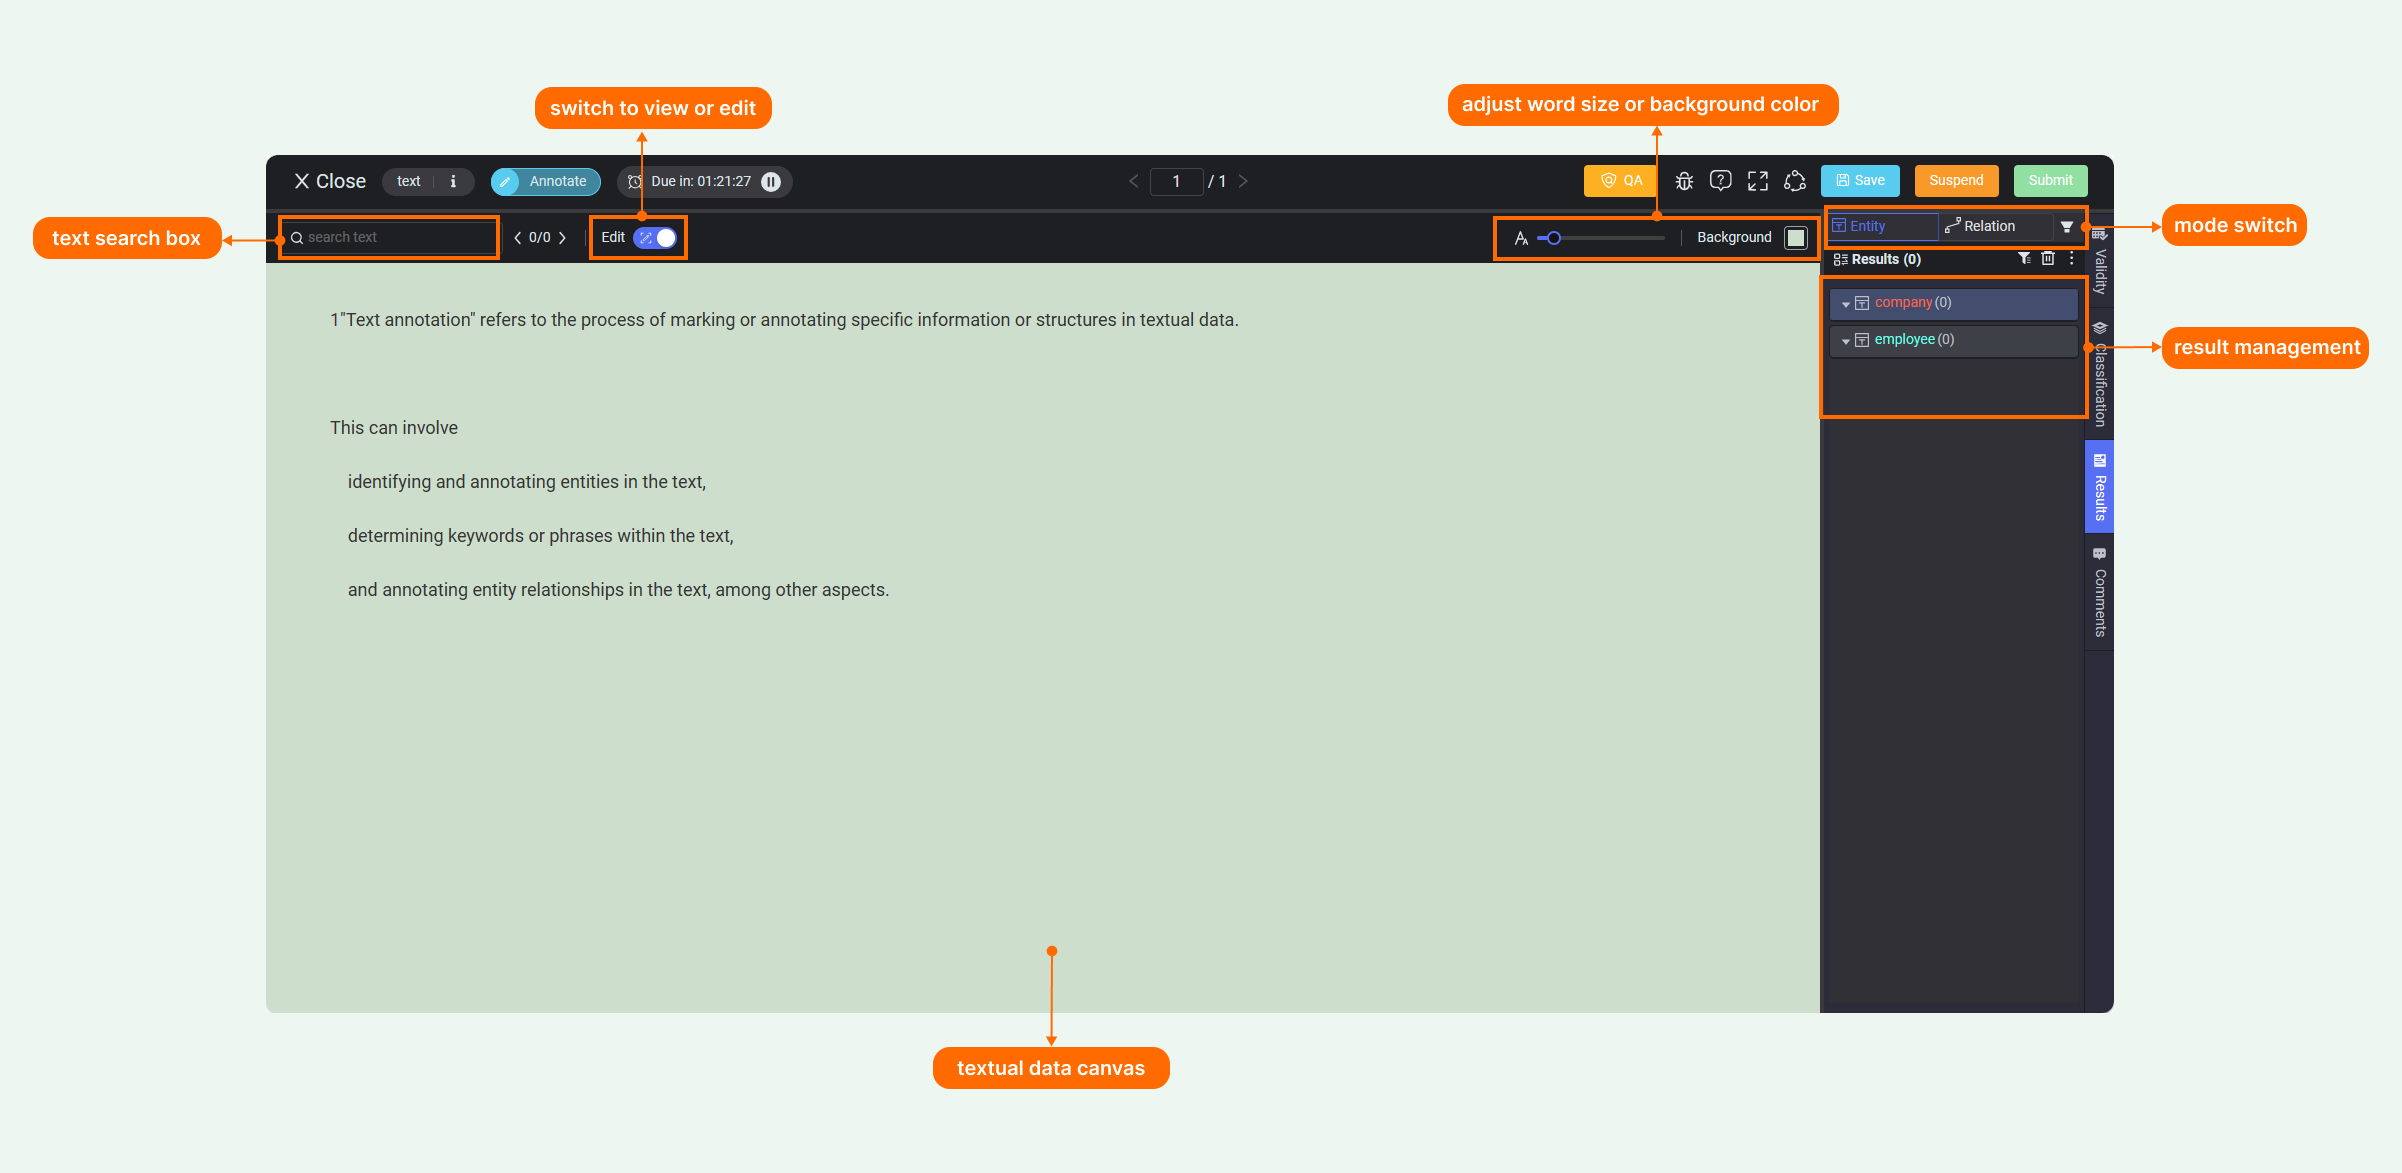
As shown in the image above, except for the workflow bar on the top, the text tool page consists of the following sections: text search box, edit button for switching view or annotation mode, textual data canvas, word size & background color adjusting tools, mode switch tabs for Entity or Reltion, and result management panel. You can use these tools to search words, perform annotations, adjust word size or the background color of the canvas, and manage annotation results, etc.
Text Entity Annotation
Before starting to conduct text entity annotation work, please make sure the Edit button on the top left is switched on for annotation mode, and also the annotation mode on the top right is set as Entity. To annotate a specific entity in the textual data, just simply use your mouse to make selections or double click on the words to create results, and then the class&attribute panel will automatically pop up for you to configure classes or attributes.
Note:Selecting a word on the data canvas will create a result under annotation mode. If you are under view mode, using the mouse for word selection will only allow you to copy the selected word, but will not create new results.
Different entity results are allowed to have overlapping parts, but not allowed to be completely identical. Creating group results is also supported. You can select multiple results, and then press Ctrl/Command + G to create a group, or press Ctrl/Command + shift + G to cancel grouping.
Text Relation Annotation
You will need to create entity annotation results first, and then switch to Relation mode to start text relation annotation.
Under annotation mode, right-click on the starting entity with your mouse, then move it to extend a dashed line from the starting entity. The endpoint of the dashed line will follow your mouse movement. Right-click on the ending entity to create a relation result, generating a relation line. Then the class&attribute panel will automatically pop up, and you can configure the class or attribute for the relation result.

On the result management panel, you will find all the relation results which have been created. In addition to the regular viewing, editing and deleting buttons available there, you can also click the bi-directional arrows icon to change the line direction of a chosen relation result.
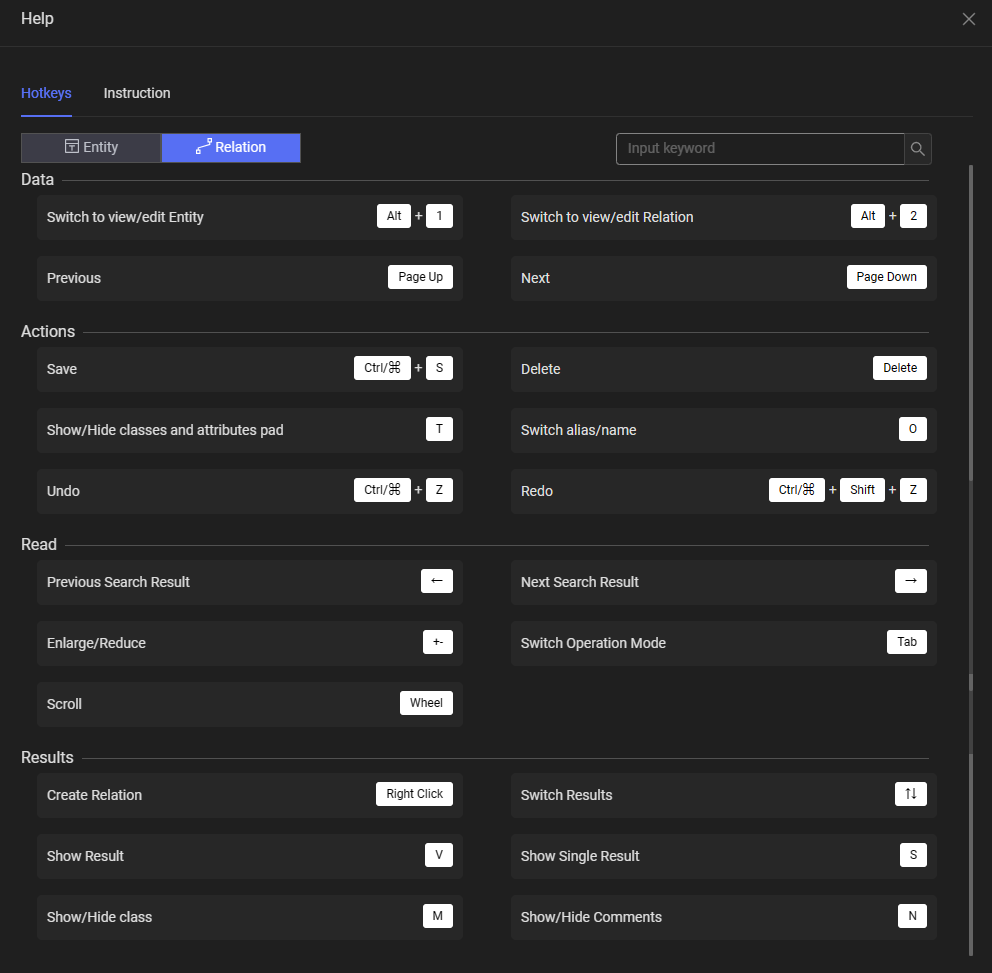
Short-cut Keys
Click the Help icon at the top right of the tool page to view all the shortcut keys:
For Entity Annotation:

For Relation Annotation:
Updated about 1 year ago