Project Manager
📚 Project Managers hold and share data, and manage annotation tasks and projects.
With BasicAI, annotation project managers can easily supervise and manage the entire project, including data annotation and team collaboration.
We will guide you through setting up and managing collaborative annotation with a specific task as an example. Follow the tutorial to get started:
Video Tutorial
Essential Steps for Quick Start0:04 - Step 1: Create a Dataset
0:36 - Step 2: Configure the Ontology
1:31 - Step 3: Create a Task
2:41 - Step 4: Manage Your Task
3:23 - Step 5: Curate Results
3:43 - Step 6: Export Results
In this tutorial, we will organize a team task to annotate a batch of 2D & 3D fused data for detecting and classifying various objects in a road scene.
Feel free to download the compressed file 📂 for this demo.
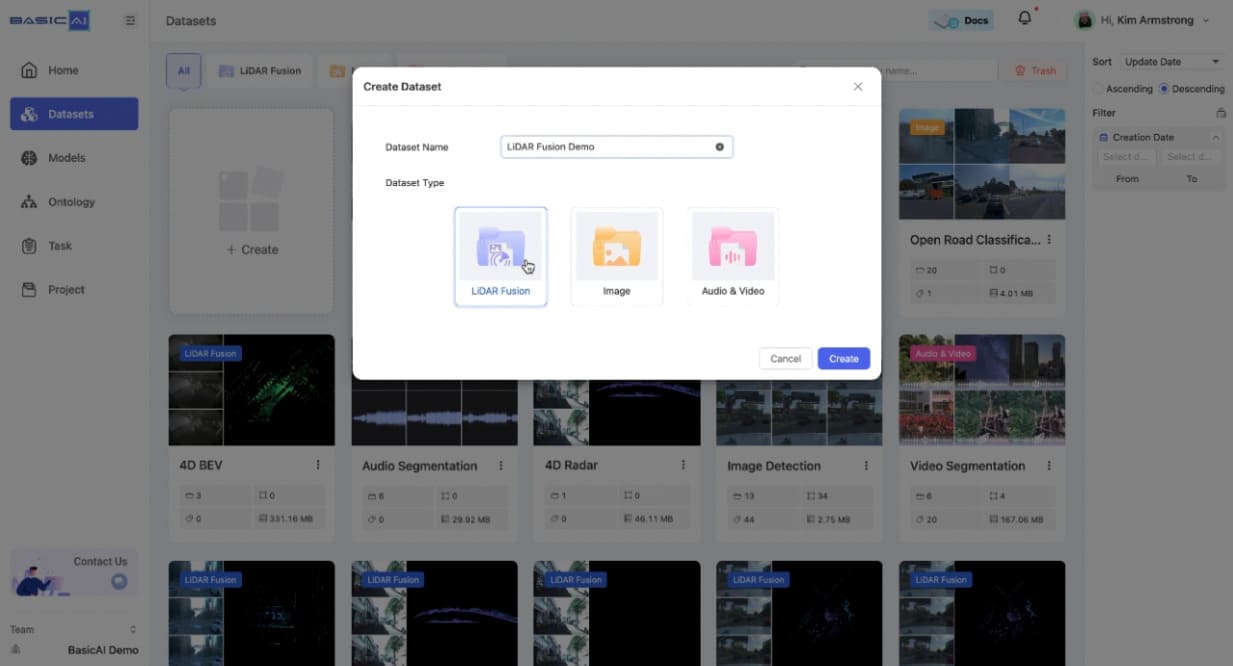
Step 1: Create a Dataset
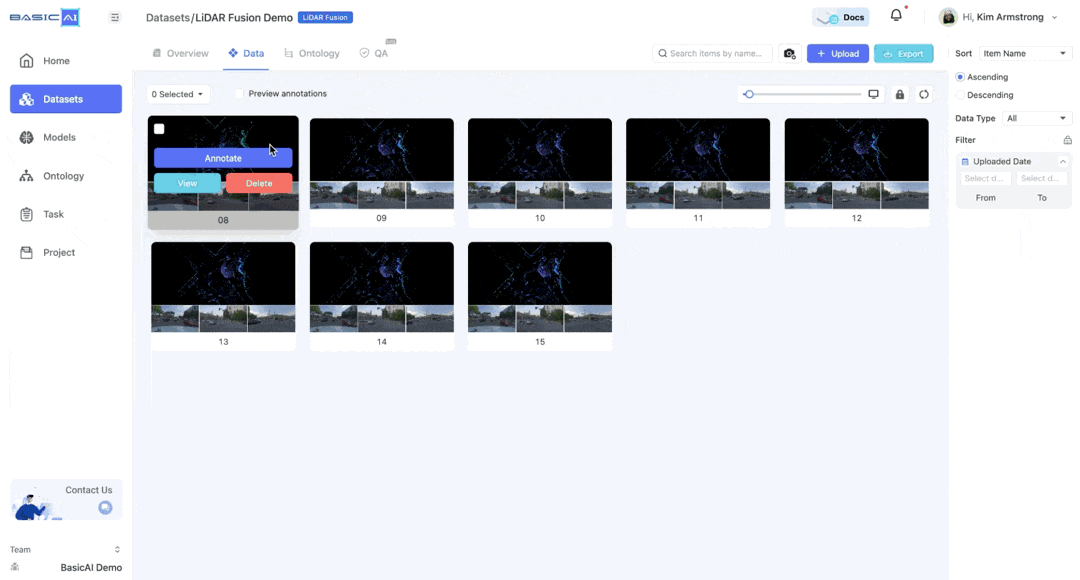
To begin, you should create a new dataset and upload the data that needs to be annotated.
- Go to the Datasets Tab on the sidebar and click the
+ Createbutton. - Enter the dataset name and choose the type
LiDAR Fusion.
For more details about data types, please refer to Create a Dataset.
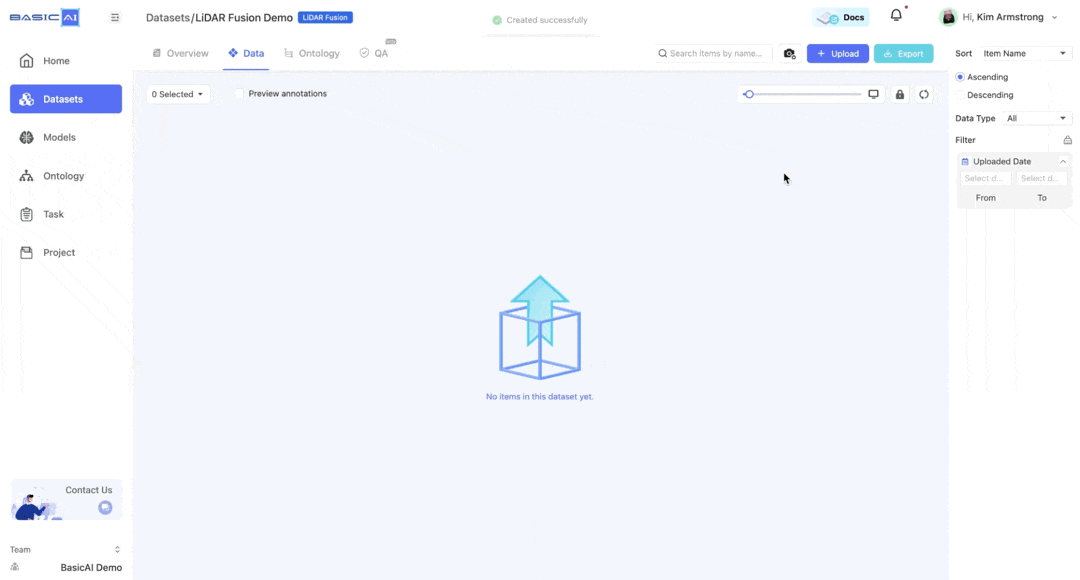
- Click on the
+ Uploadbutton. - Choose the upload method as
Local Datato upload the local ZIP file.
You can also import annotations if the data has been pre-labeled (optional).
For more details about uploading data, please refer to Upload Data.
Run Models (Optional)It is a common practice to use models for pre-labeling datasets to improve annotation efficiency.
Go to the Models Tab and select the
Basic LiDAR Object Detection Model. For detailed instructions, please refer to Model.
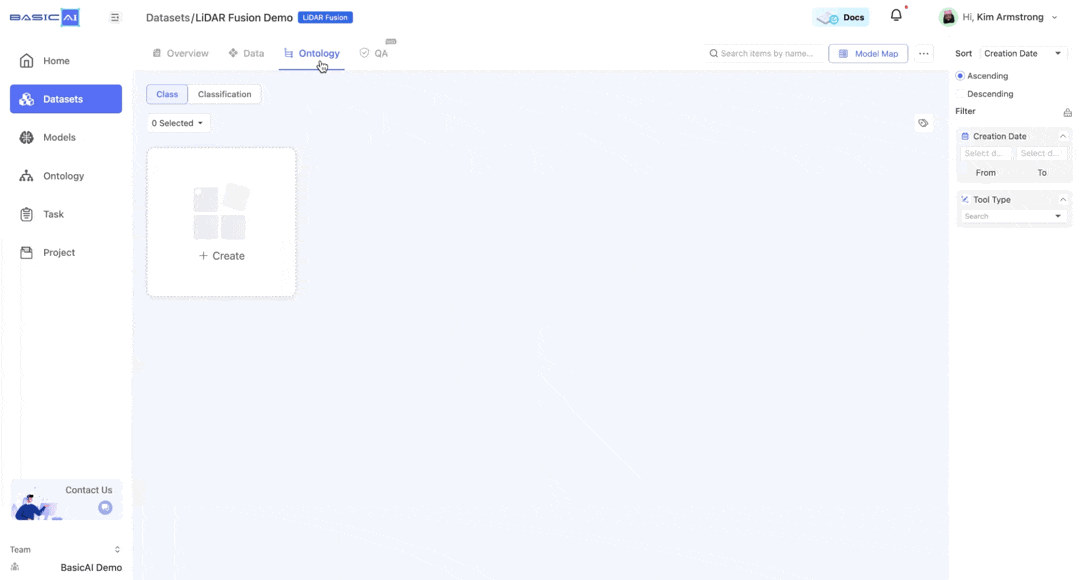
Step 2: Configure the Ontology
After uploading the data successfully, you can preview and filter the items in the Data list. Most importantly, you need to configure the Ontology, setting the Class and Classification.
The ontology should be created in the dataset, NOT in the Ontology Tab.
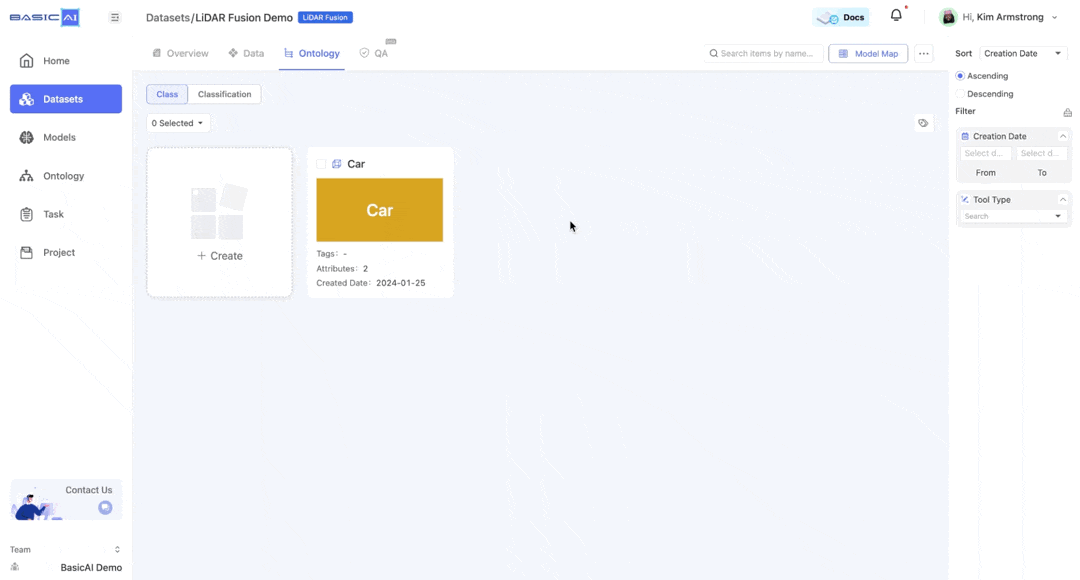
📖 Class
* Go to the Ontology list and click the + Create button under the Class category.
- Name the class Car and select the annotation tool type
Cuboid.
- Click on the
Manage Attributesbutton to configure its Attribute. Here, we will set the class Car with two attributes: Motion Type and Occlusion Level. - Provide the information and add options for each attribute.
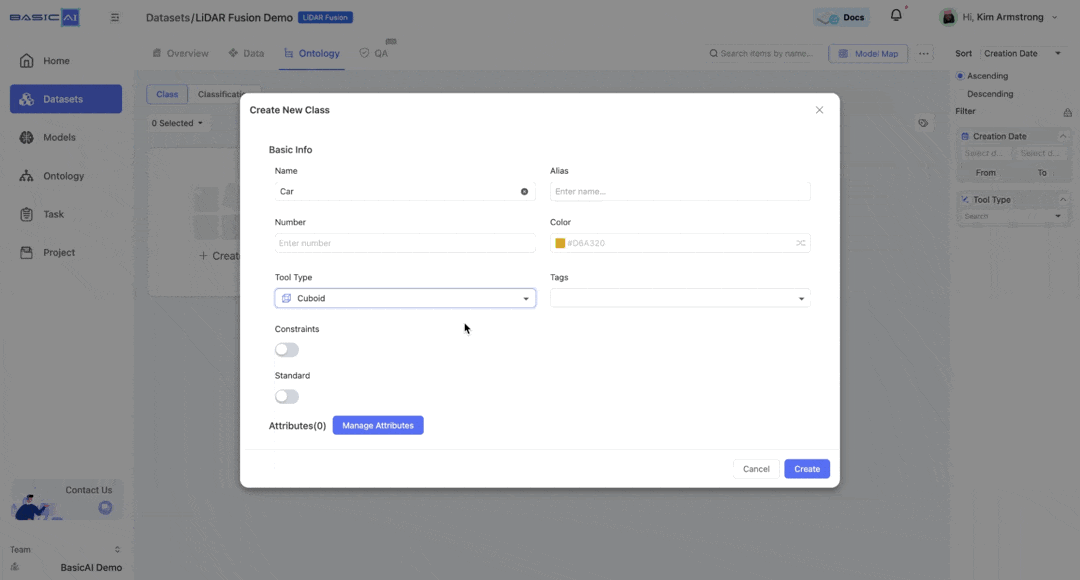
- To copy an existing class, click on the top right corner of the card.
Similarly, let's create two new classes named Bus and Pedestrian.
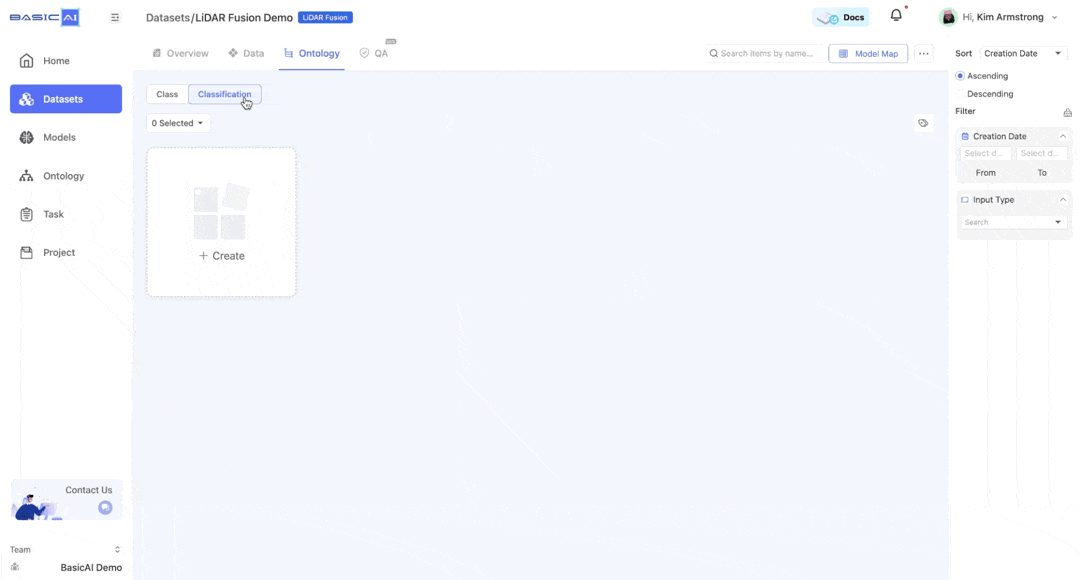
📖 Classification
* Switch to the Classification category. Click the + Create button to create a classification weather that describes the entire data.
Furthermore, the class and classification can be imported from the Ontology Center or via JSON by clicking the ... button located in the top right corner.
For more details about configuring ontology, please refer to Ontology.
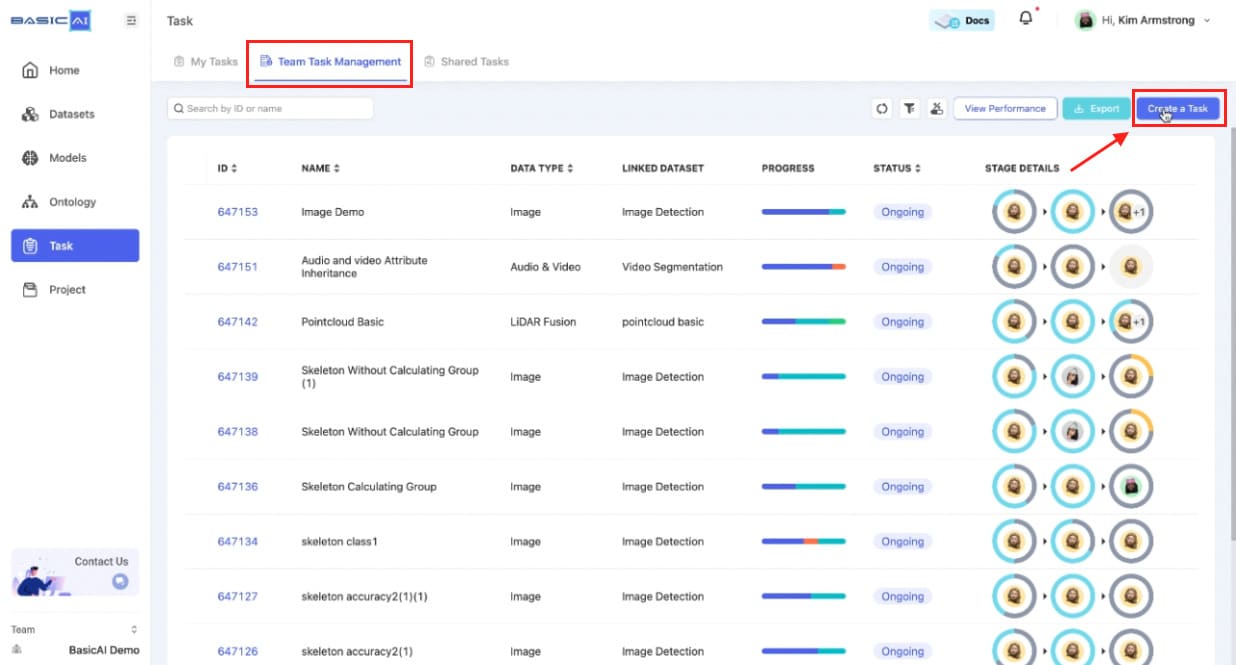
Step 3: Create a Task
An efficient workflow is crucial for collaborative annotation. BasicAI makes it easy to create and manage team tasks.
Head to the Team Task Management list in the Task Tab on the sidebar. Click on the Create a Task button and configure task details.
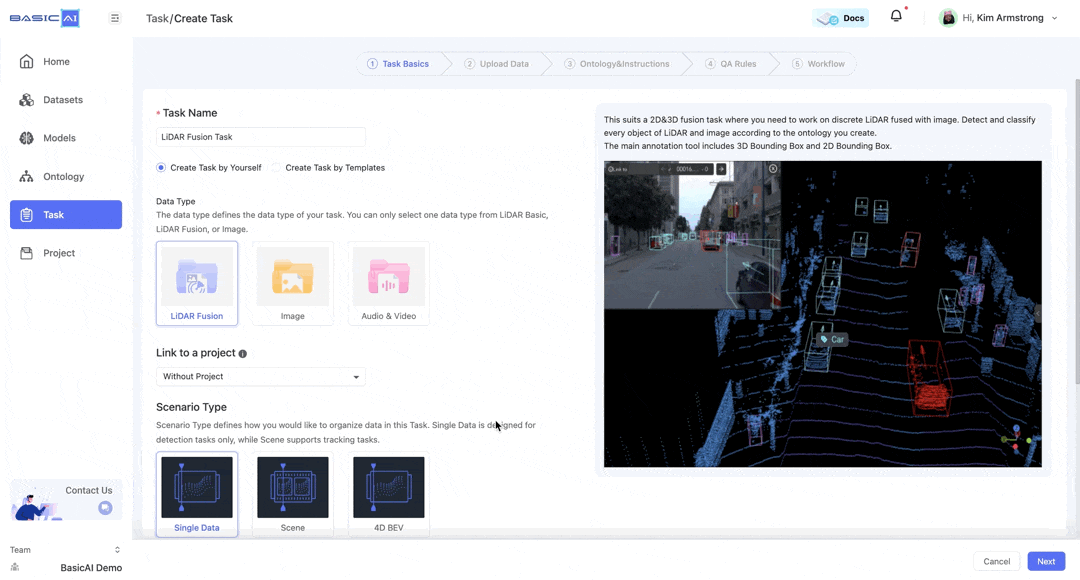
1️⃣ Task Basics
* Enter the task name and choose Create Task by Yourself.
- Select the data type as
Lidar Fusionto maintain consistency with the previously uploaded dataset. - Keep the default option
Without Project, as no project is linked to the task.
If needed, you can first create a project in the Project Tab on the sidebar, which represents a higher level of tasks. Tasks and projects can only be linked if they share the same data type.

- Select
Single Dataas the scenario type since this task does not require a tracking ID. - Choose
Instanceas the annotation type, indicating the annotation of data in an instantial manner, such as with a bounding box, cuboid, polygon, etc. - Click
Nextto proceed to the next stage.
For detailed instructions on creating tasks by templates or exploring other available options, please refer to Create.
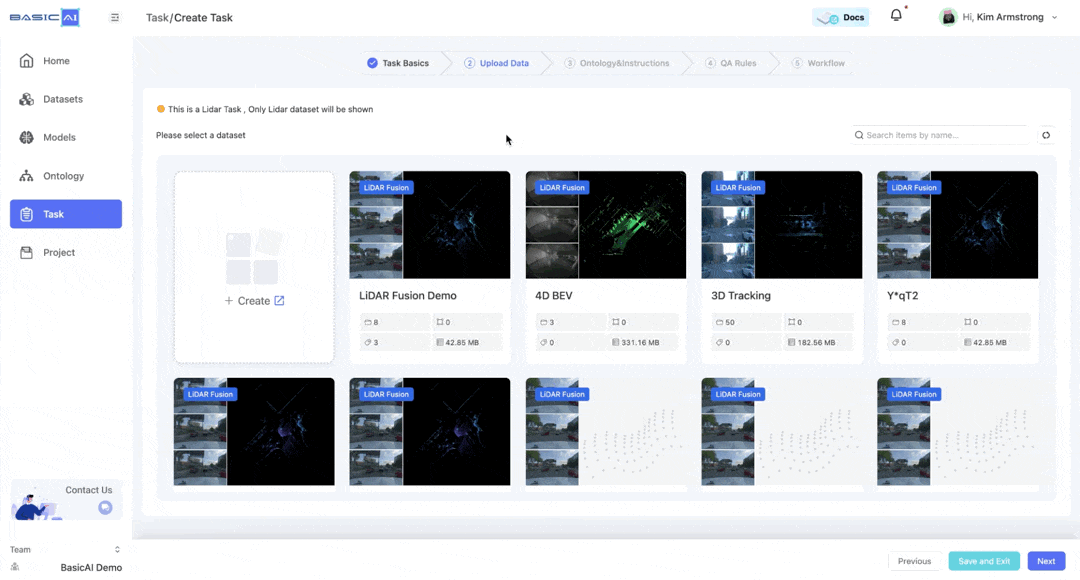
2️⃣ Upload Data
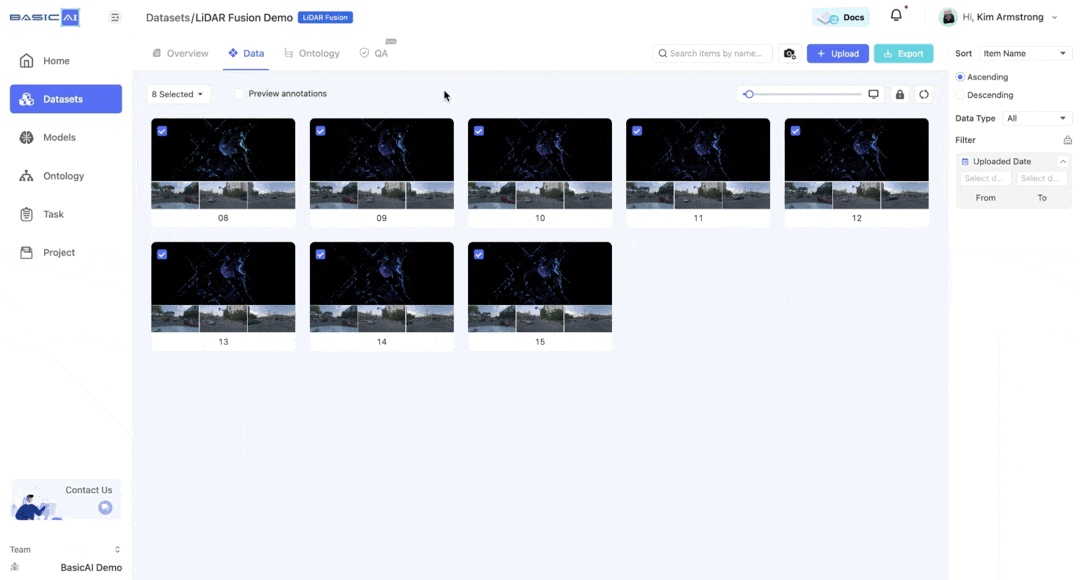
* Choose the previously uploaded dataset and click + Add to add data to this task.
- Select all the data and click the
Confirmbutton. The data will be added successfully.
You can also upload pre-labeled results and data from a new dataset.
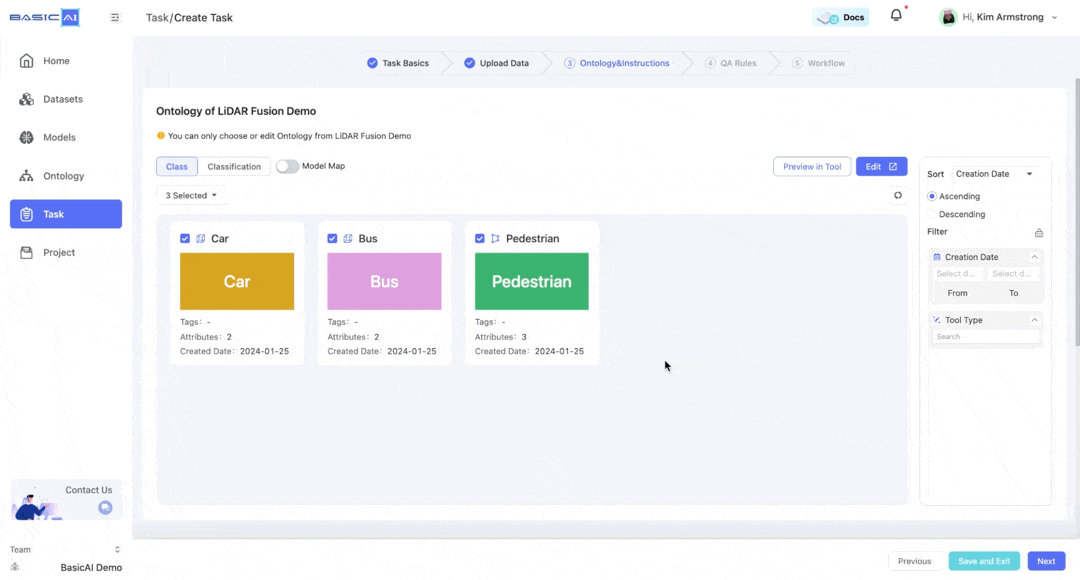
3️⃣ Ontology & Instructions
* Choose or edit the dataset's ontology (class and classification).
- Provide attachments (in PDF format) or instructions for standardizing the team's work. (optional)
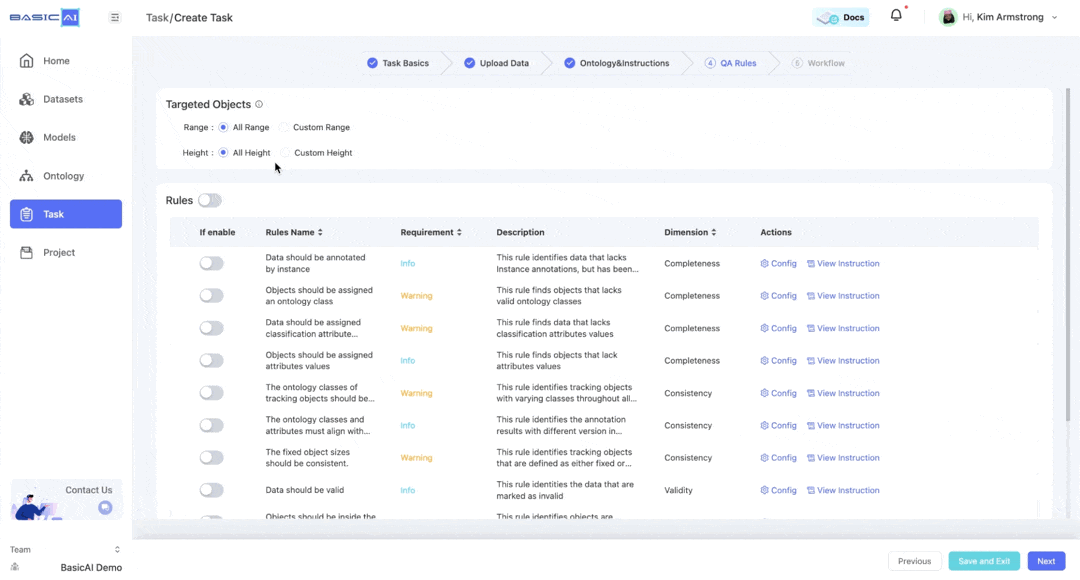
4️⃣ QA Rules (Optional)
* Set up QA rules for targeted objects. Once enabled, these rules will be automatically applied to the tool.
5️⃣ Workflow
* Distribute the task as One Task.
- Assign annotation and multiple review stages to team members. The
Claim SizeandMax Claim Durationcan be customized. - Assign the admins and inspectors to this task.
In addition to your team members, you can also assign different roles to yourself and partners.
For more information on role permissions, please refer to the Role & Permissions document.
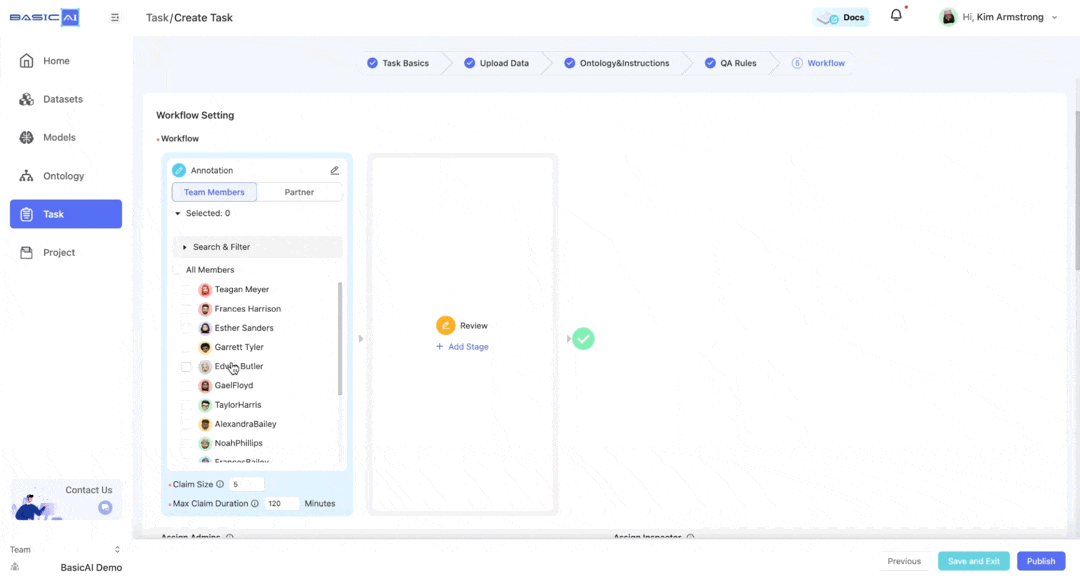
- Furthermore, configure settings related to the task. Find more details on Workflow Setup.
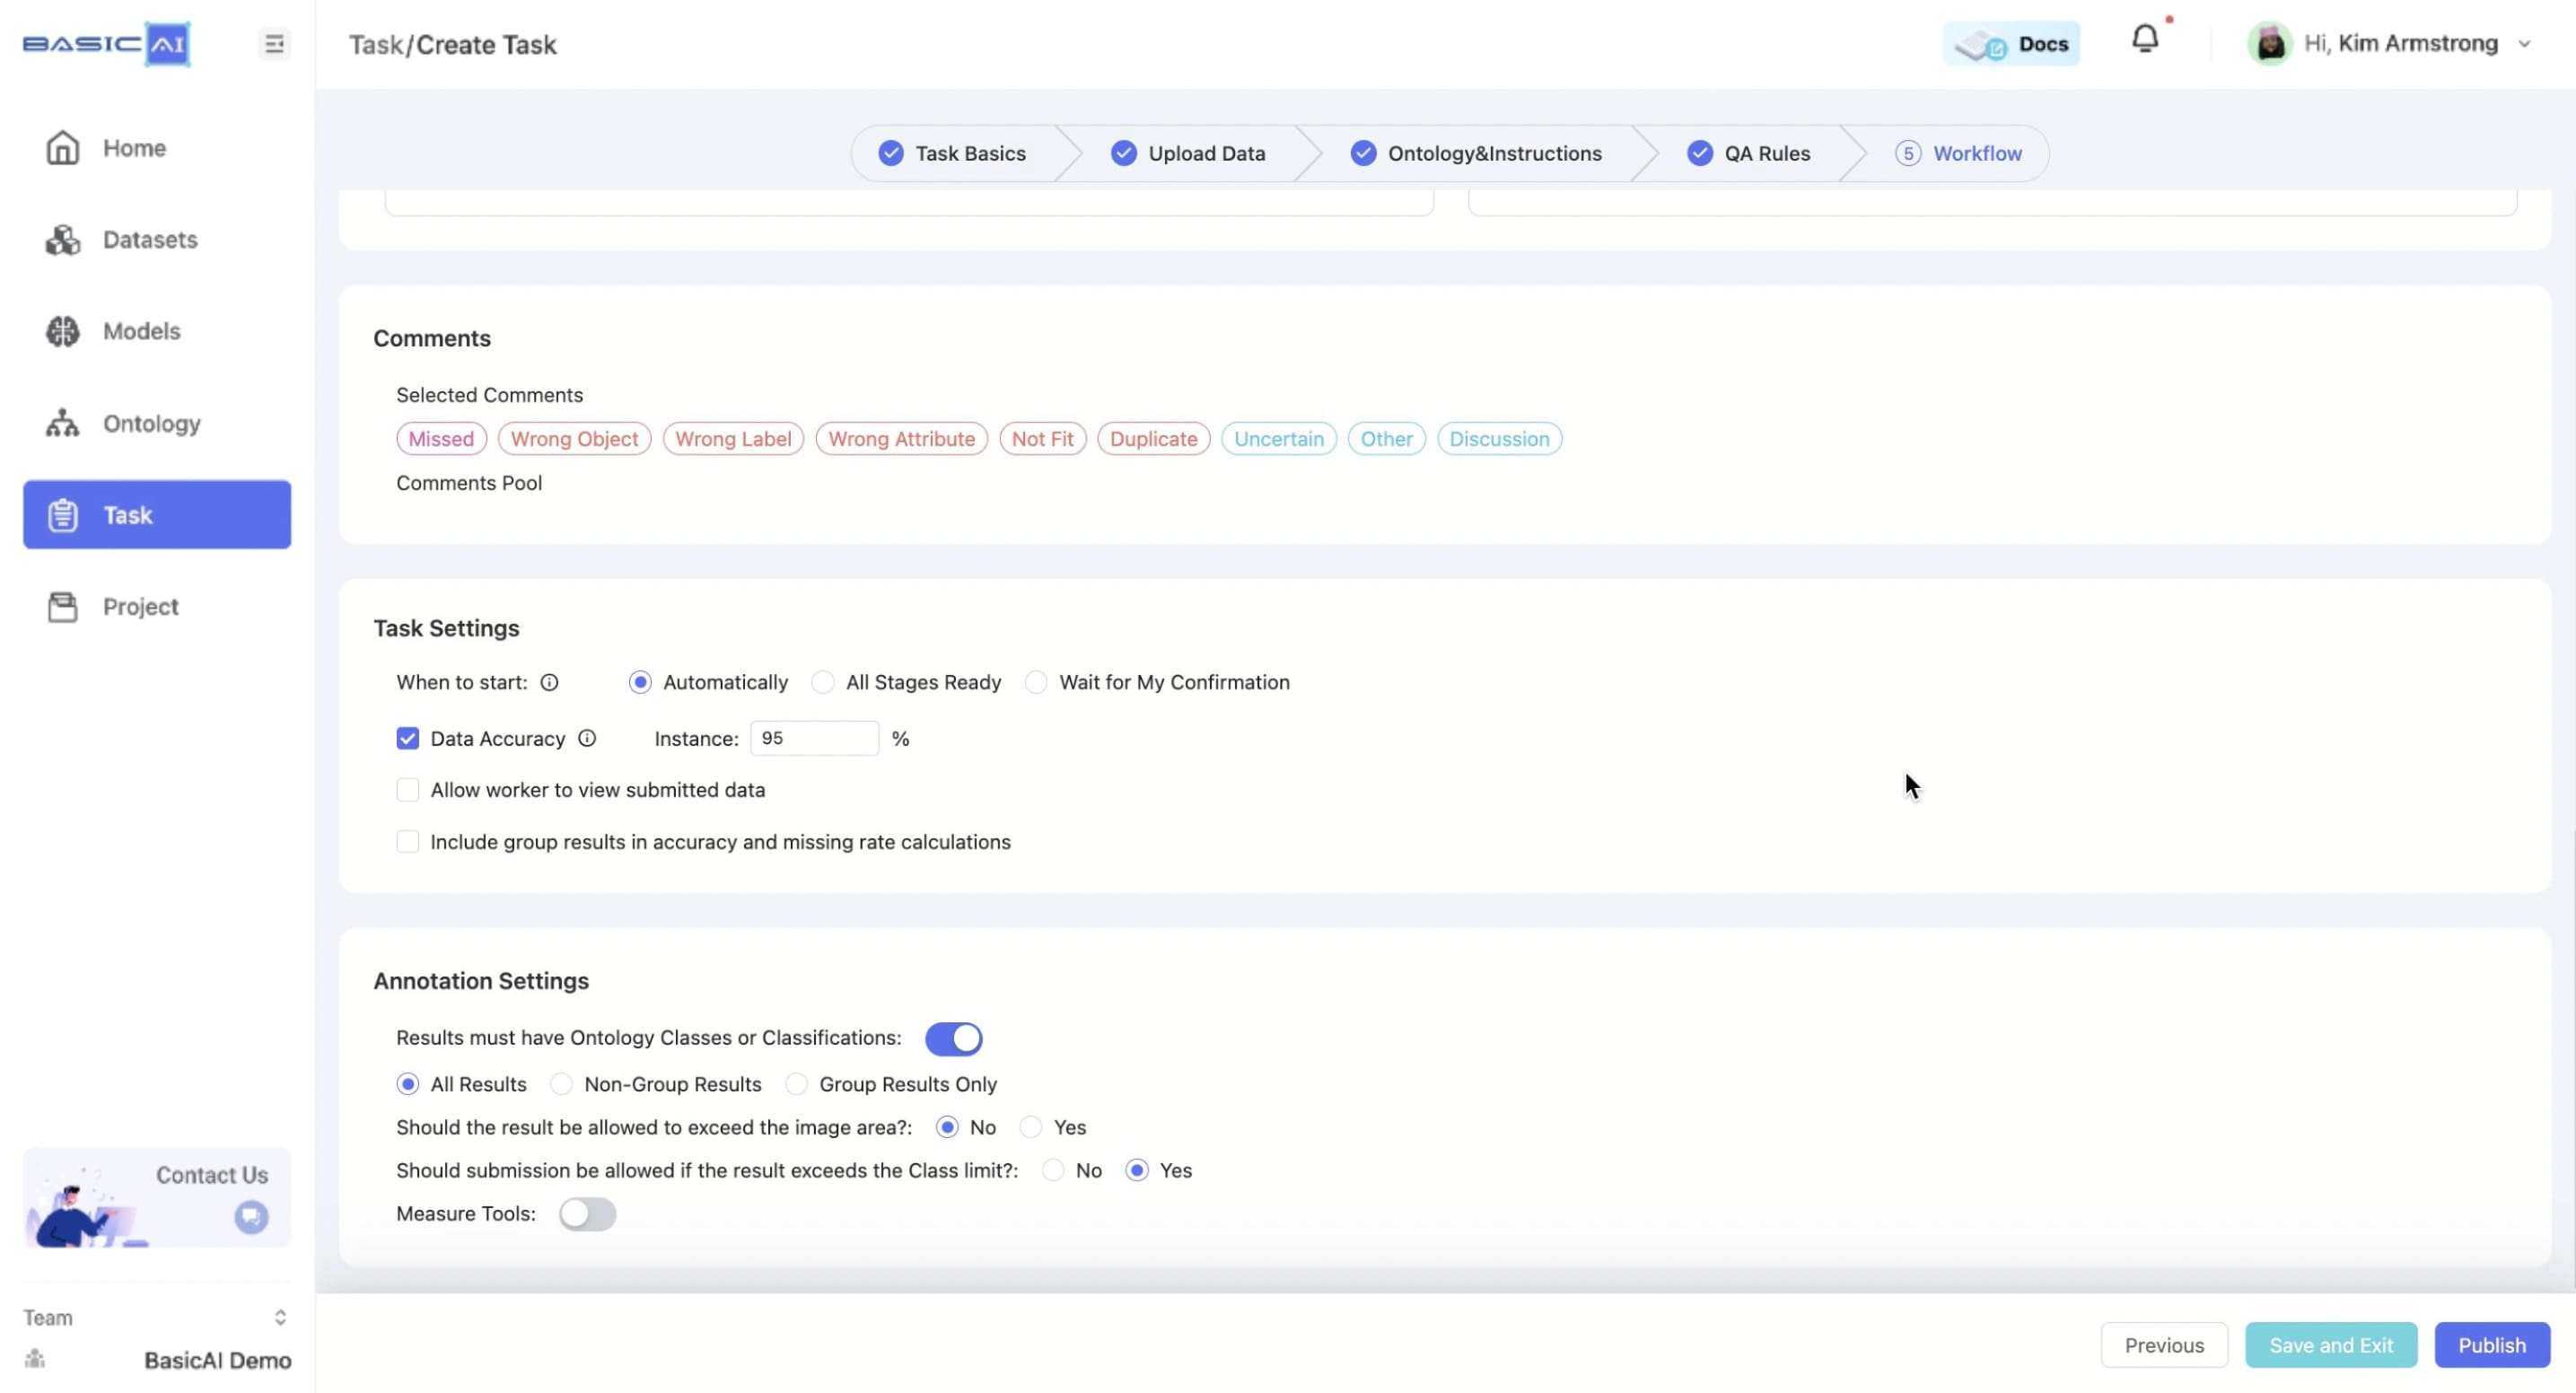
- Once the setup is complete, click the
Publishbutton!
For more details about creating tasks, please refer to Create.
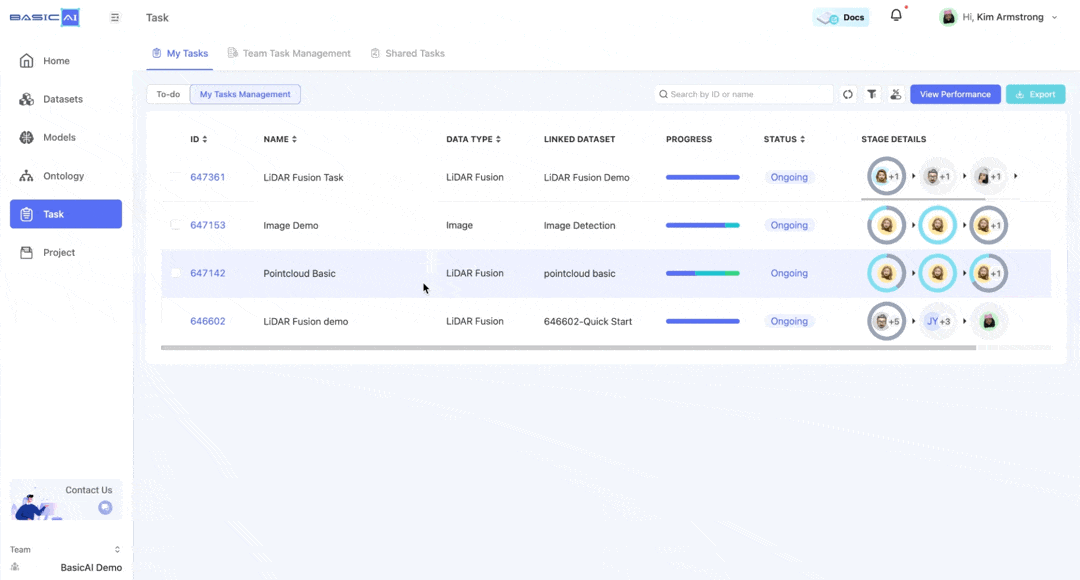
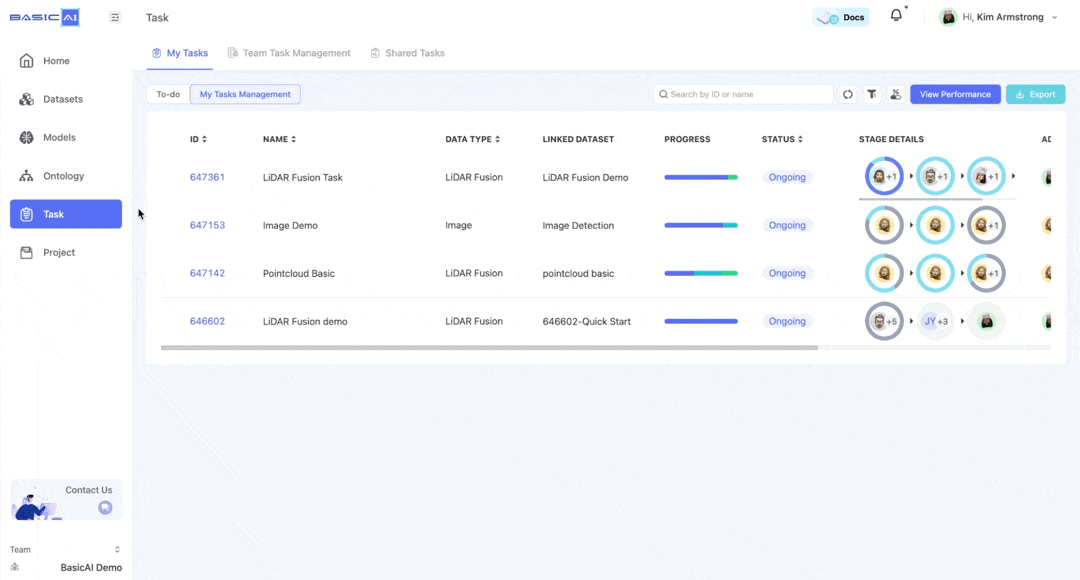
Step 4: Manage Your Task
After publishing, team members can view their assigned tasks in the My Tasks list.
Annotators, reviewers, and inspectors are able to locate tasks in the To-Do section and perform their respective actions.
The project manager can manage tasks in the My Tasks Management section.
The Team Task Management list displays tasks for the entire team, while the My Task Management section only shows tasks assigned to you as a project manager.
- Quickly preview task information, including ID, progress, status, and stage details. The displayed information can be customized by clicking on the setting icon.
- By clicking the
...button in the list, you can pause/close/copy/delete the task.
| Actions | Description |
|---|---|
| Pause | The status will be changed to paused . All your workers cannot access this task until you restart it. |
| Close | ‼️ Once closed, the task will NOT be able to restart. All unaccepted annotations will be discarded. |
| Copy | Copy the task with customized settings. After refreshing, you can find the new one in the Team Task Management list. |
| Delete | ‼️ Once deleted, all your data related to this task, such as comments, rejections, statistics, etc., will be removed. Your original data and all the annotations that have been accepted will NOT be removed. |
- Select multiple tasks to carry out bulk operations, like adjusting task status, configuring workflow, and enabling QA.
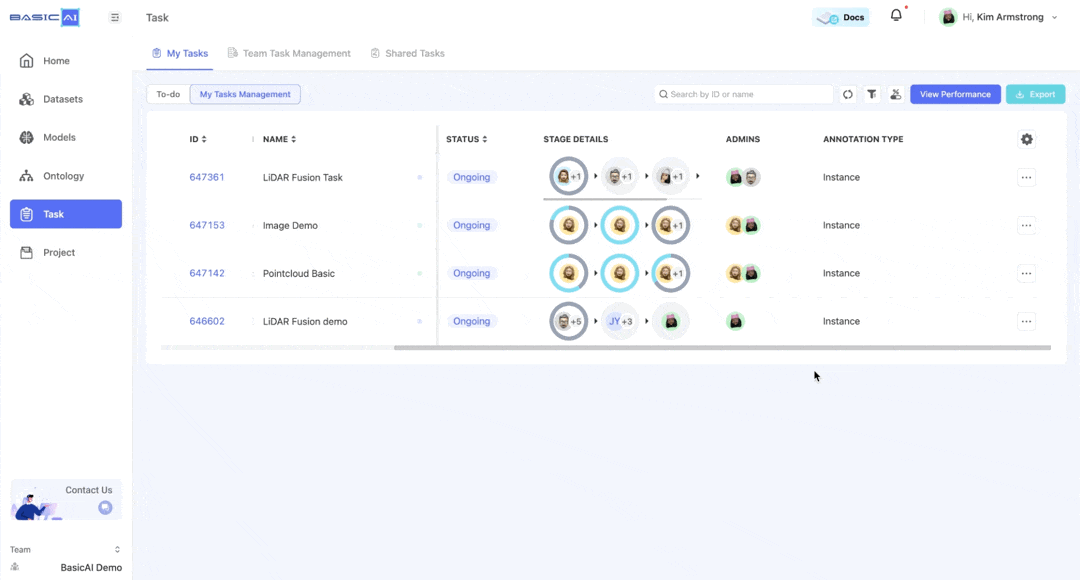
- Click on a task to access its details page. From there, you can view the task overview, manage data results, perform auto QA, review performance, and edit task settings.
For more details about managing tasks, please refer to Manage.
Step 5: Curate Results
Once the inspectors have accepted the data, the annotation results will be integrated into the dataset. You can view them in the Datasets.
- Select the dataset and click the
Viewor Annotate button on the data card to access the tool page. - Load annotation results from different sources (specific tasks, model runs, or without tasks) in the top right corner. You can compare, analyze, and modify them with ease.
Step 6: Export Results
Export the annotation results from the dataset:
- Select the data (entire all or a portion) and click the
Exportbutton in the top right corner. Click theCreatebutton to set up the export. - Configure the ZIP architecture, the source, and the format of the annotation results.
- Click the
Createbutton to download to your local drive. Alternatively, you can save to the cloud by enabling theCloud Storageoption.
It also supports exporting intermediate data from the Task and Project Tab on the sidebar, which enables you to filter the data according to the workflow status.
For more details about exporting, please refer to Export.
Updated about 1 year ago