Object Detection & Tracking - Image
Guide for Instance Annotation Mode in Image Tool
Guides on object detection and tracking with BasicAI Image Tool, an all-in-one smart data labeling platform.
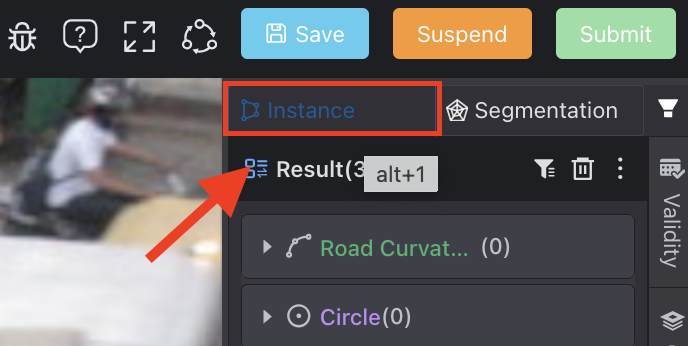
To detect objects on Image Data or track them in a Scene (frame series), you need to choose Instance (Alt+1) in the Mode Switch.
1. Object Detection
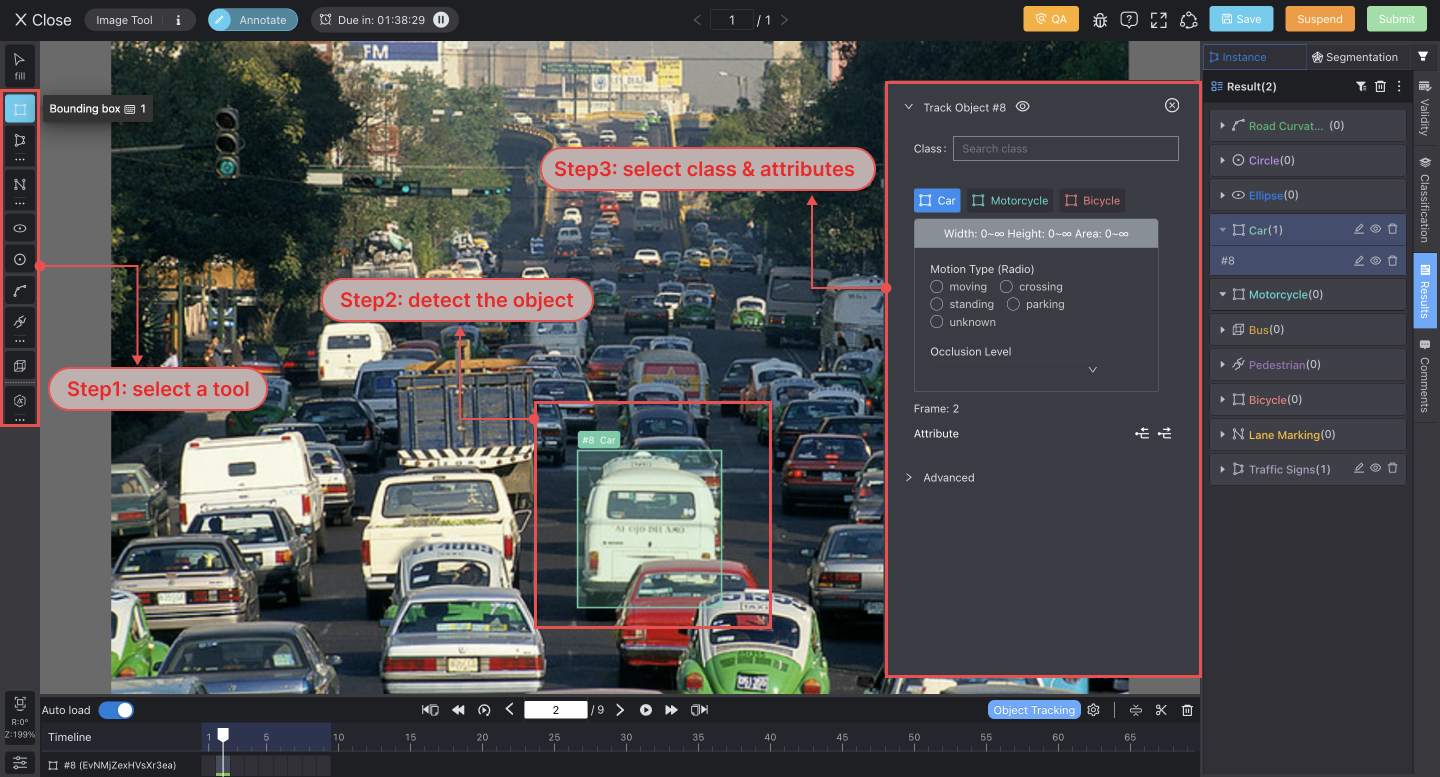
The object detection process generally involves selecting annotation tools from the toolbar, drawing on the image data, and then choosing the object's class & attributes.
For specific instructions on various tools, please refer to the Tool Guide page.
Smart Editor (Model)
In addition to manual annotation using tools, you can also run models to enhance efficiency.
Click ... below the Smart Editor icon to configure it. You can choose the model, whether to predict all classes in it or set up the confidence and classes manually. Then, apply the settings and run.
Click the Smart Editor icon again to display the AI annotation results. You may need to assign classes & attributes to them manually.
Class & Attributes
After detecting an object, you need to choose its Class and provide the corresponding Attribute information. Press T to show/hide classes and attributes pad.
Exercise caution when changing an object's class to avoid losing its attributes.

First, select an appropriate Class for the object. You can use the search function to find the Class quickly.
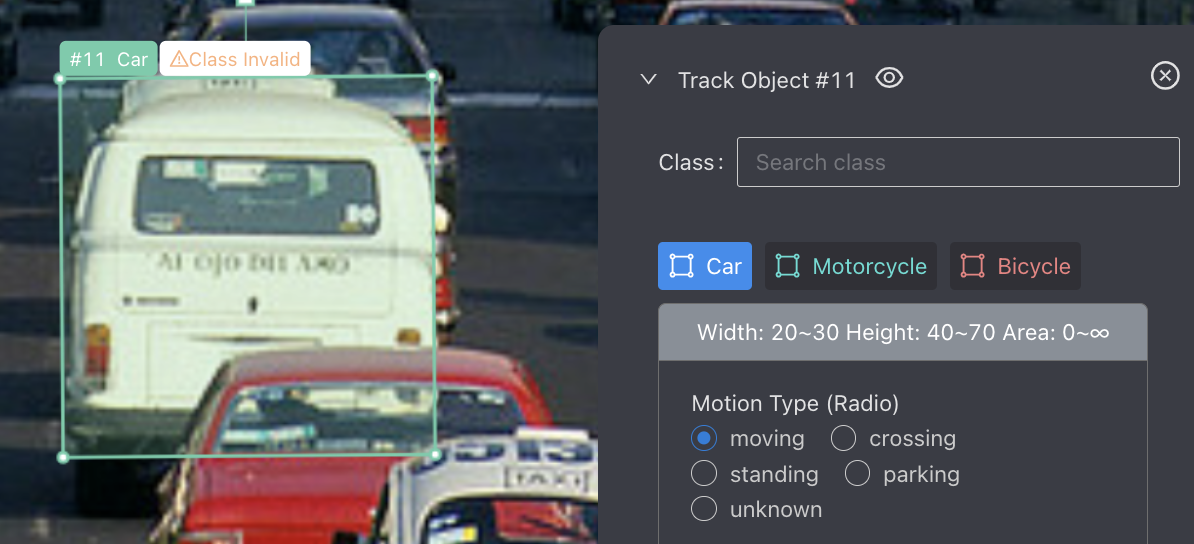
Below the class tag displays its constraints. A "Class Invalid" error appears if the result fails to meet these limits.
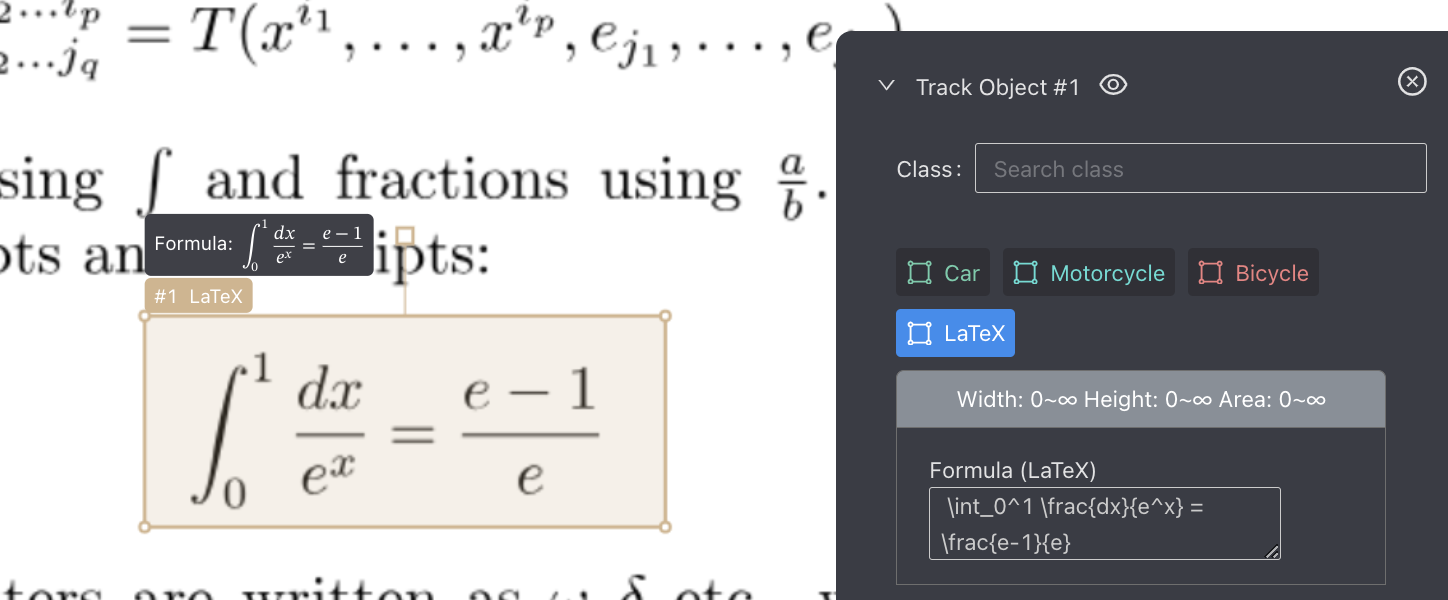
Then, fill in the object's Attributes. There are five input methods: radio, multi-selection, dropdown, text, and rank.
Sometimes, you may need to input LaTeX expressions in the text box. Enter the formula, and the mathematical formula can be generated in real time. Prompts will be given if the formula is entered incorrectly.
You can press the hotkey , to preview it.
As for tracking objects in a Scene (series frames), you can either copy attributes from other objects in the same frame or apply the current attributes to other frames of this object.
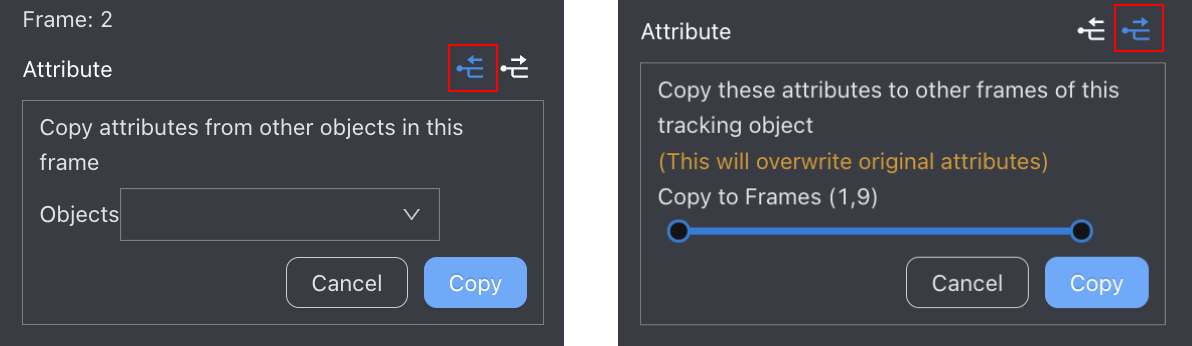
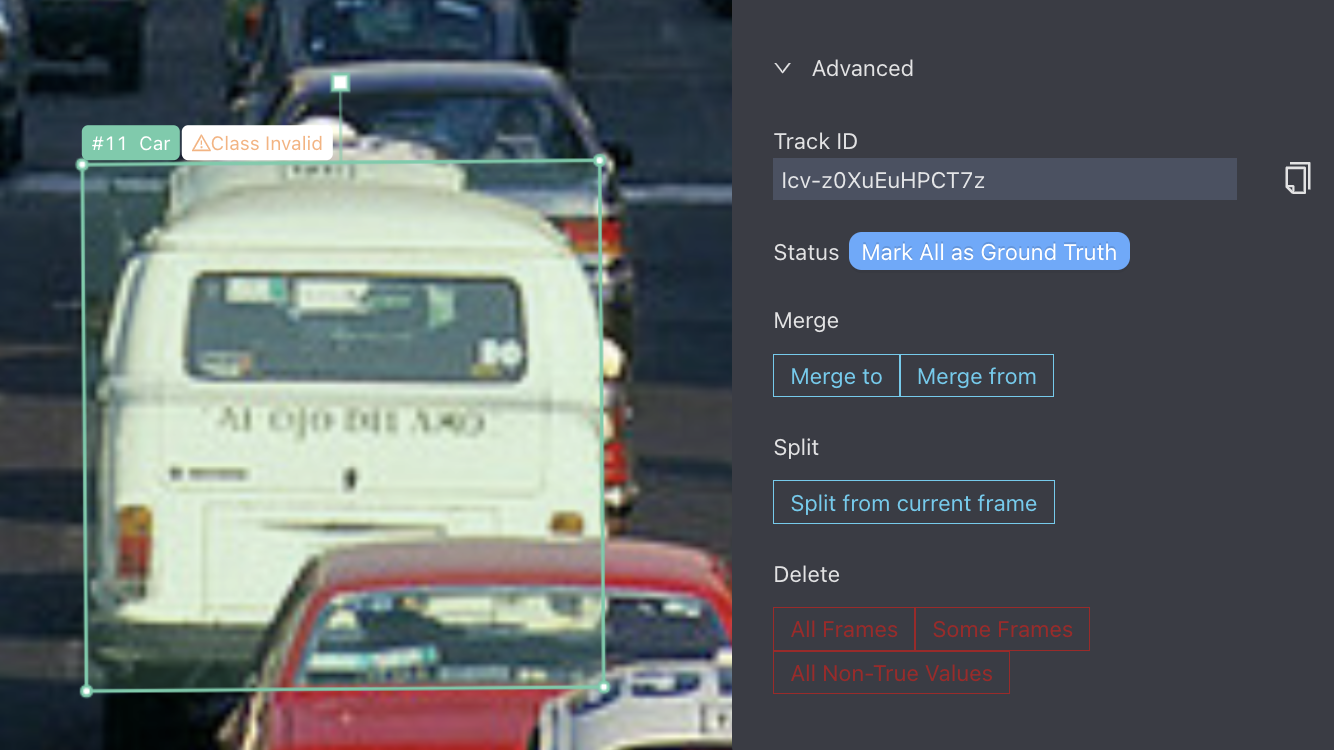
In the advanced section, you can easily update information for the selected object across all frames, including marking all results as ground truth, merging, splitting, and deleting.
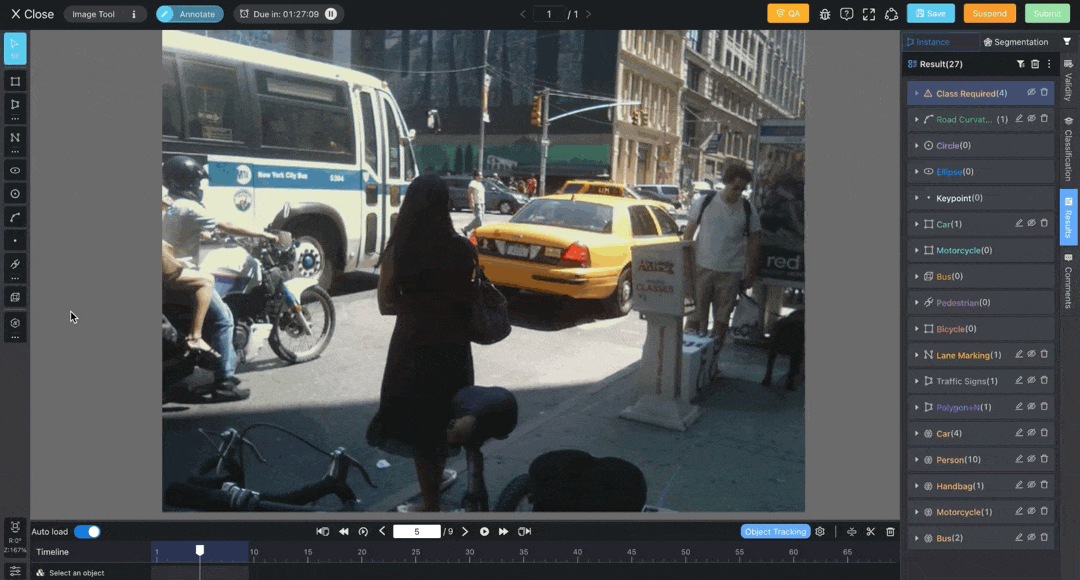
Result Management
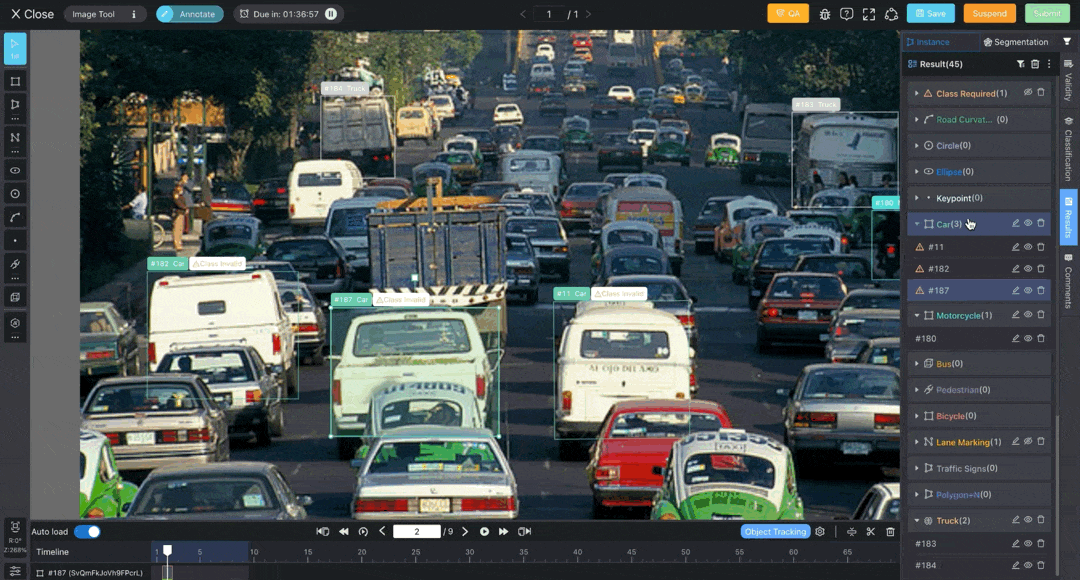
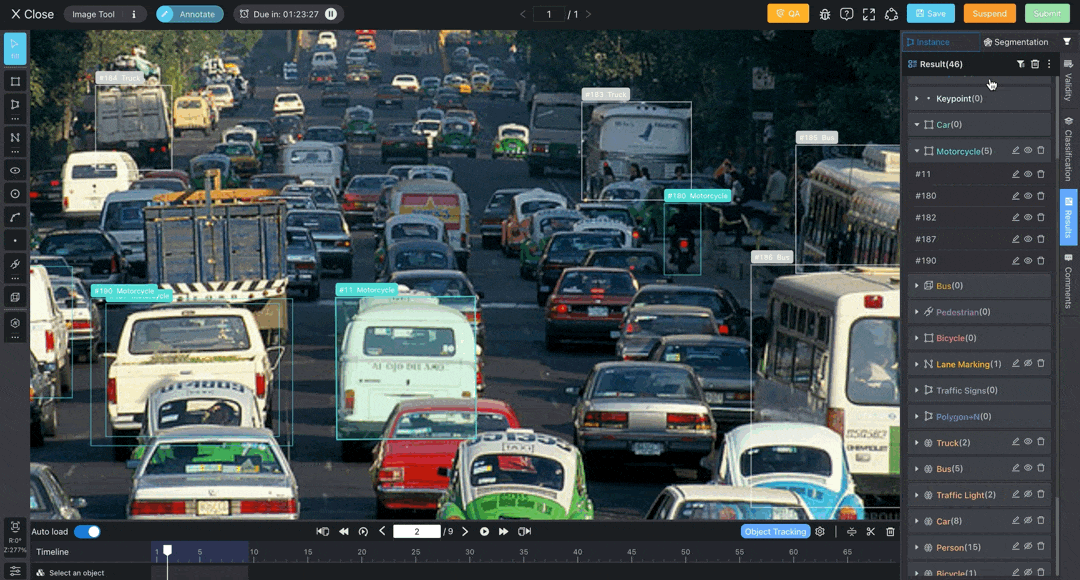
The annotated objects will be automatically numbered and categorized by Class in the Result List. You can click on an object to view or edit it. Press Esc to cancel selection.
Press S to show a single result. Other objects will be filtered while selecting or drawing an object.
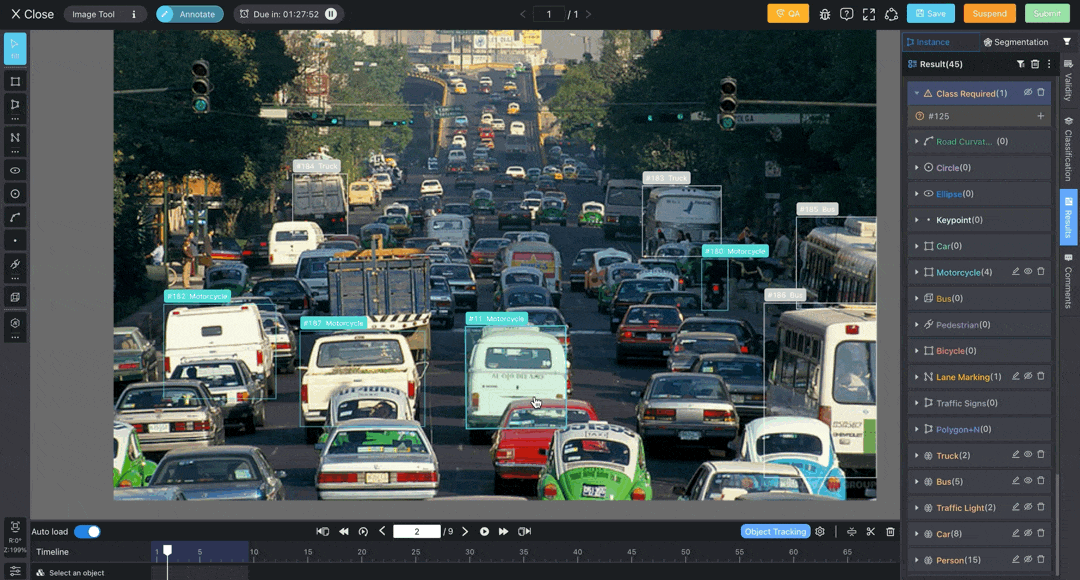
The results will display different validity statuses: model-generated results marked 'No True Value' and manually processed results marked 'Ground Truth.' If an object has been generated but has no result in the current frame, it will be displayed as 'No Object' with a dashed outline on the canvas.
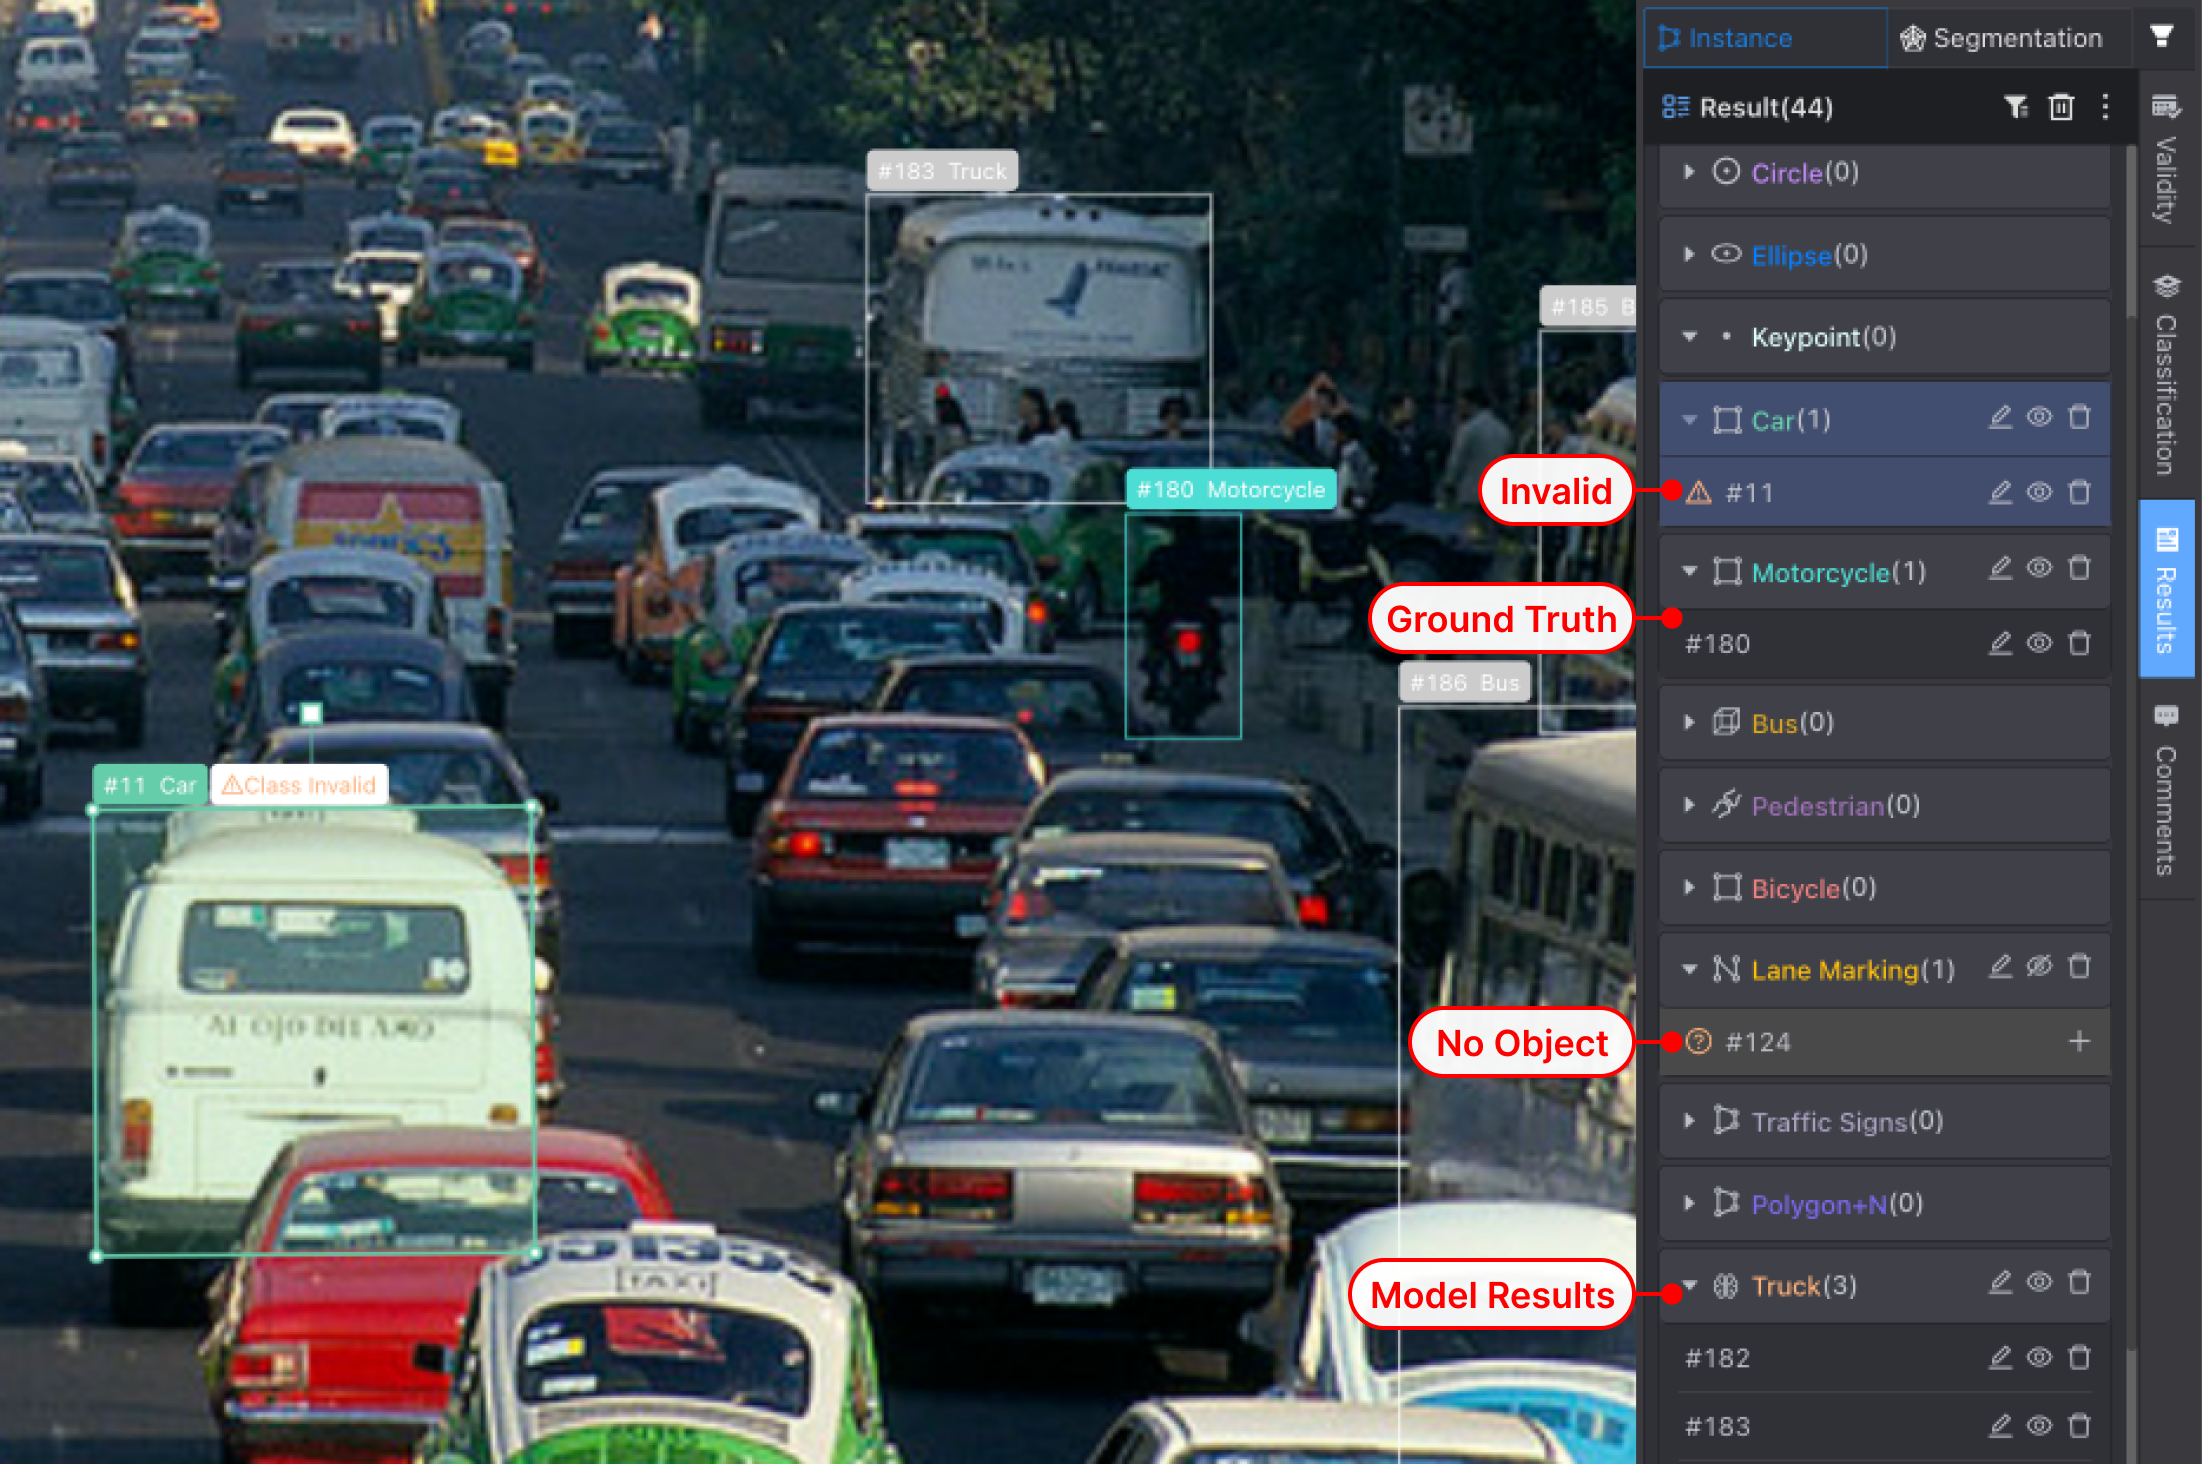
You can edit the entire Class, including quickly deleting objects within it, toggling visibility, filling in attributes in batch, or switching to another Class (the same tool type is required).
At the top of the result list, you can filter results by Class and tool, delete results, and set up result previews.
Validity, Classifications, and CommentsOn the right of the results list, you can switch to the Validity, Classifications, and Comments lists.
These properties and comments are specific to the entire Data or Scene. For more details, you can visit the Annotation Tools Commons page.
2. Object Tracking in Scene
When annotating a Scene, you can track objects across frames in the Timeline area.
Auto Object Tracking
When you select an object of interest within a labeled frame and then switch to another frame, the object's position will be shown with a dashed line, matching the position in the previous labeled frame.
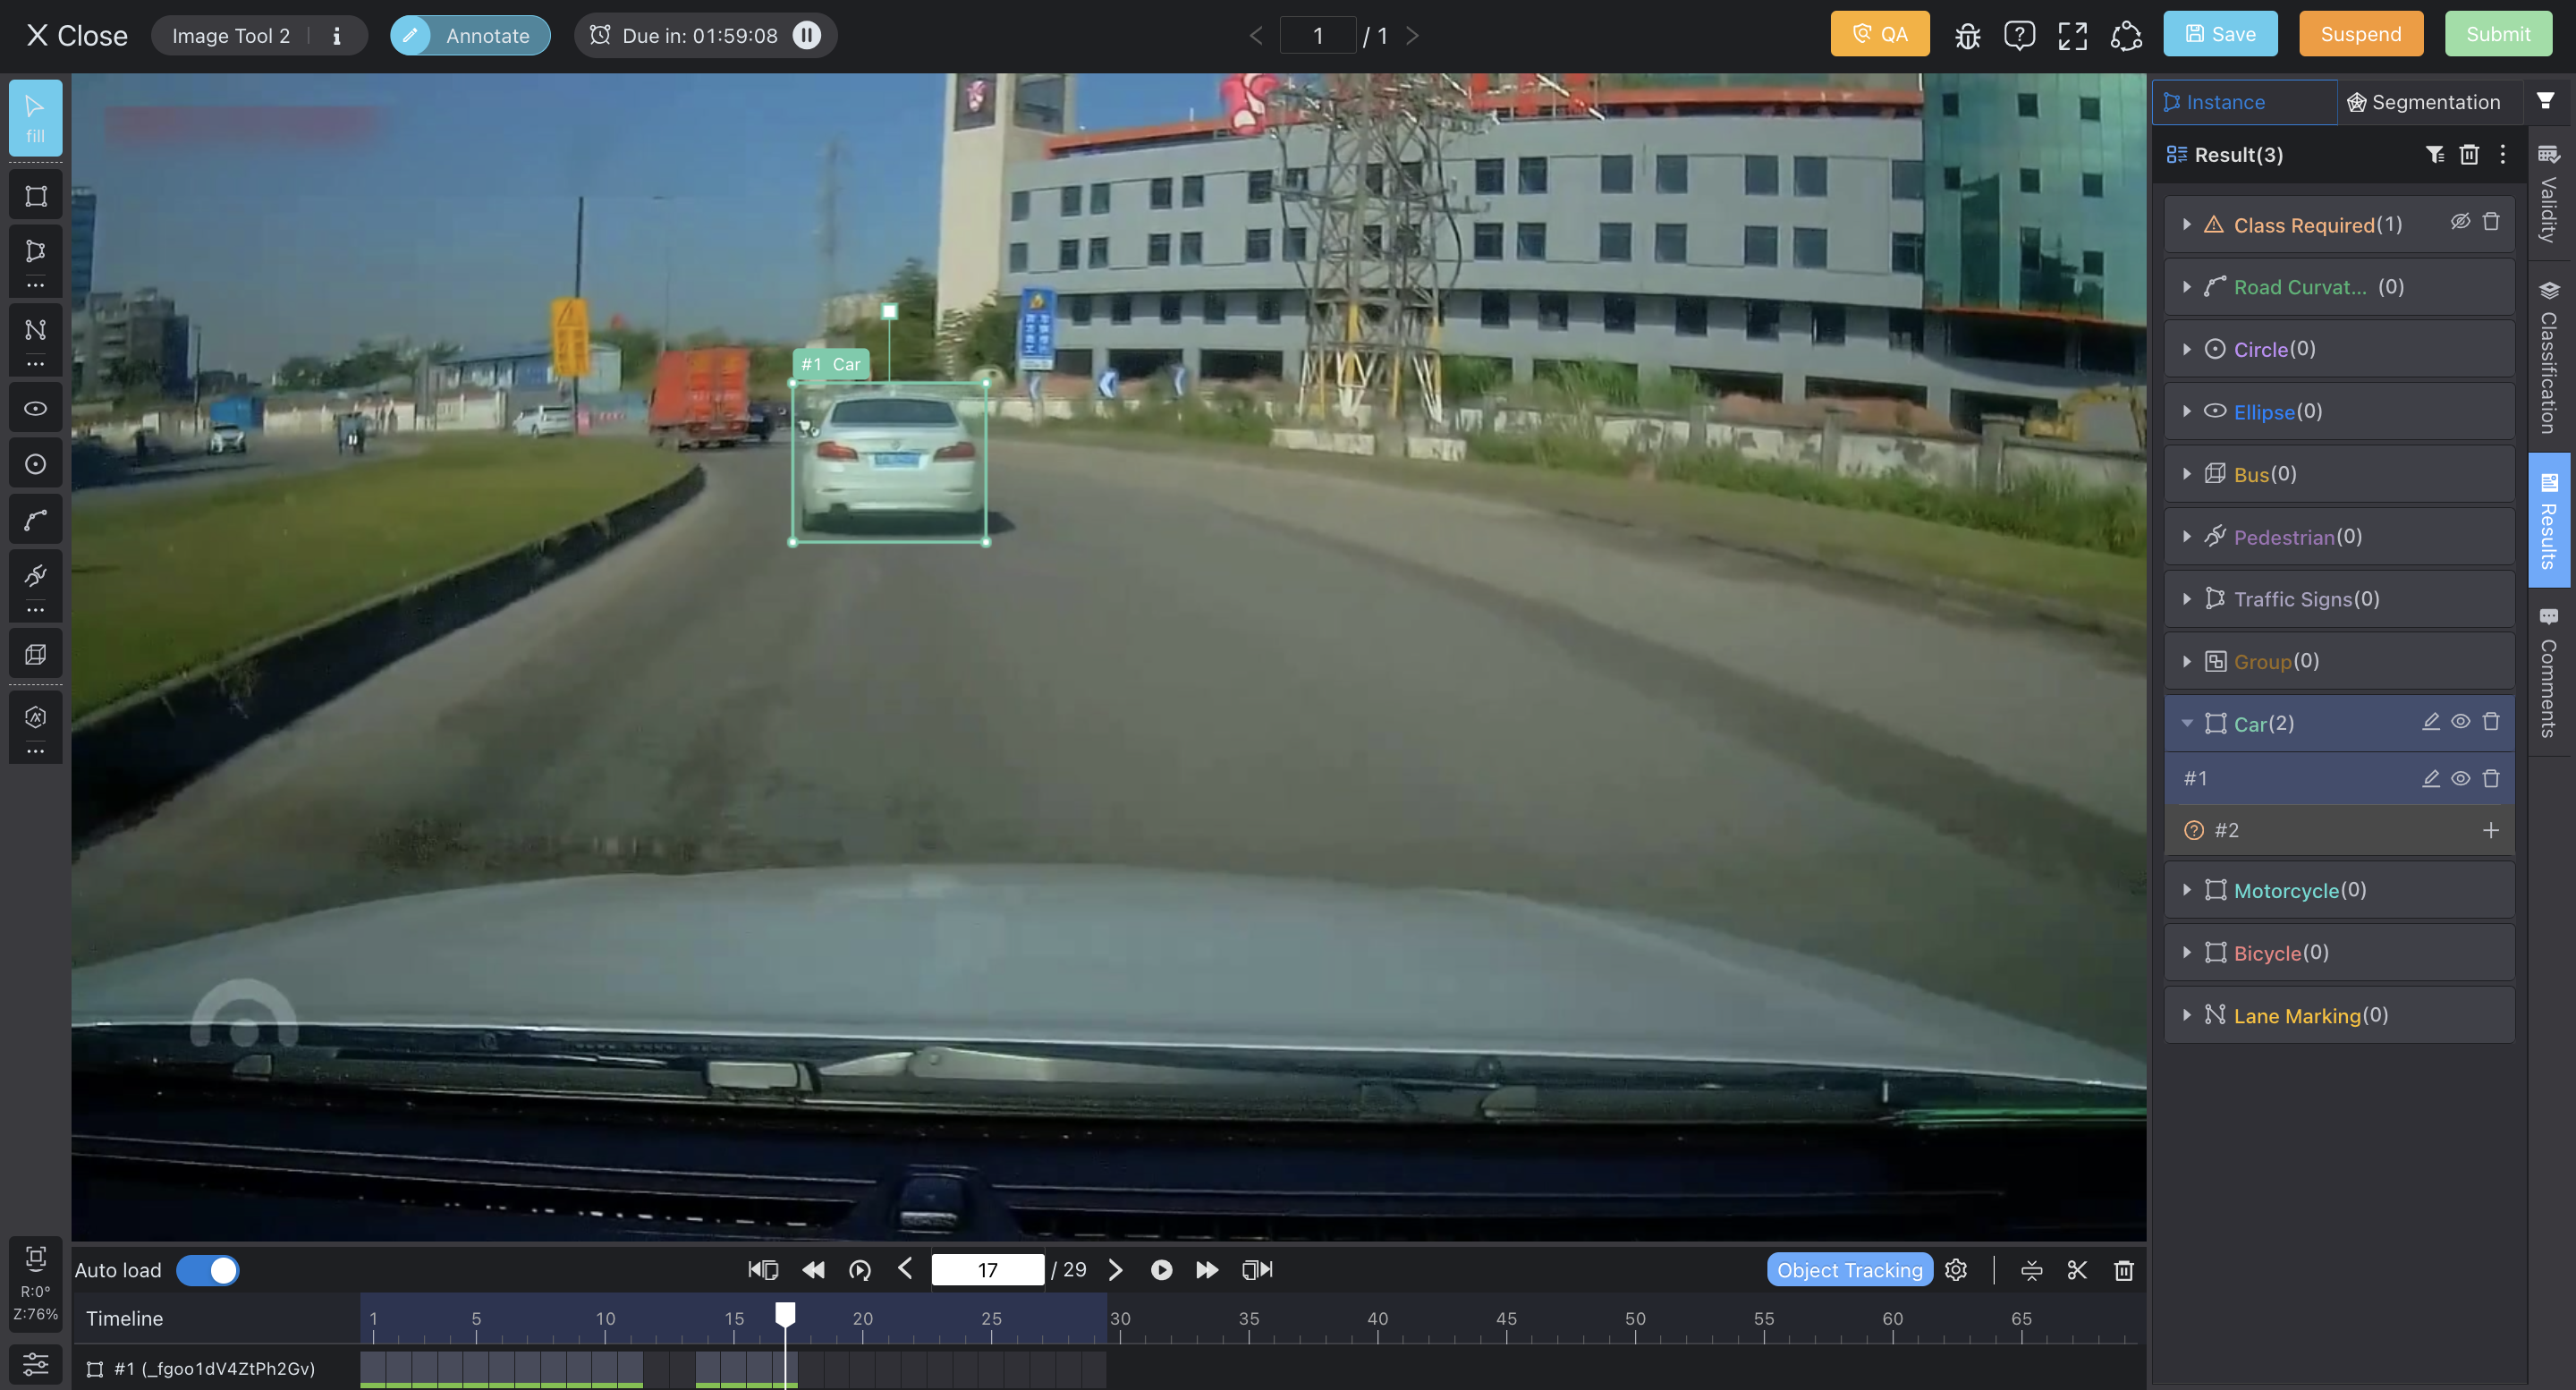
object labeled

object predicted
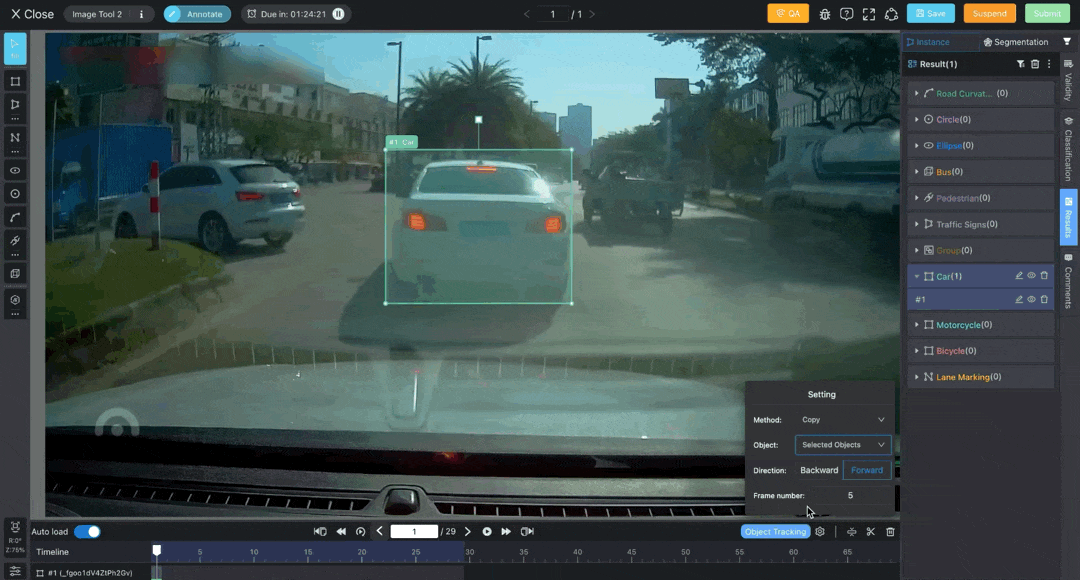
You can also run the auto object tracking. Configure the process firstly. BasicAI Image Tool currently only supports the Copy method.
- Copy: Duplicate the result to other frames with identical positions.
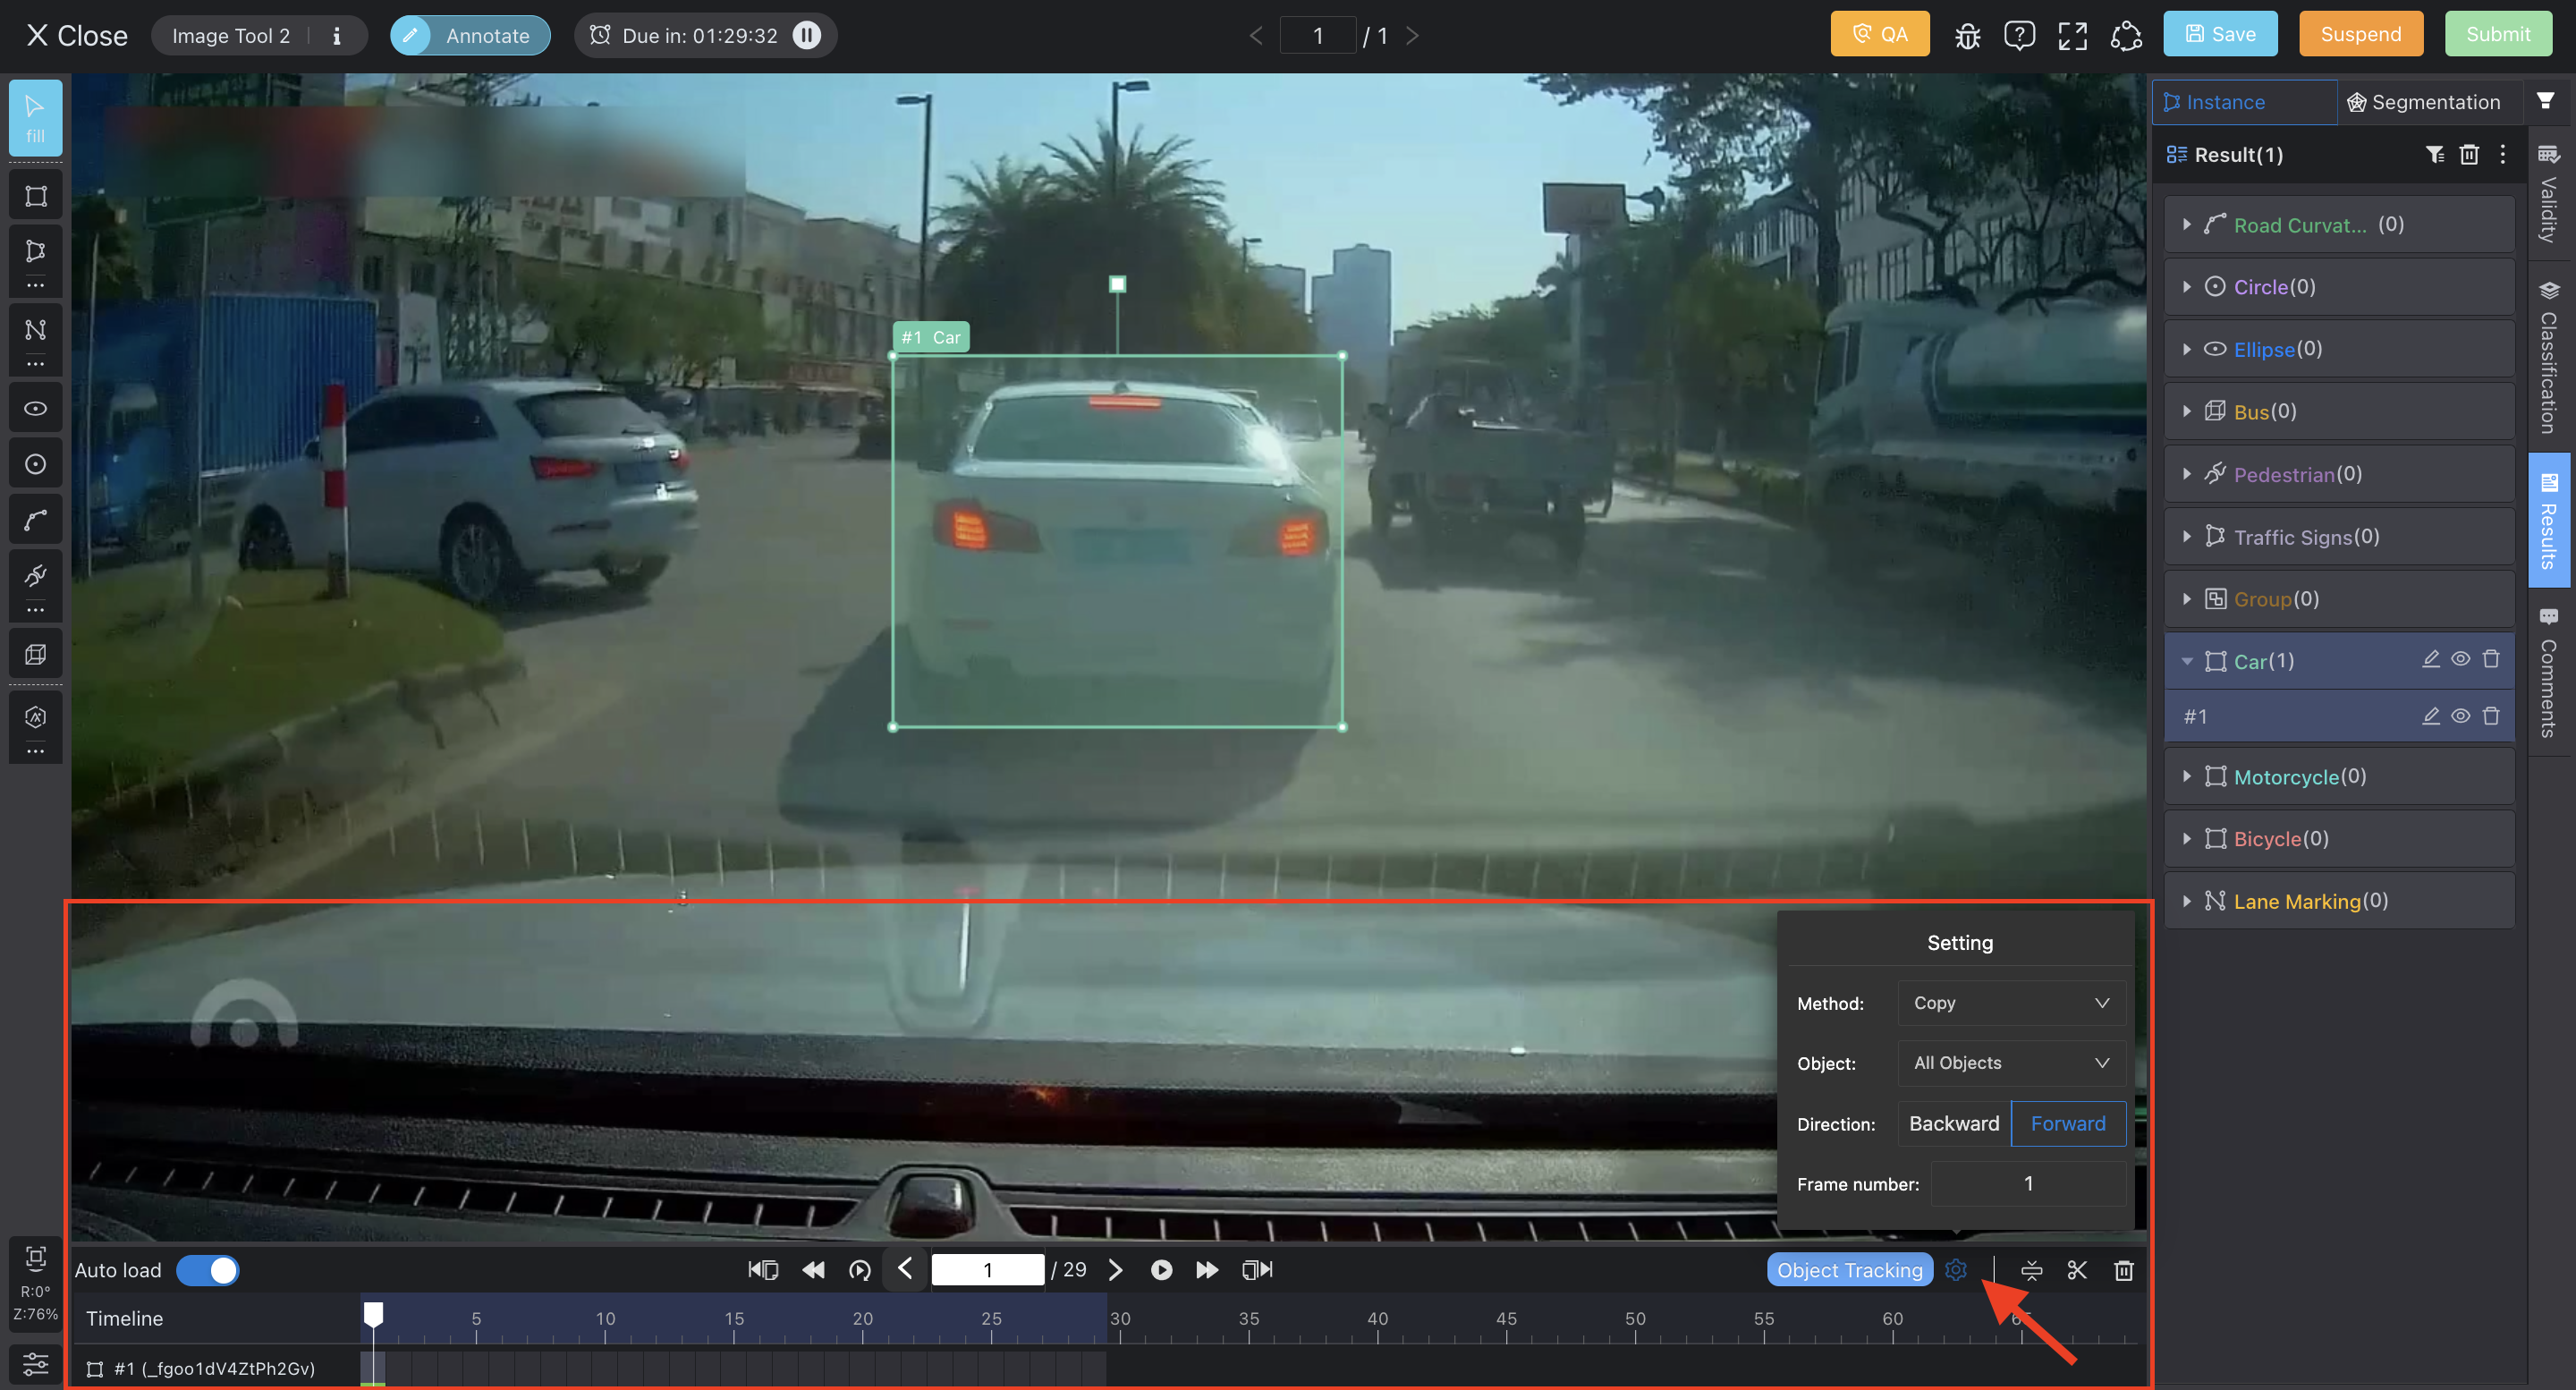
You can choose options for applying to the selected object/all objects, tracking in forward/backward frames, and specifying frame number (Increased runtime for more results and frames).
Then, click the Object Tracking button. The tracking results will be applied to the Image Data across frames after a few seconds.
You will need to adjust the size and position of the object manually in each frame.
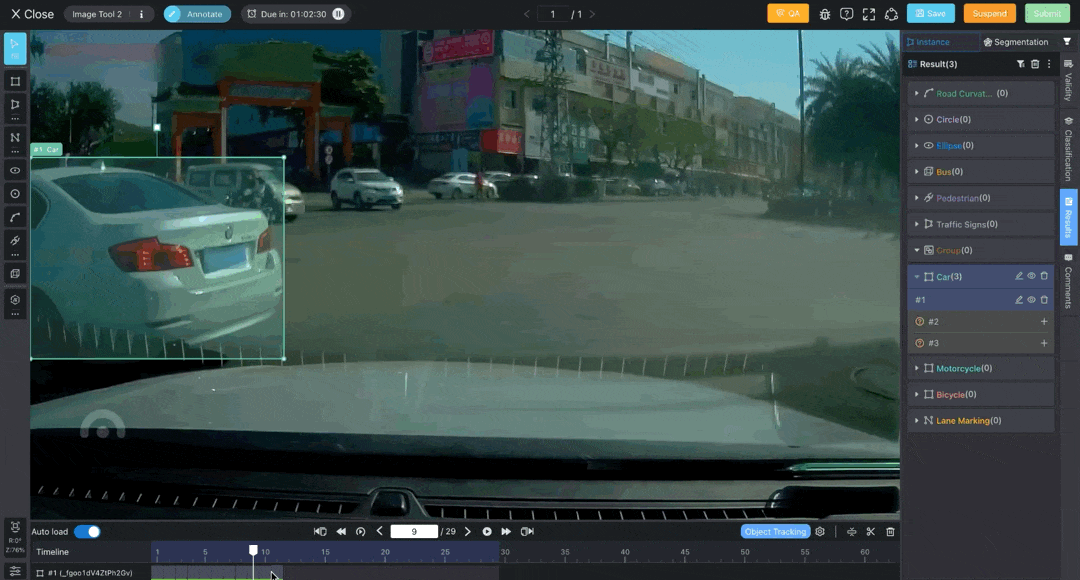
Merge
Select an object (X) and click the Merge icon above the Timeline. Choose the Merge Type and the Target (Y).
- X Merge From Y: Merge Y to X, keeping the Tracking ID and Class of X and deleting Y.
- X Merge To Y: Merge X to Y, keeping the Tracking ID and Class of Y and deleting X.
NOTICE:The frames of X and Y must not overlap.
X and Y must have the same class.
Objects cannot be merged with themselves.
For example, if result #1 (in frames 1-11) and result #3 (in frames 14-17) pertain to the same object, we can merge them to maintain the consistent Tracking ID and Class. Select result #1 and merge from the target #3. Then, result #3 will be deleted, and its information will be merged into result #1.
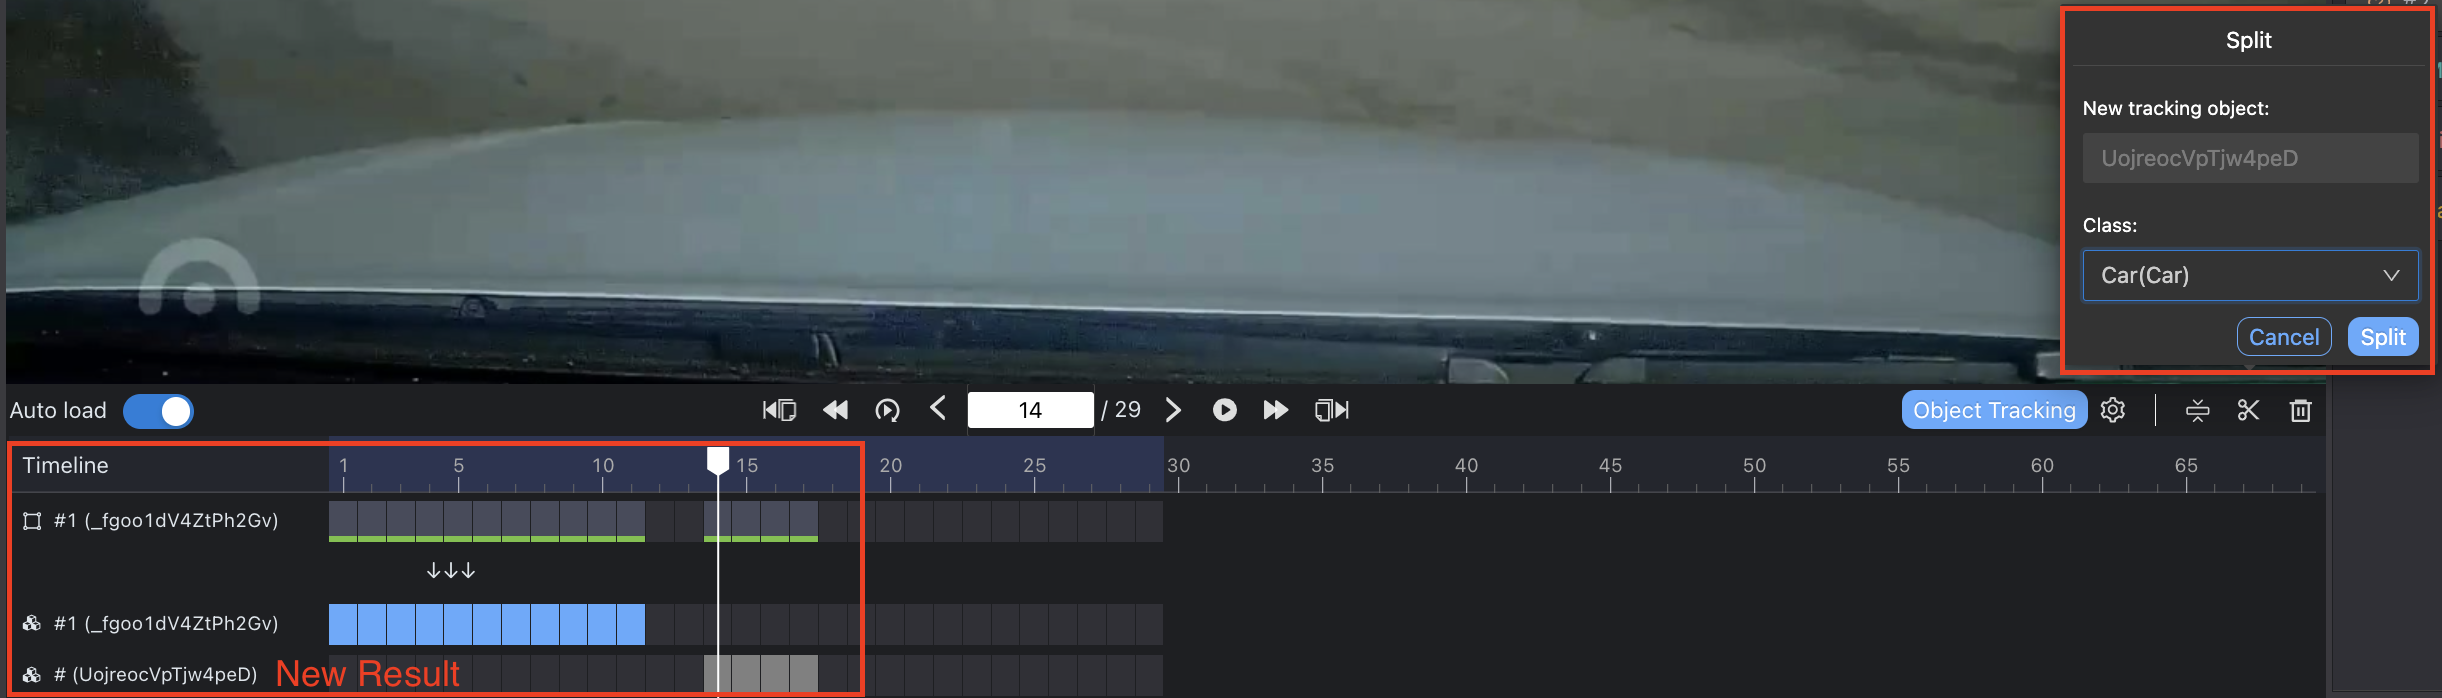
Split
Like the reverse of merging, an object can be divided into multiple parts.
Select an object (X) and choose a specific frame. Click the Split icon and set the Class for the new object (Y). X and Y will be separated from the selected frame.
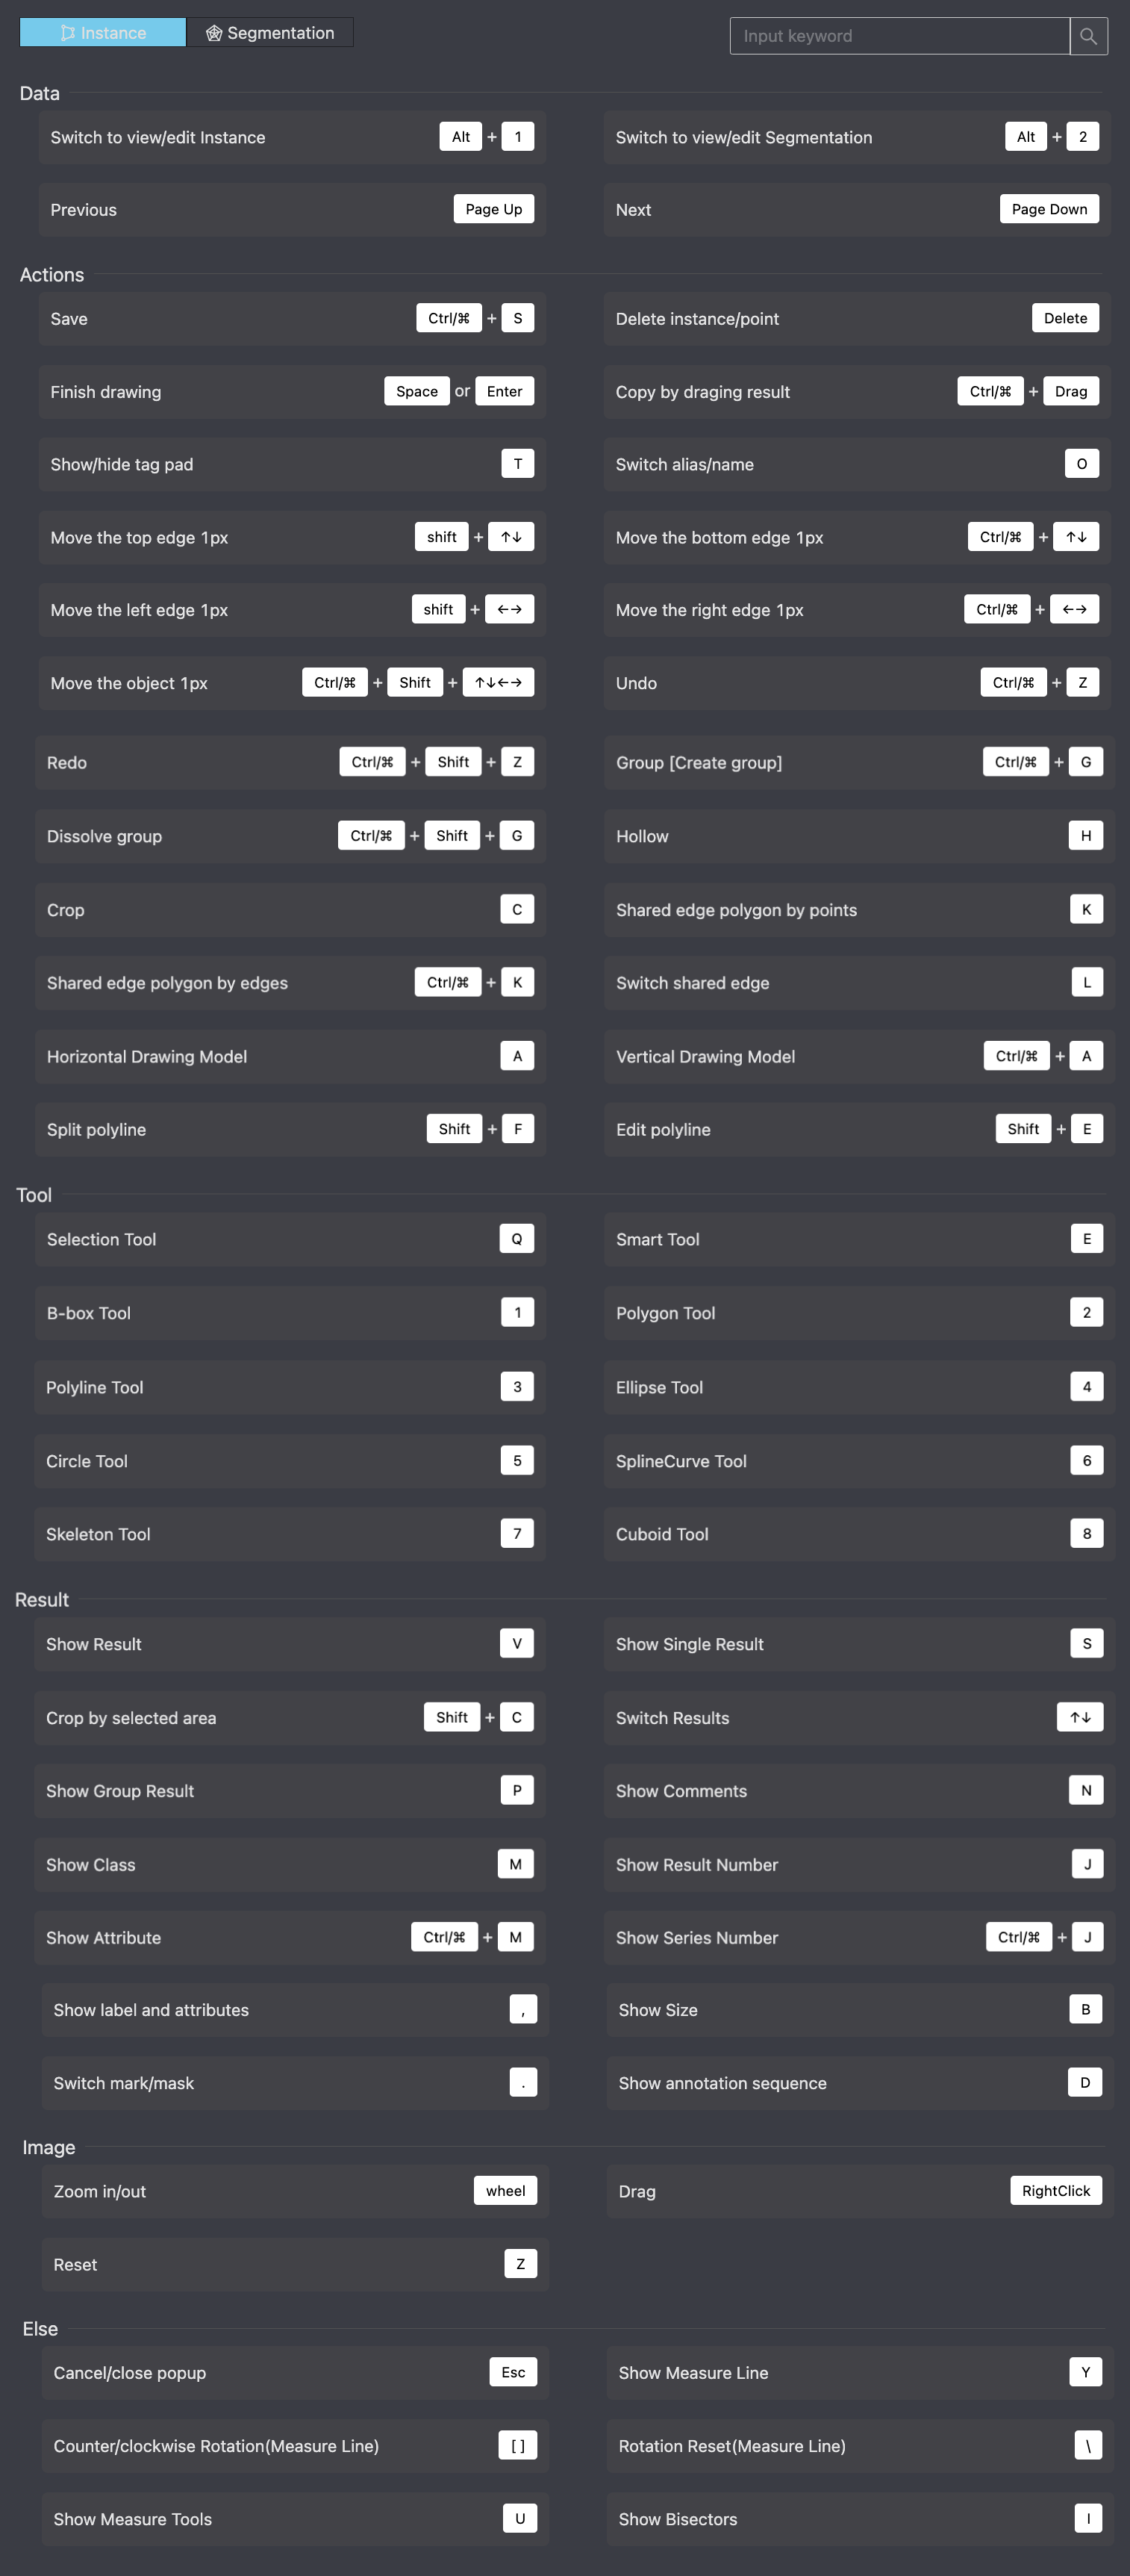
3. Shortcut Keys
Updated about 1 year ago