Manage Projects
On the Project page, click VIEW beside a project name to access the project details and management page. You will find the following tabs under the Project page:
1. Project-Overview
Under the Overview tab of the project details page, a list of project data and progress is displayed, including the following information:
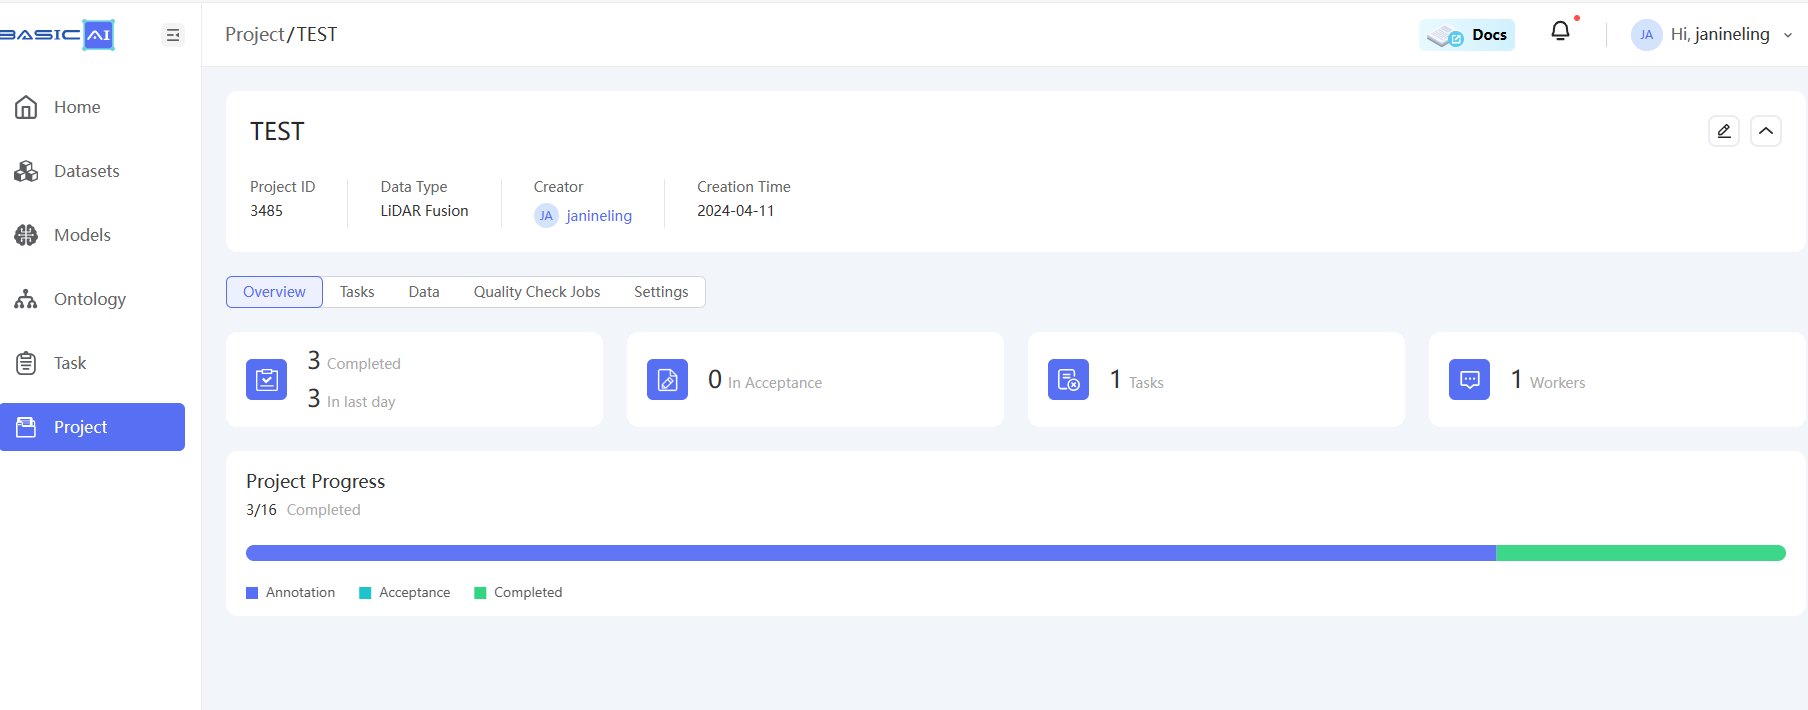
- Total number of completed tasks
- Number of tasks completed yesterday
- Total number of tasks in acceptance
- The number of all tasks included in the project
- The number of workers included in the project
- Project progress bar, including task counts in the annotation or acceptance stage, and completed task counts
2. Project-Tasks
Click the Tasks tab to browse all the tasks contained in the project. If you want to manage tasks in batches, move the mouse to the left check box of the sheet list and select the task ID. A toolbar will appear at the bottom of the page.
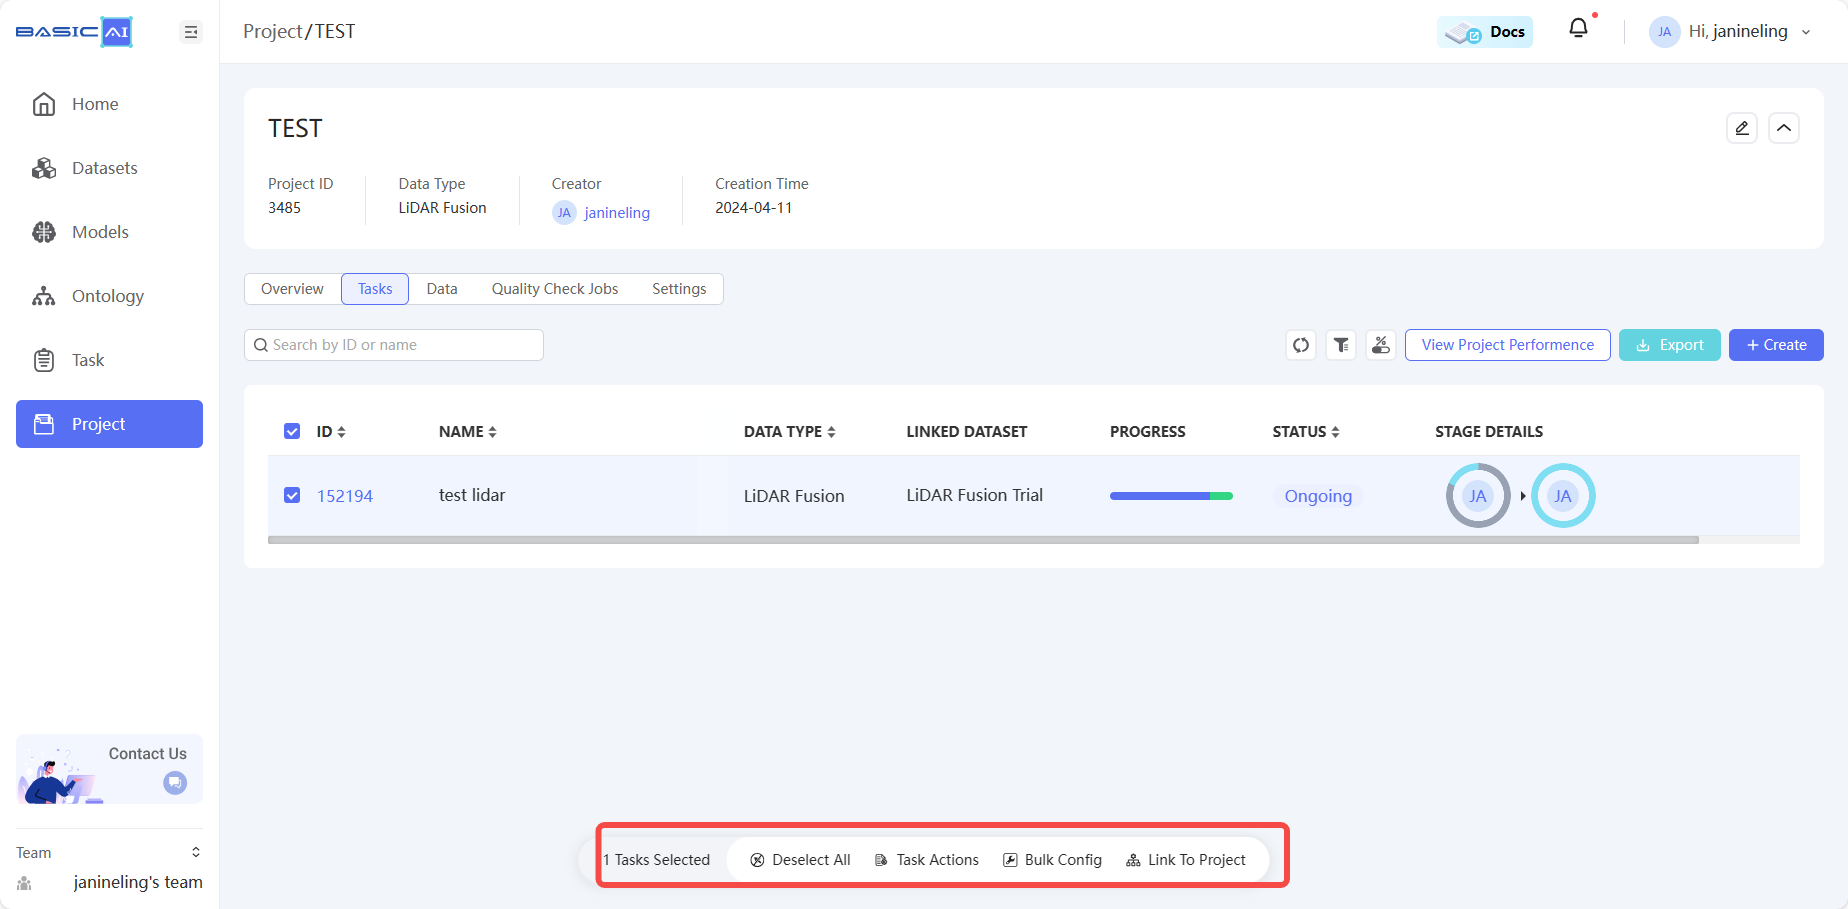
This page's display and use logic are similar to those of the Task Management page. For more details, please refer to the Task Management guide.
TipThere is one more option within the Project
Task Actionstab: Re-assign, which supports to bulk re-assign multiple tasks at the same time.
3. Project-Data
Click the Data tab on the Project page to browse all the data details contained in the project, and perform operations such as searching, filtering, and reassigning data.
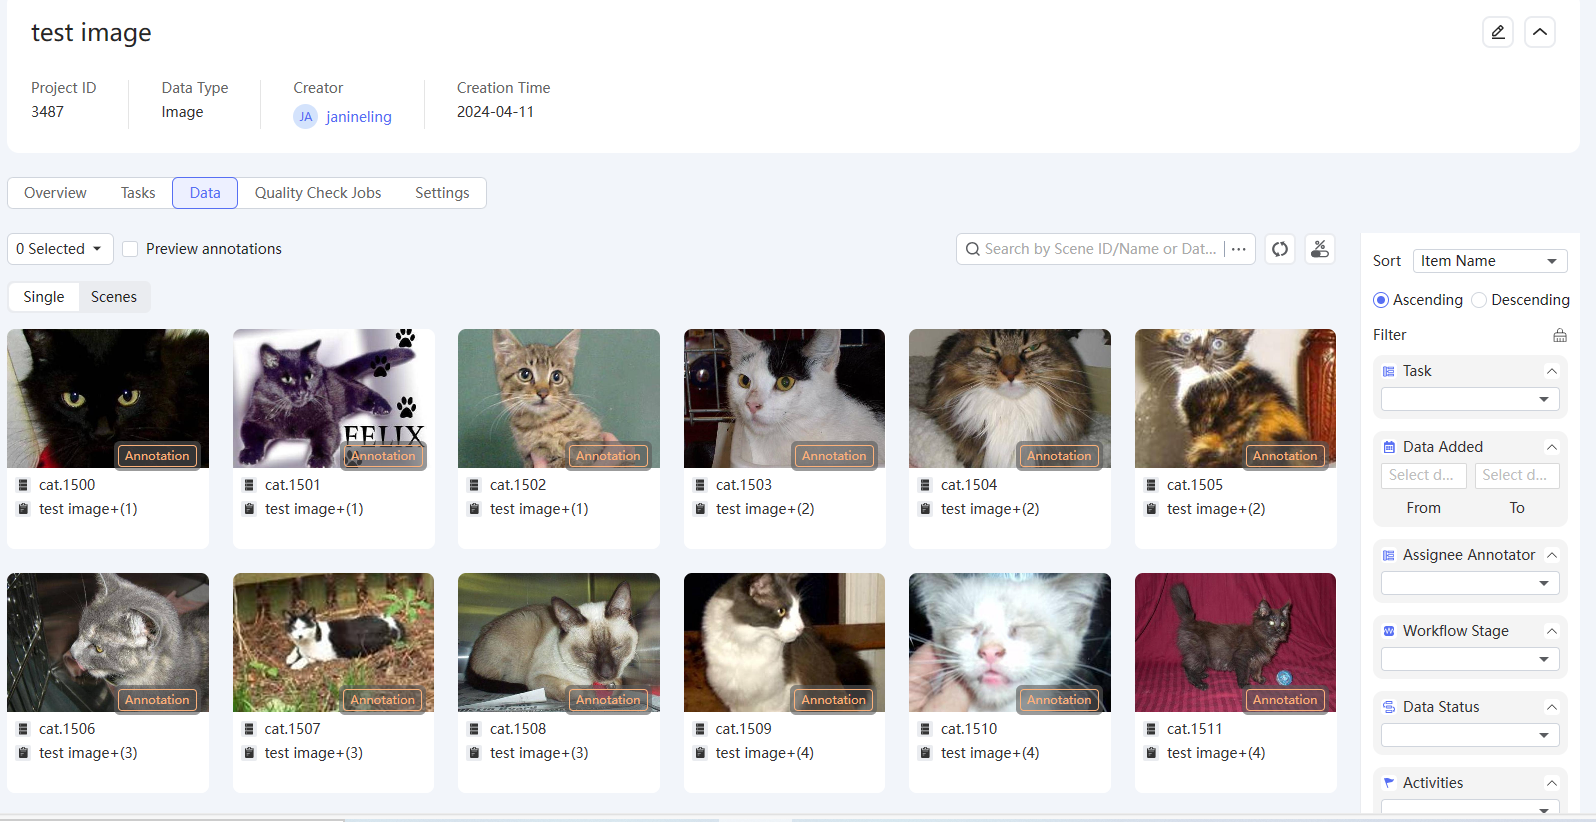
Data display types can be divided into three forms: single, scenes, and 4D Bev.
This page's display and use logic are similar to those of the Task-Data page. For more details, please refer to the Task-Data guide.
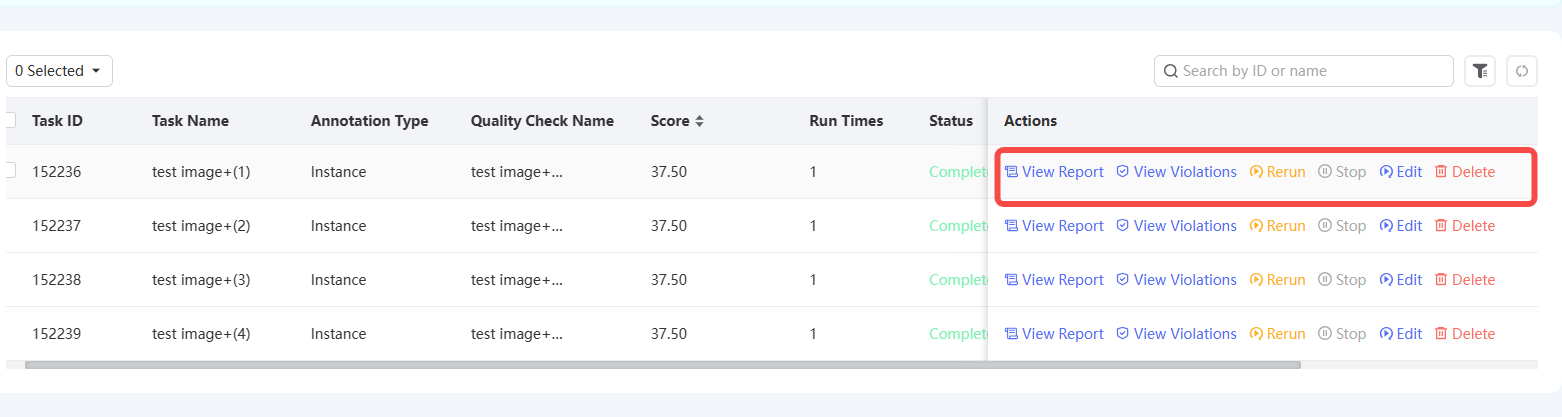
4. Projects-Quality Check Jobs
Under the Quality Check Jobs tab, checking the full data of all tasks in the project according to system-automated QA rules is available, and also viewing QC reports & violation records. The specific operation steps are as follows:
a. Build Data Indexes: Before running a QC job, click Build at the right side of the prompt bar to create a data index table.
b. Create a Quality Check Job: Click the Create a Quality Check Job button and follow the page instructions to complete the configuration. The configuration items include Quality Check Job name, Task Selection, Data Selection, and QA Rule Selection. After completing all the options, click Confirm to create a QC Job.
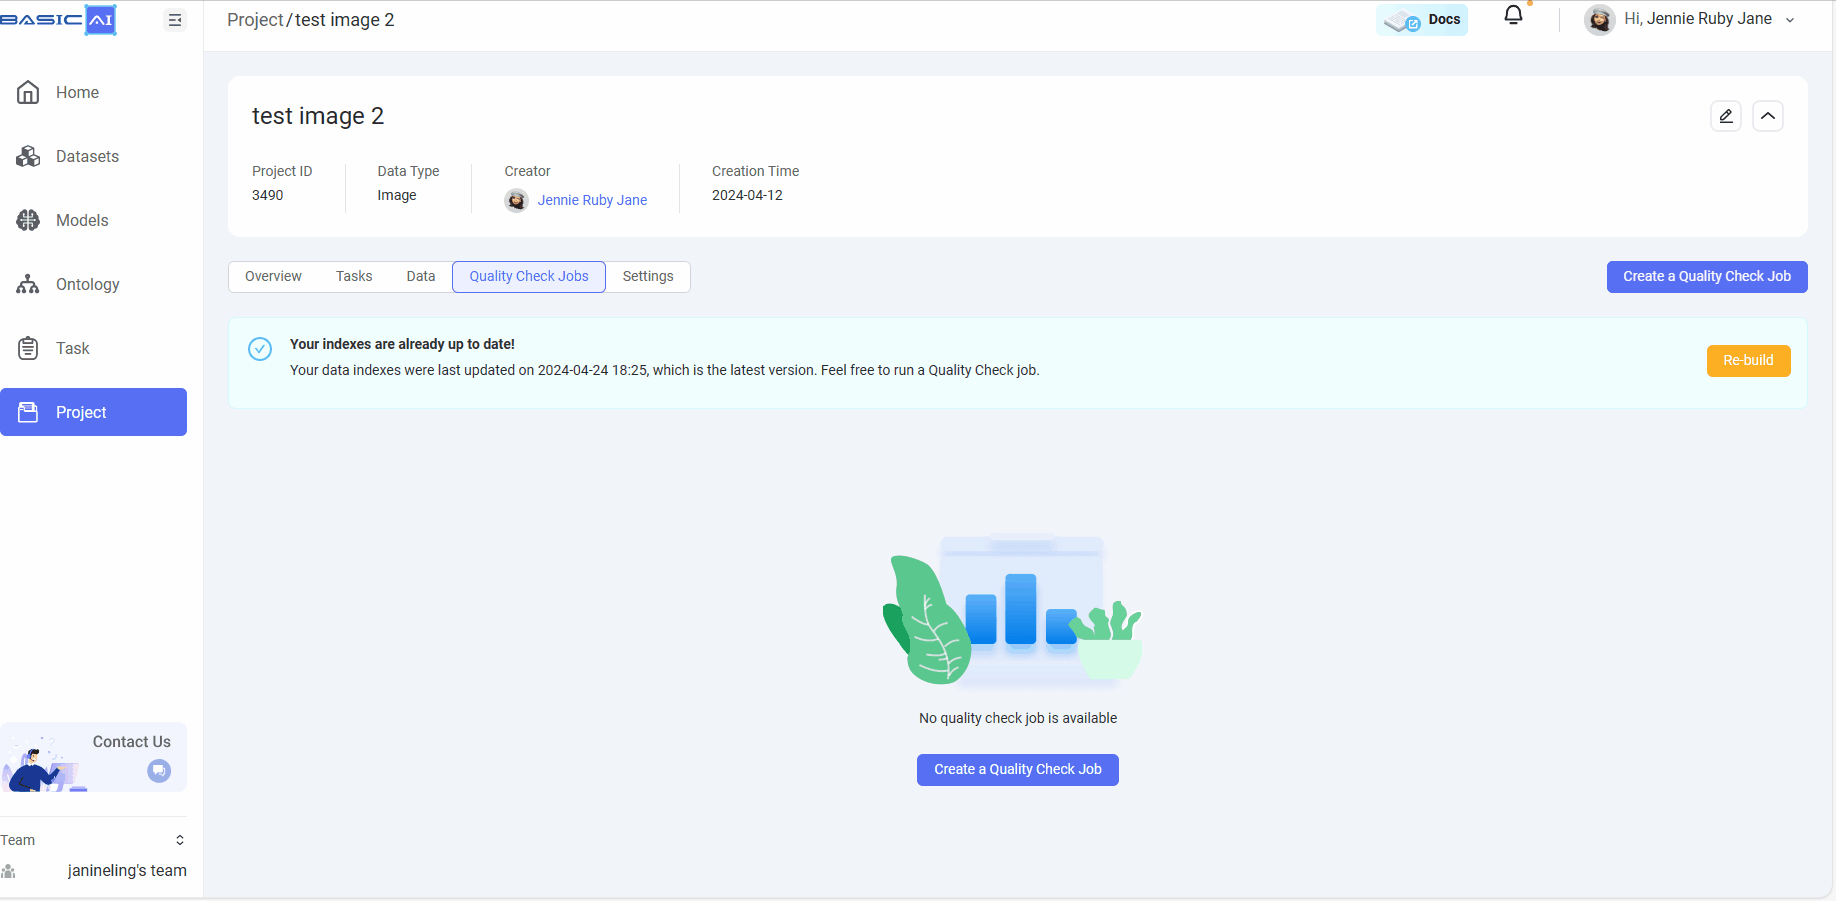
c. Quality Check Index Table: After creating the QC Job, the page will generate QC-related data tables according to the selected tasks, displaying QC scores, run times, status, progress and other information. The right operation bar supports viewing QC reports & violation records, rerunning, pausing, editing, and deleting.
5. Project-Settings
On the Settings page, you can perform the following two operations on a Project:
a. Disband: Unbind the project and tasks after clicking, but the task data will not be affected.
b. Delete: Delete the project. Clicking it will not only unbind the project and tasks, but also delete all the data of the tasks.
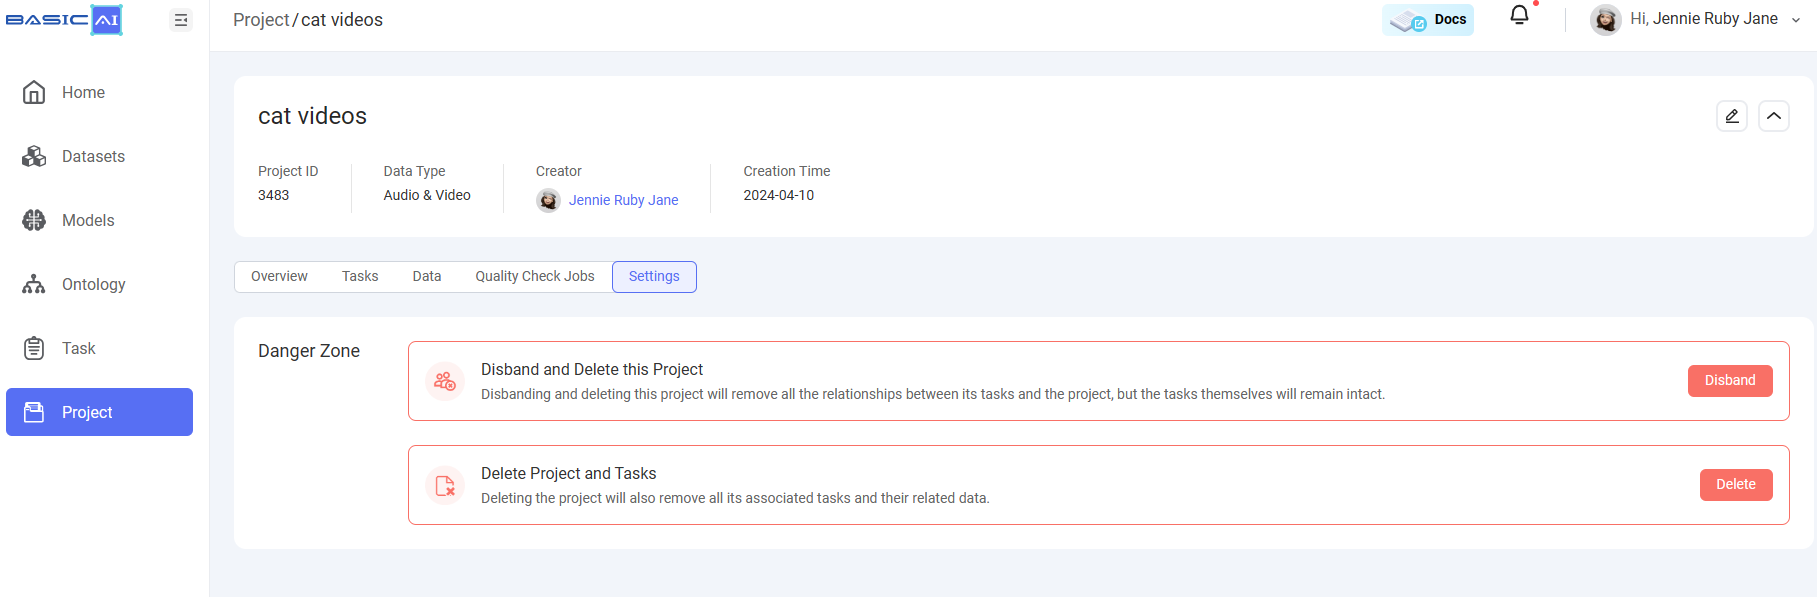
CautionPlease operate with caution on the Project-Settings page to avoid affecting tasks or even losing data.
Updated about 1 year ago