lmage Annotation
# Image Tool
Using digital images from cameras and videos and deep learning models, machines can accurately identify and classify objects — and then react to what they see.
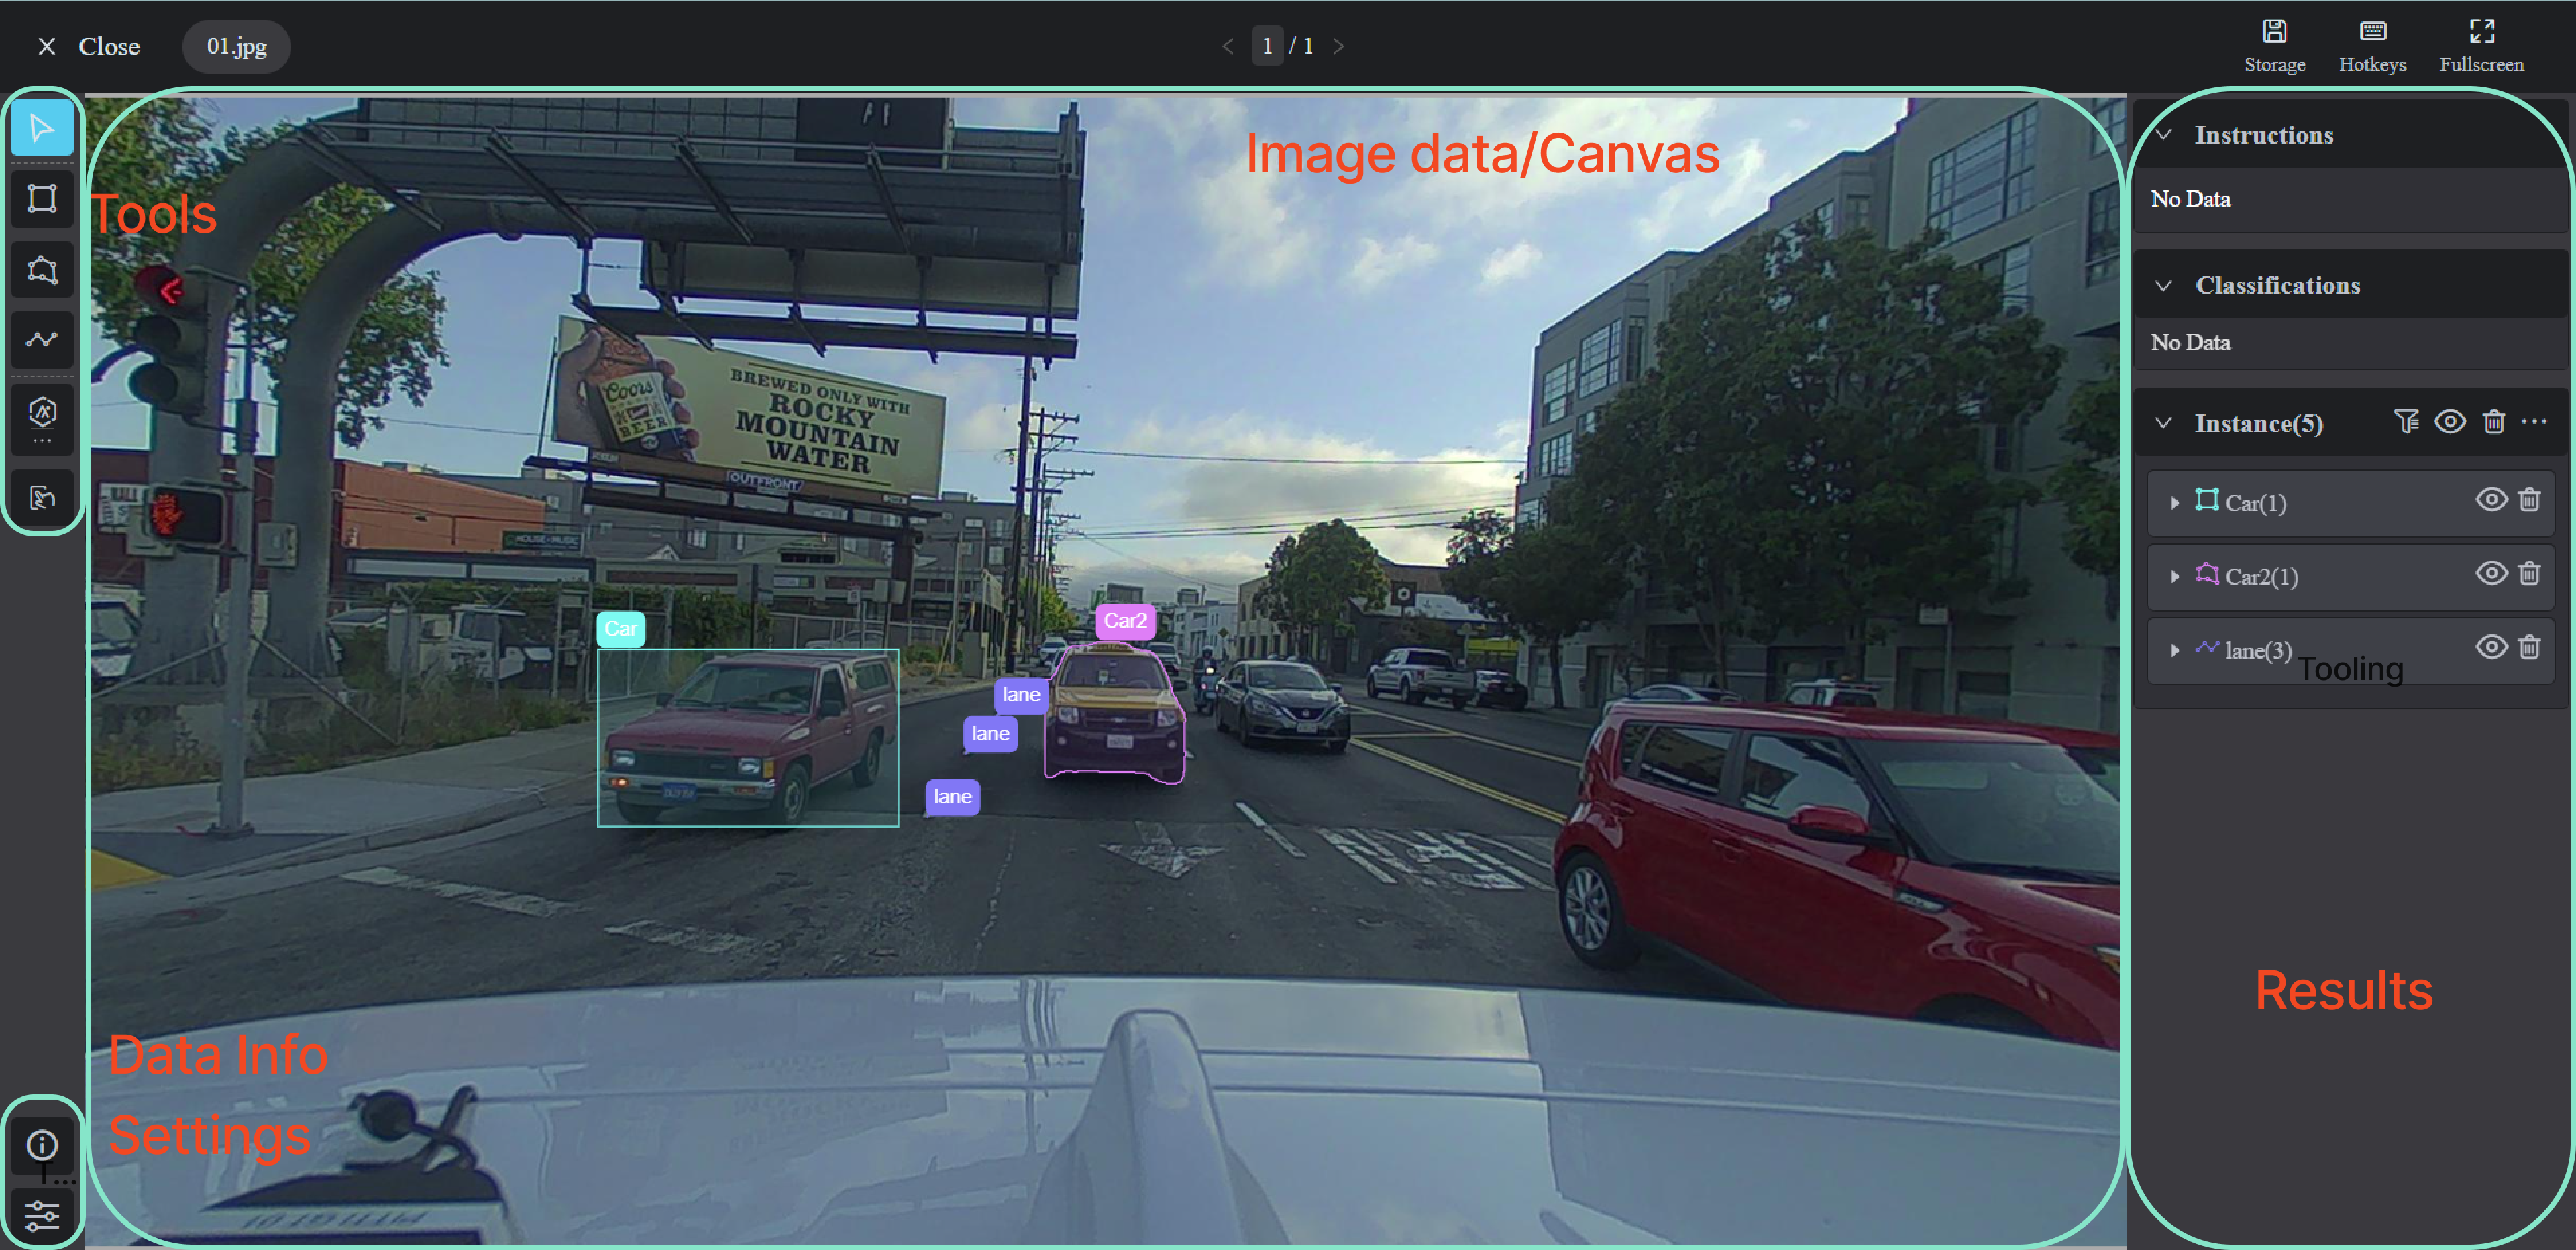
## Image Annotation Overview
The interface of **Image Annotation** includes Tool, Image data/Canvas, Result, Data info and Settings area, which is straightforward.
## Start to Annotate
Select the annotation types (bounding box, polygon and polyline) from the left toolbar that you need and draw on the canvas. After that, select the class and the attribute.
## LaTeX Input and Validation
LaTeX is a software system for document preparation and it is a very useful function when transcribing books or handwritten documents.
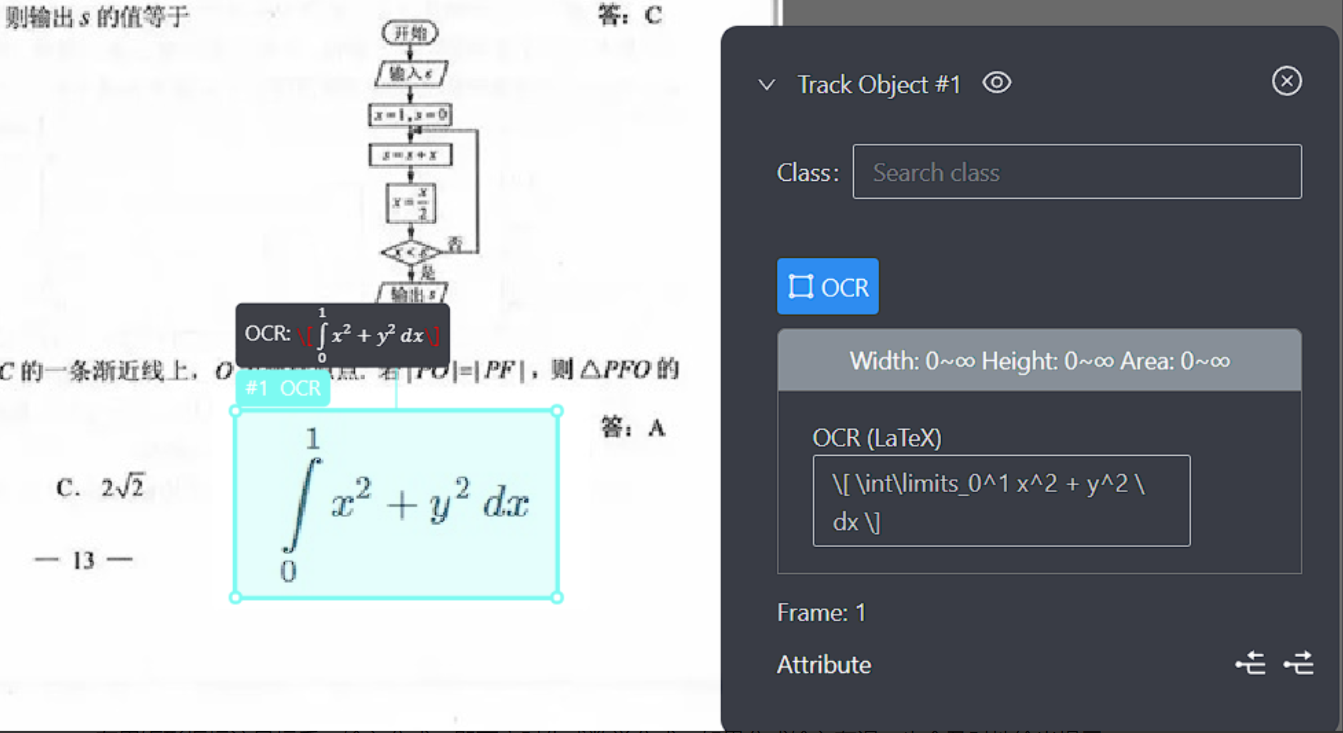
After using the b-box to label target, enter the formula, and the mathematical formula can be generated in real time. If the formula is entered incorrectly, prompts will also be given.
- In **Ontology**, create a class, and in **Attributes**, **Input Type** selects **Text**. Here, **LaTeX Expressions** can be set as on.
- In **Image Annotation Interface**, create a result and select the class, then LaTeX Expressions can be input.
- Use shortcut key `,` to display it or in result list, click `...` button and turn **Show Attr** as on.
## Run the Model to Predict
Image Annotation Tool is integrated with various models for different use cases.
With just one click, you can effortlessly run a model prediction and the results will be generated on the image.
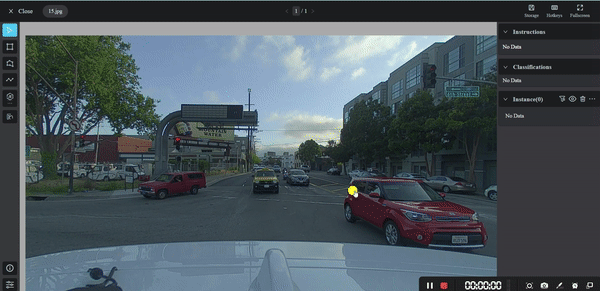
All available models can be chosen from the list.
For model details and instructions on integrating it with your or third party’s models, refer to the Model page.
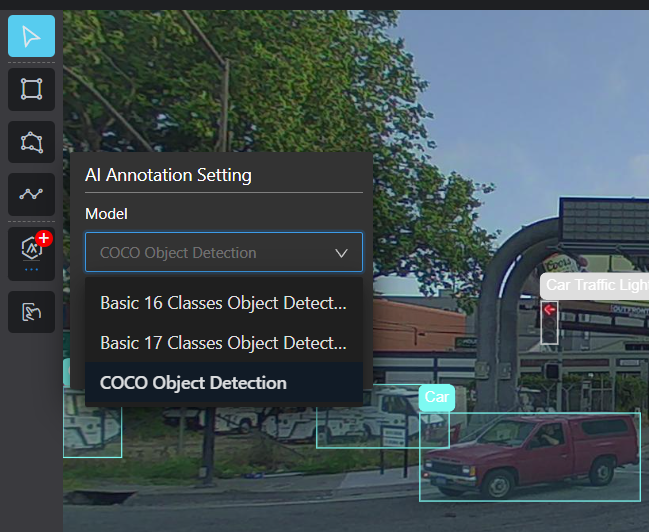
## Run the Interactive Model
Select the interactive model (for segmentation) and draw a bounding box around the object. The AI model will then generate a polygon that accurately fits the identified object.

## Data Info
Click on the Info icon to access information about the data. You can view the Data ID, name, dimensions, and file size.
## Settings
The Settings section includes various parameters that can assist you in the annotation process by allowing you to adjust values or toggle options such as brightness, contrast, opacity, auxiliary lines, or display modes.
## Shortcut List
| Instance Tool | Key |
| :------------------------------: | :----------------: |
| **Data** | Shortcut key |
| Switch to view/edit instance | Alt + 1 |
| Switch to view/edit segmentation | Alt + 2 |
| Previous | Page Up |
| Next | Page Down |
| | |
| **Actions** | Shortcut key |
| Save | Ctrl/⌘ + S |
| Cancel | Esc |
| Delete instance/point | Delete |
| Finish drawing | Enter or Space |
| Switch alias/name | O |
| Show/hide tag pad | T |
| Move upper side out by 1px | Ctrl/⌘ + ↑ |
| Move bottom side out by 1px | Ctrl/⌘ + ↓ |
| Move left side out by 1px | Ctrl/⌘ + ← |
| Move right side out by 1px | Ctrl/⌘ + → |
| Move upper side out by 10px | Ctrl/⌘ + Shift + ↑ |
| Move bottom side out by 10px | Ctrl/⌘ + Shift + ↓ |
| Move left side out by 10px | Ctrl/⌘ + Shift + ← |
| Move right side out by 10px | Ctrl/⌘ + Shift + → |
| Undo | Ctrl/⌘ + Z |
| Redo | Ctrl/⌘ + Shift + Z |
| Crop1 Do not crop the first one | X |
| Crop2 Crop the first one | Ctrl + X |
| Crop | C |
| Shared edge polygon by points | K |
| Switch shared edge | L |
| Shared edge polygon by edges | Ctrl/⌘ + K |
| | |
| **Tool** | Shortcut key |
| Select | Q |
| Smart Tool | E |
| Bounding box tool | 1 |
| Polygon tool | 2 |
| Polyline tool | 3 |
| Ellipse tool | 4 |
| Circle tool | 5 |
| Spline curve tool | 6 |
| Key-point tool | 7 |
| Circle tool | 5 |
| Cuboid tool | 8 |
| | |
| **Result** | Shortcut key |
| Show single result | S |
| Switch results | ↑ ↓ |
| Switch result number | J |
| Switch comments | N |
| Switch class | M |
| Switch label and attributes | , |
| Switch size | B |
| Switch mark/mask | . |
| | |
| **Image** | Shortcut key |
| Zoom in/out | Wheel |
| Drag | Space + Left click |
| Reset | Z |
| Cancel/close popup | Esc |Updated 4 months ago